
Assemble the basic optics module
The imaging optics for this version of the microscope consist of a Raspberry Pi camera and the lens from the camera. To create a microscope, the wide angle lens is reversed and separated from the camera. This makes quite a good microscope objective with a field of view about 750×560μm, similar to using a 20x objective.
For this section you will need:
Tools
- 1 #1 pozidrive screwdriver
- 1 Pi Camera lens tool - This should come with the Raspberry Pi Camera Module v2. If it is missing, you can 3D print a workaround lens removal tool.
Printed Parts
Electronic Components
- 1 300mm Pi Camera ribbon cable - Make sure that the cable is Type B, as identified in the part page
- 1 Raspberry Pi Camera Module v2
Mechanical Components
These instructions assume you will build the upright microscope with a basic optics module. You can also use the high resolution optics module (with an RMS objective) on the upright microscope, or other options from the customisations page.
If using the high resolution optics module, a 400mm Raspberry Pi ribbon cable is preferable due to the additional height.
Step 1: Visually inspect the lens spacer
Take the lens spacer and confirm that:
- It has been printed in black

- It is dust free (You can blow air through to clean it)
- The central shaft is not obstructed by strings of plastic
Step 2: Remove Pi Camera Lens


Caution!
The camera board is static sensitive.
- Before touching the Pi Camera touch a metal earthed object. If you own one, consider wearing and anti-static strap.
- Take the Pi Camera out of the package. Make sure to hold it only by the sides of the board.
- Take the protective film off the lens.
- Take the Pi Camera lens tool and place it over the lens
- Slowly unscrew the lens (About 4 full turns of the tool)
- Carefully lift off the lens.
- Save the lens and the camera, we use both in this version of the microscope.
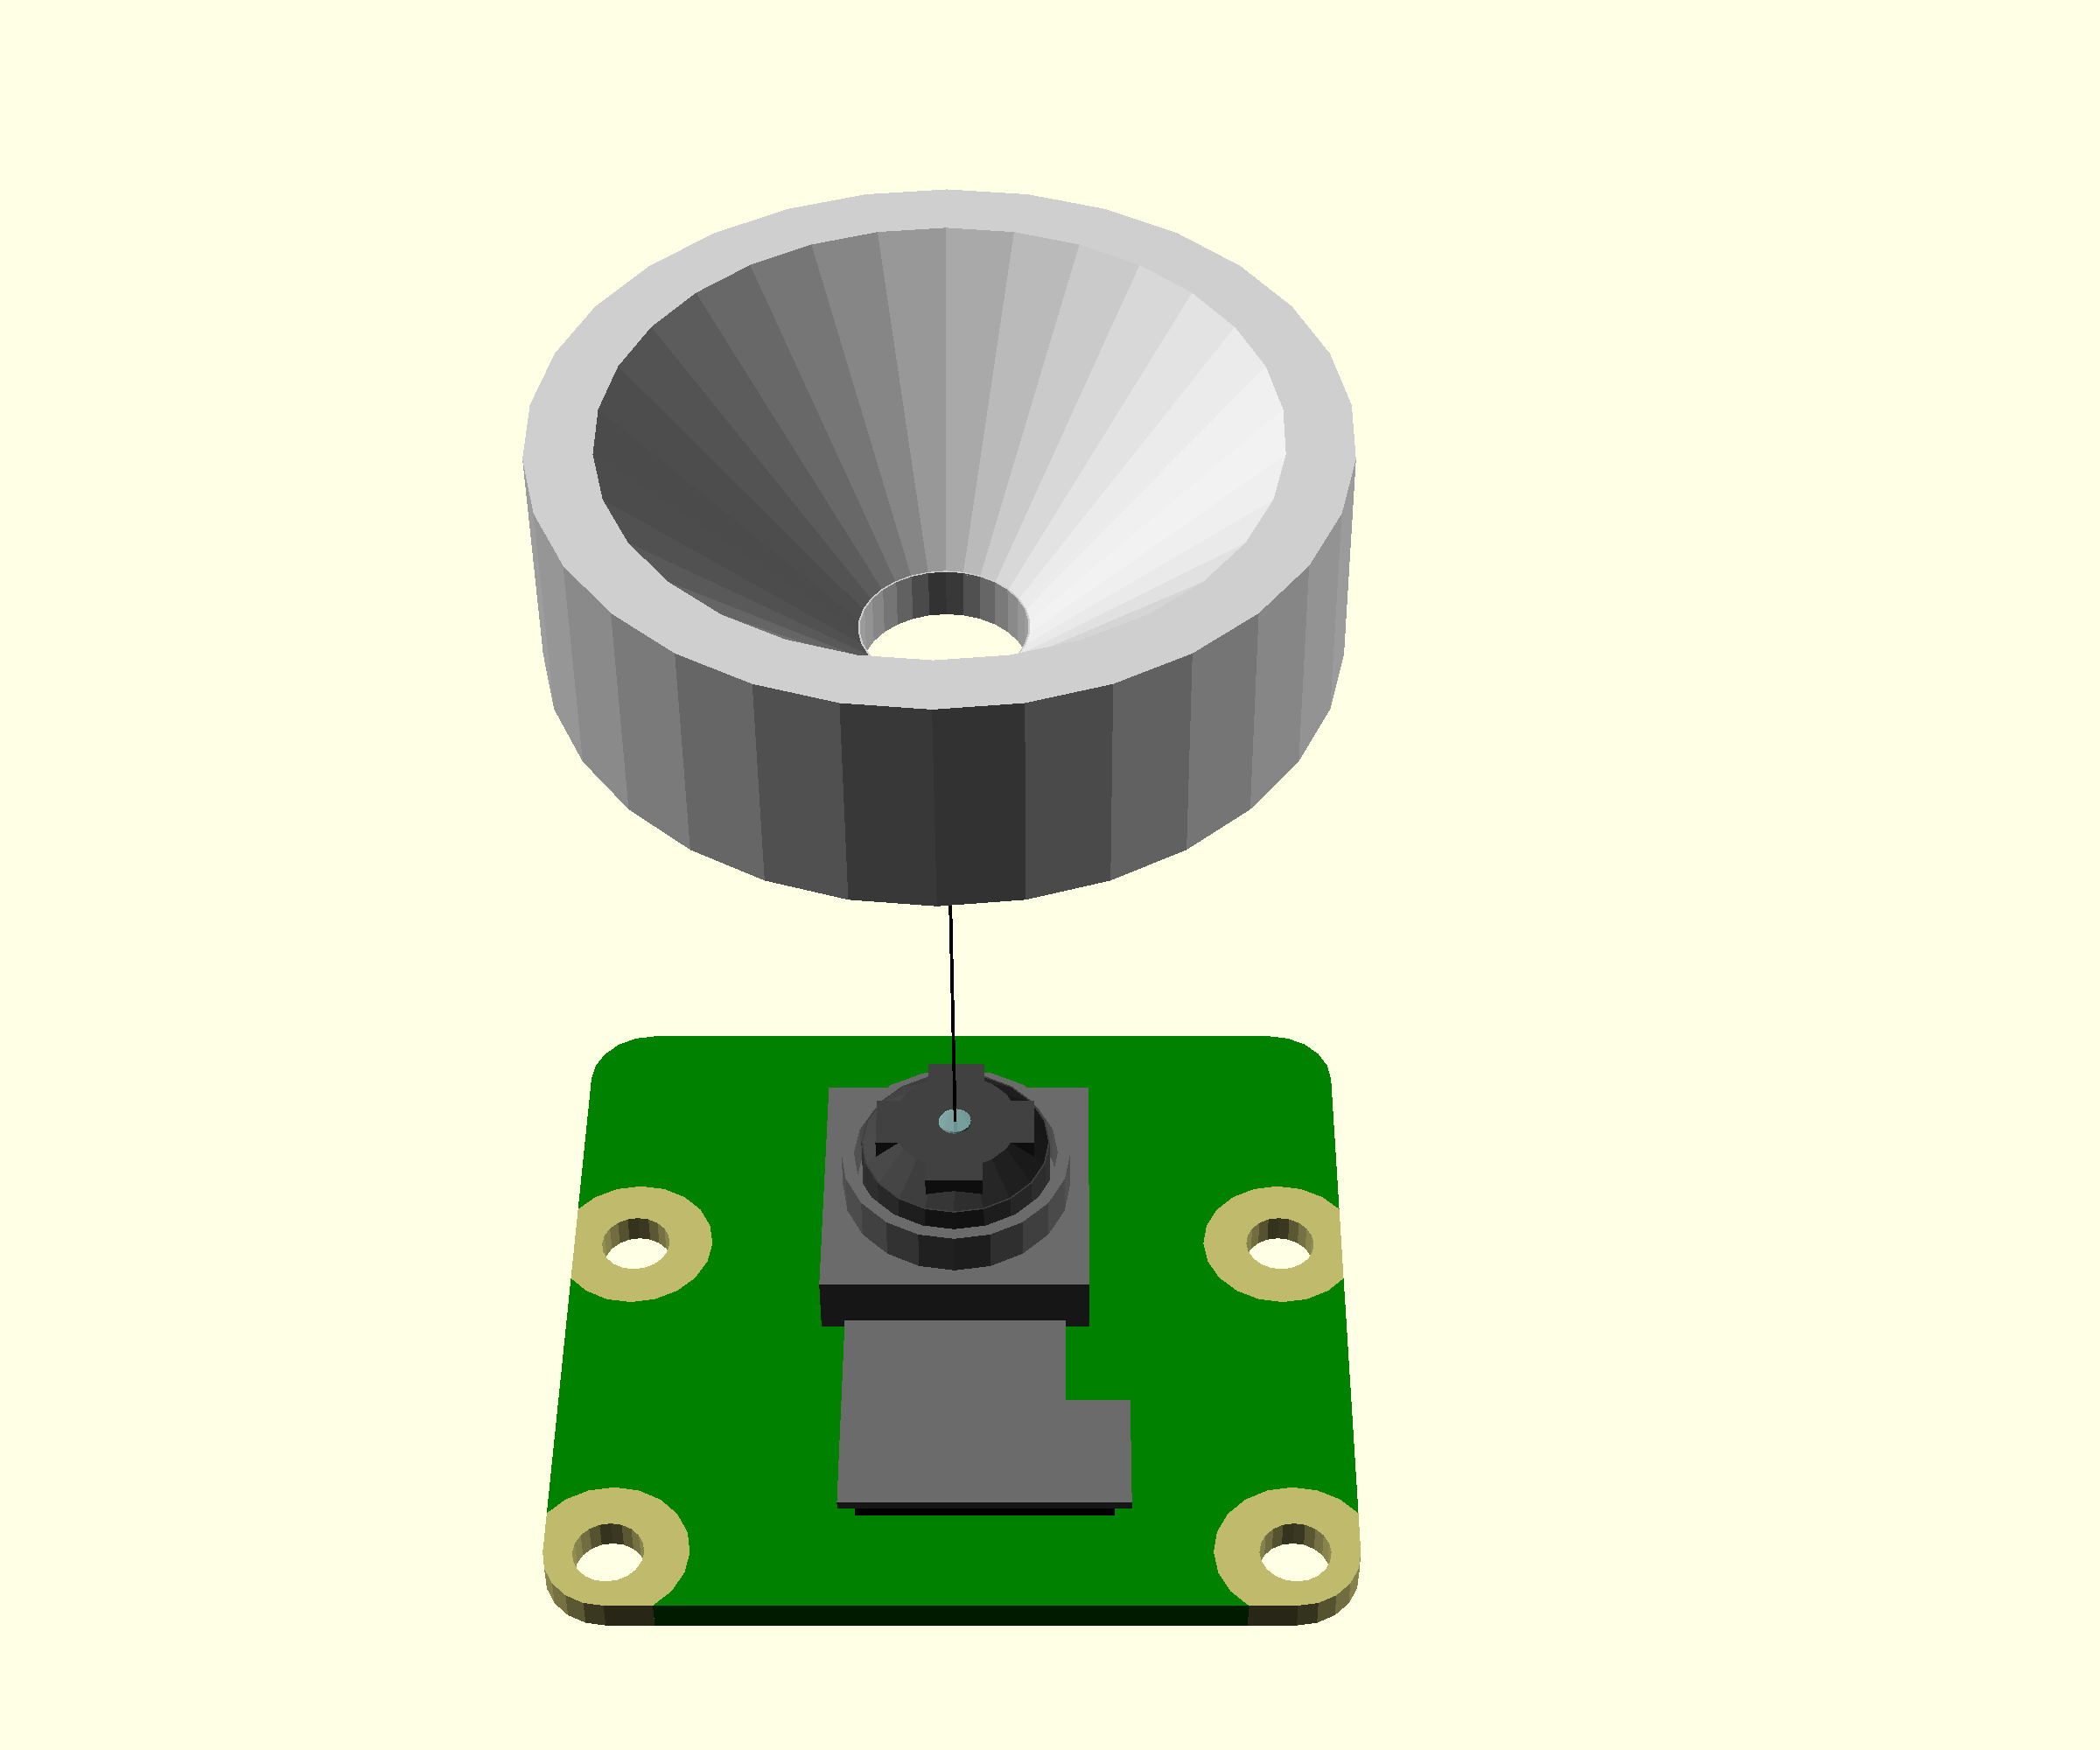
Step 3: Push-fit the lens
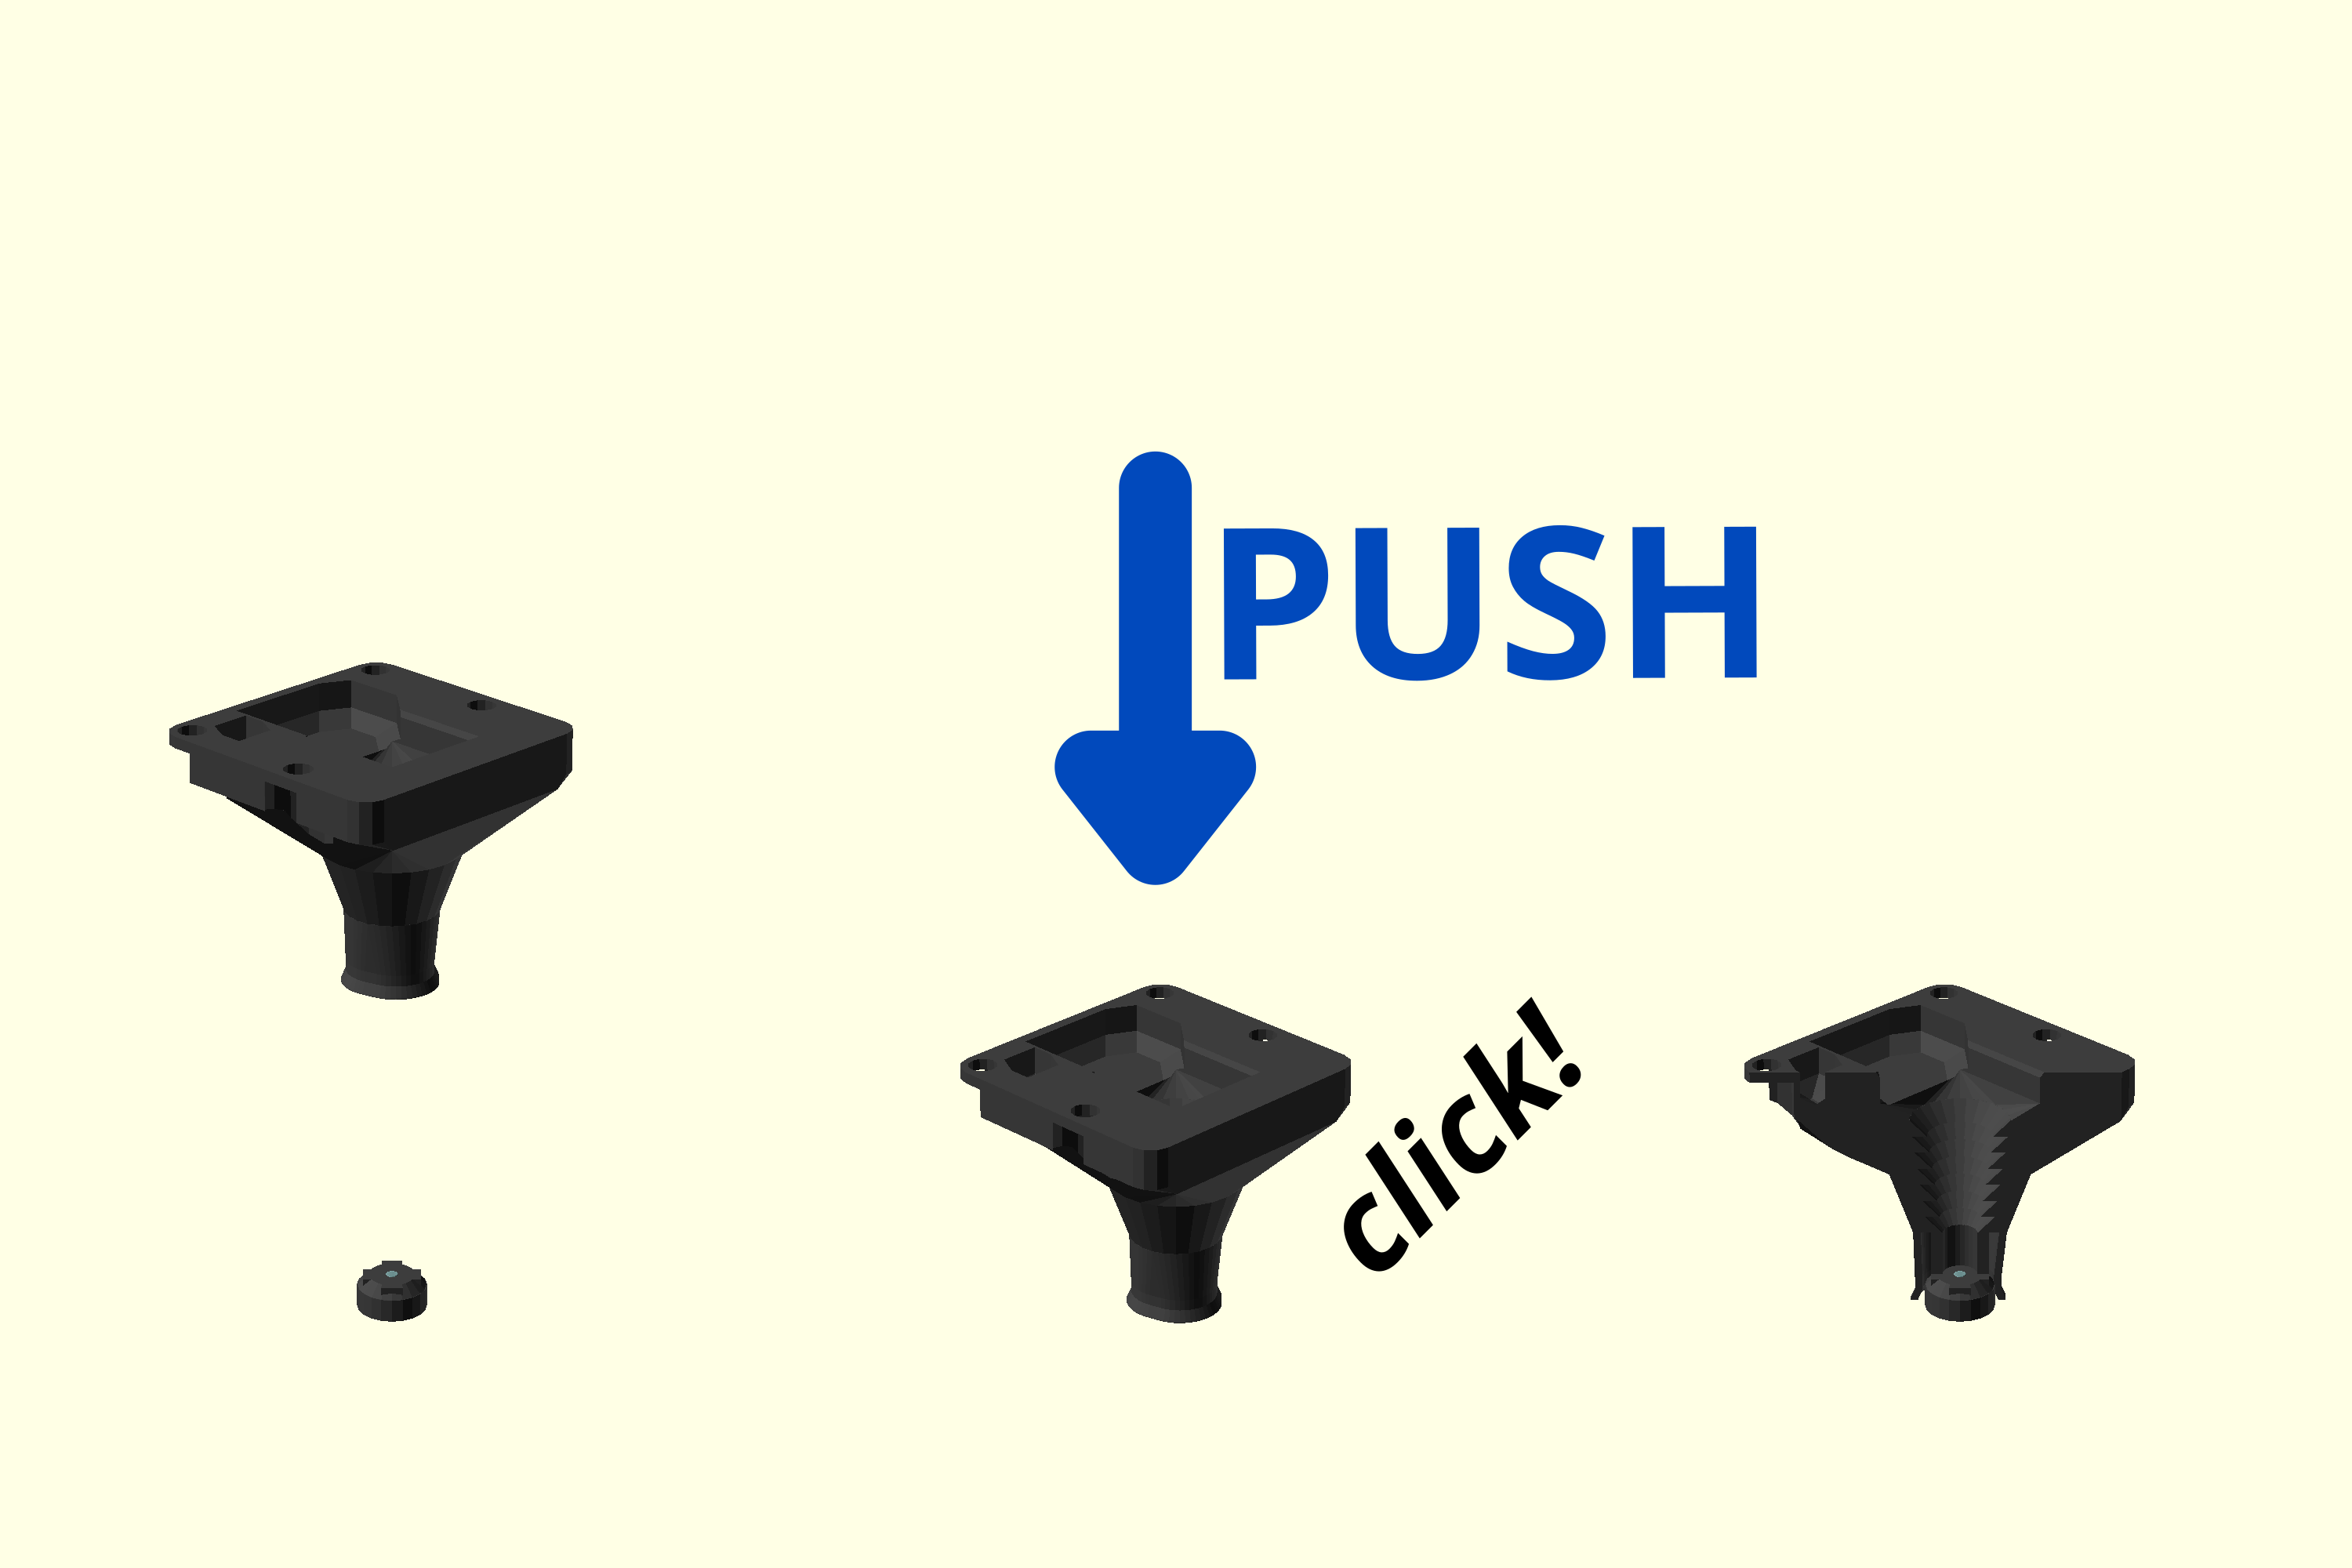
- Work out which side of the Pi Camera lens used to be facing the camera sensor (This is the side with more lens visible).
- Place the lens on a clean surface with the side that was next to the camera sensor on the bottom.
- Push the lens spacer down onto the lens until it clicks into place.
Step 4: Attach the Pi Camera
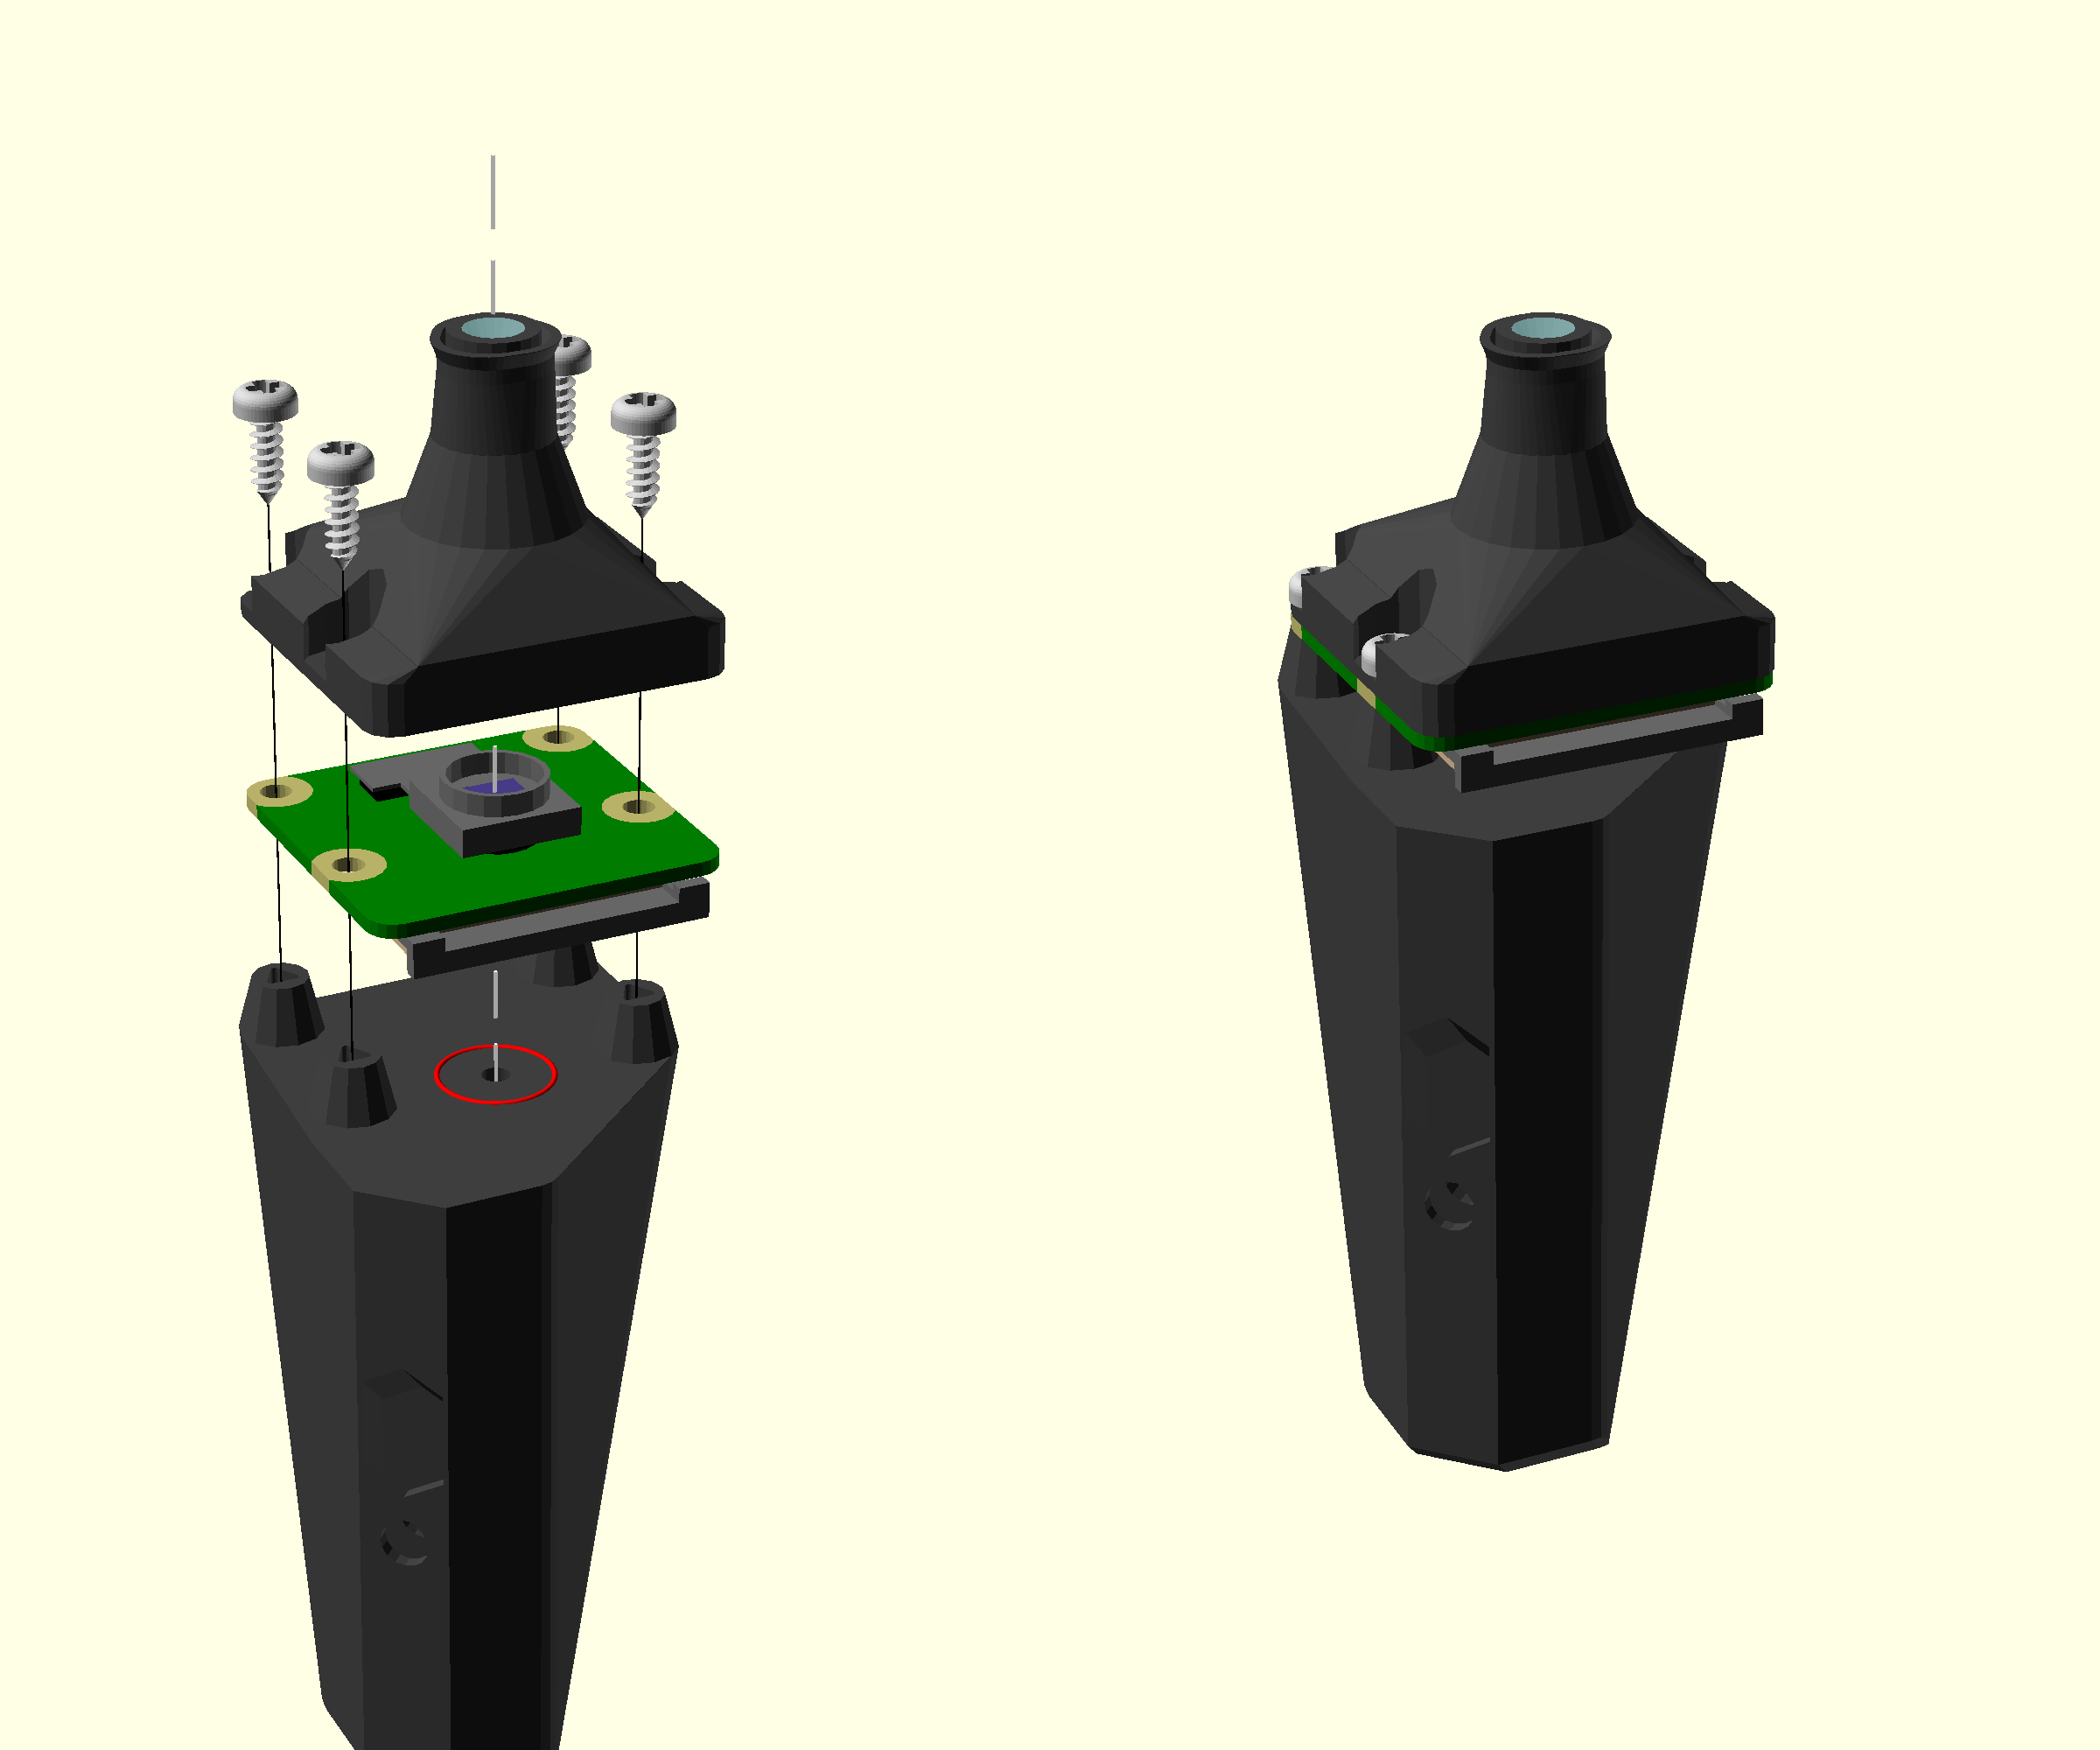
- Locate the dimple on top of the camera platform (highlighted with a red circle in the picture.)
- Take the Pi Camera and place it on top of the camera platform so that the centre of the camera sensor is directly above the dimple.
- Place the lens spacer over the camera
- Use four No 2 6.5mm self tapping screws to secure the three parts together using a #1 pozidrive screwdriver
- Take care to not over torque the screws
Step 5: Attach the mounting screw
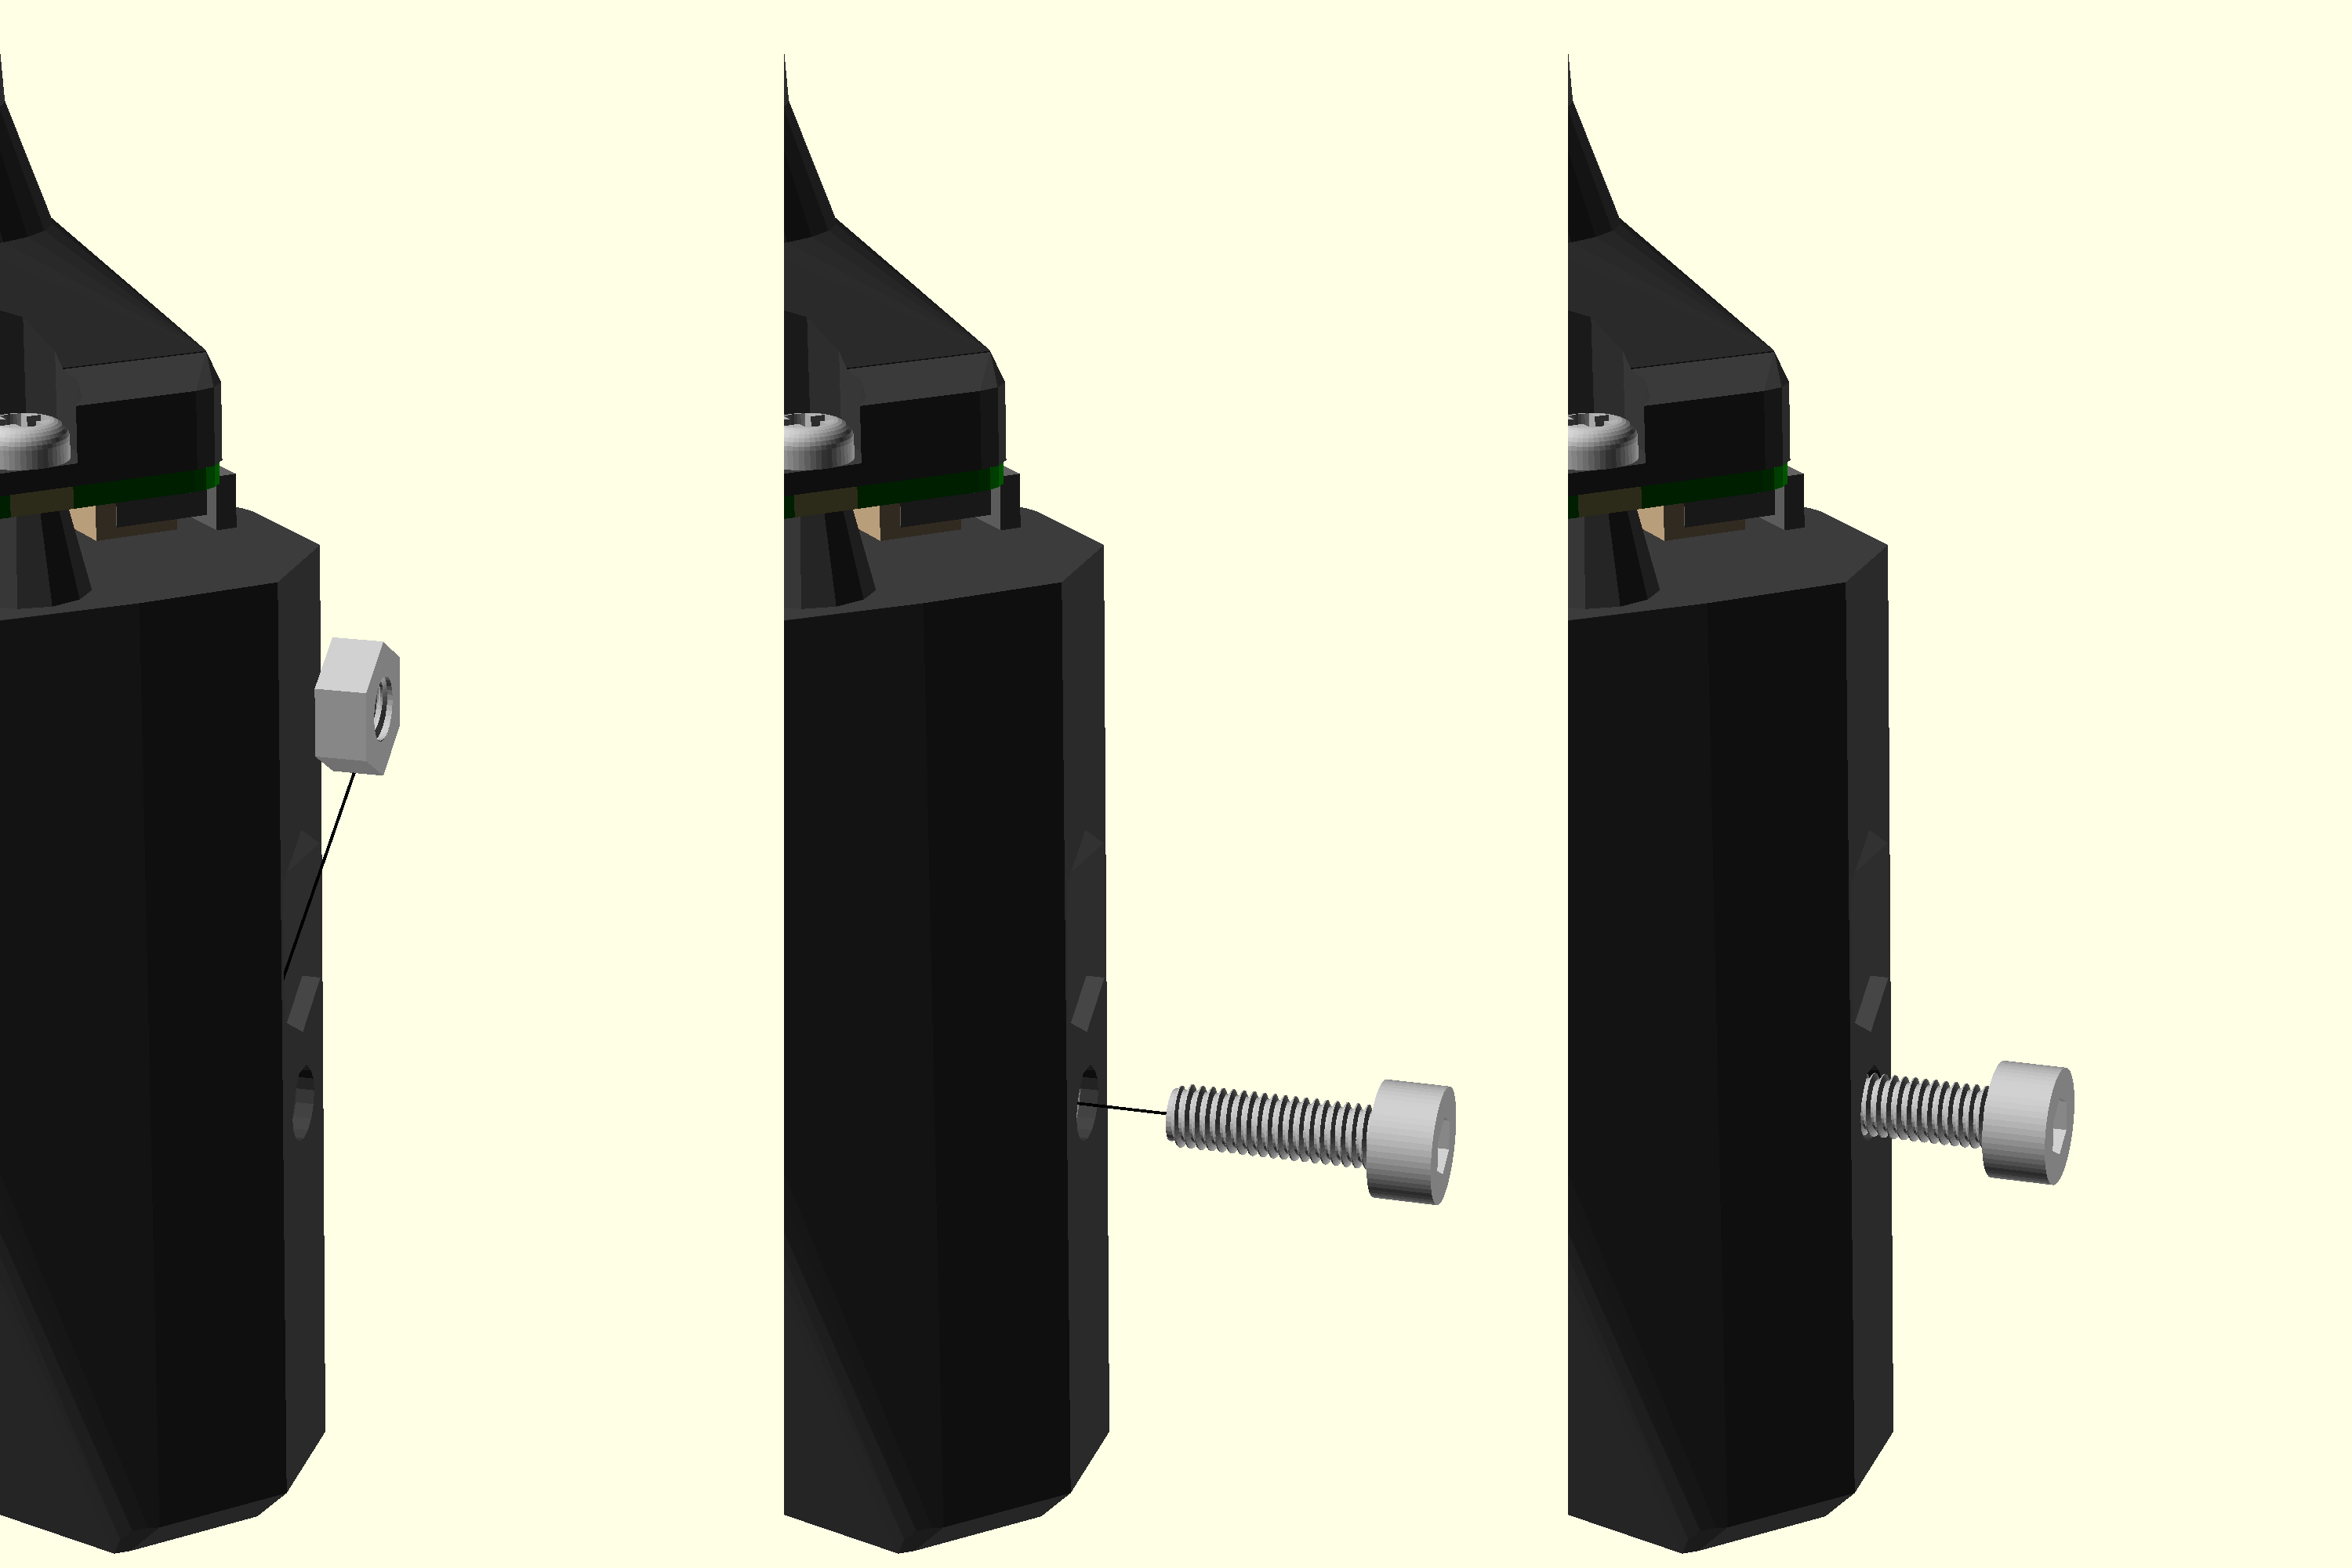
- Take an M3 nut and push it into the nut trap from the top
- Take an M3x10 cap head screw and screw it into the nut.
- Only screw it in a couple of turns. About 5 mm of thread should still be visible
Step 6: Check the ribbon cable
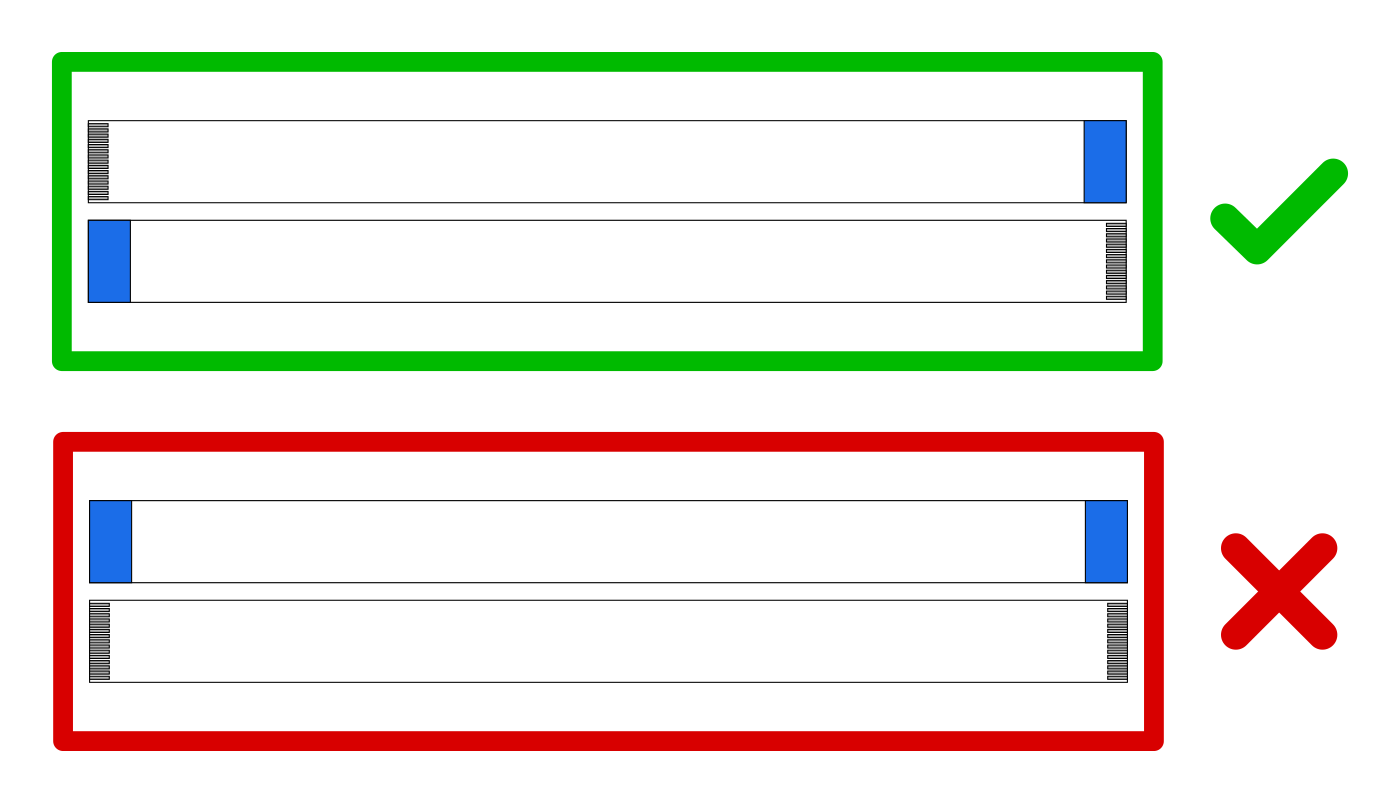
- Place the 300mm Pi Camera ribbon cable flat on a table
- Check that the connections are on opposite sides of the cable at the two ends.
Warning
Using a cable of the wrong type will cause the camera to burn out in a few seconds.
Step 7: Connect the ribbon cable
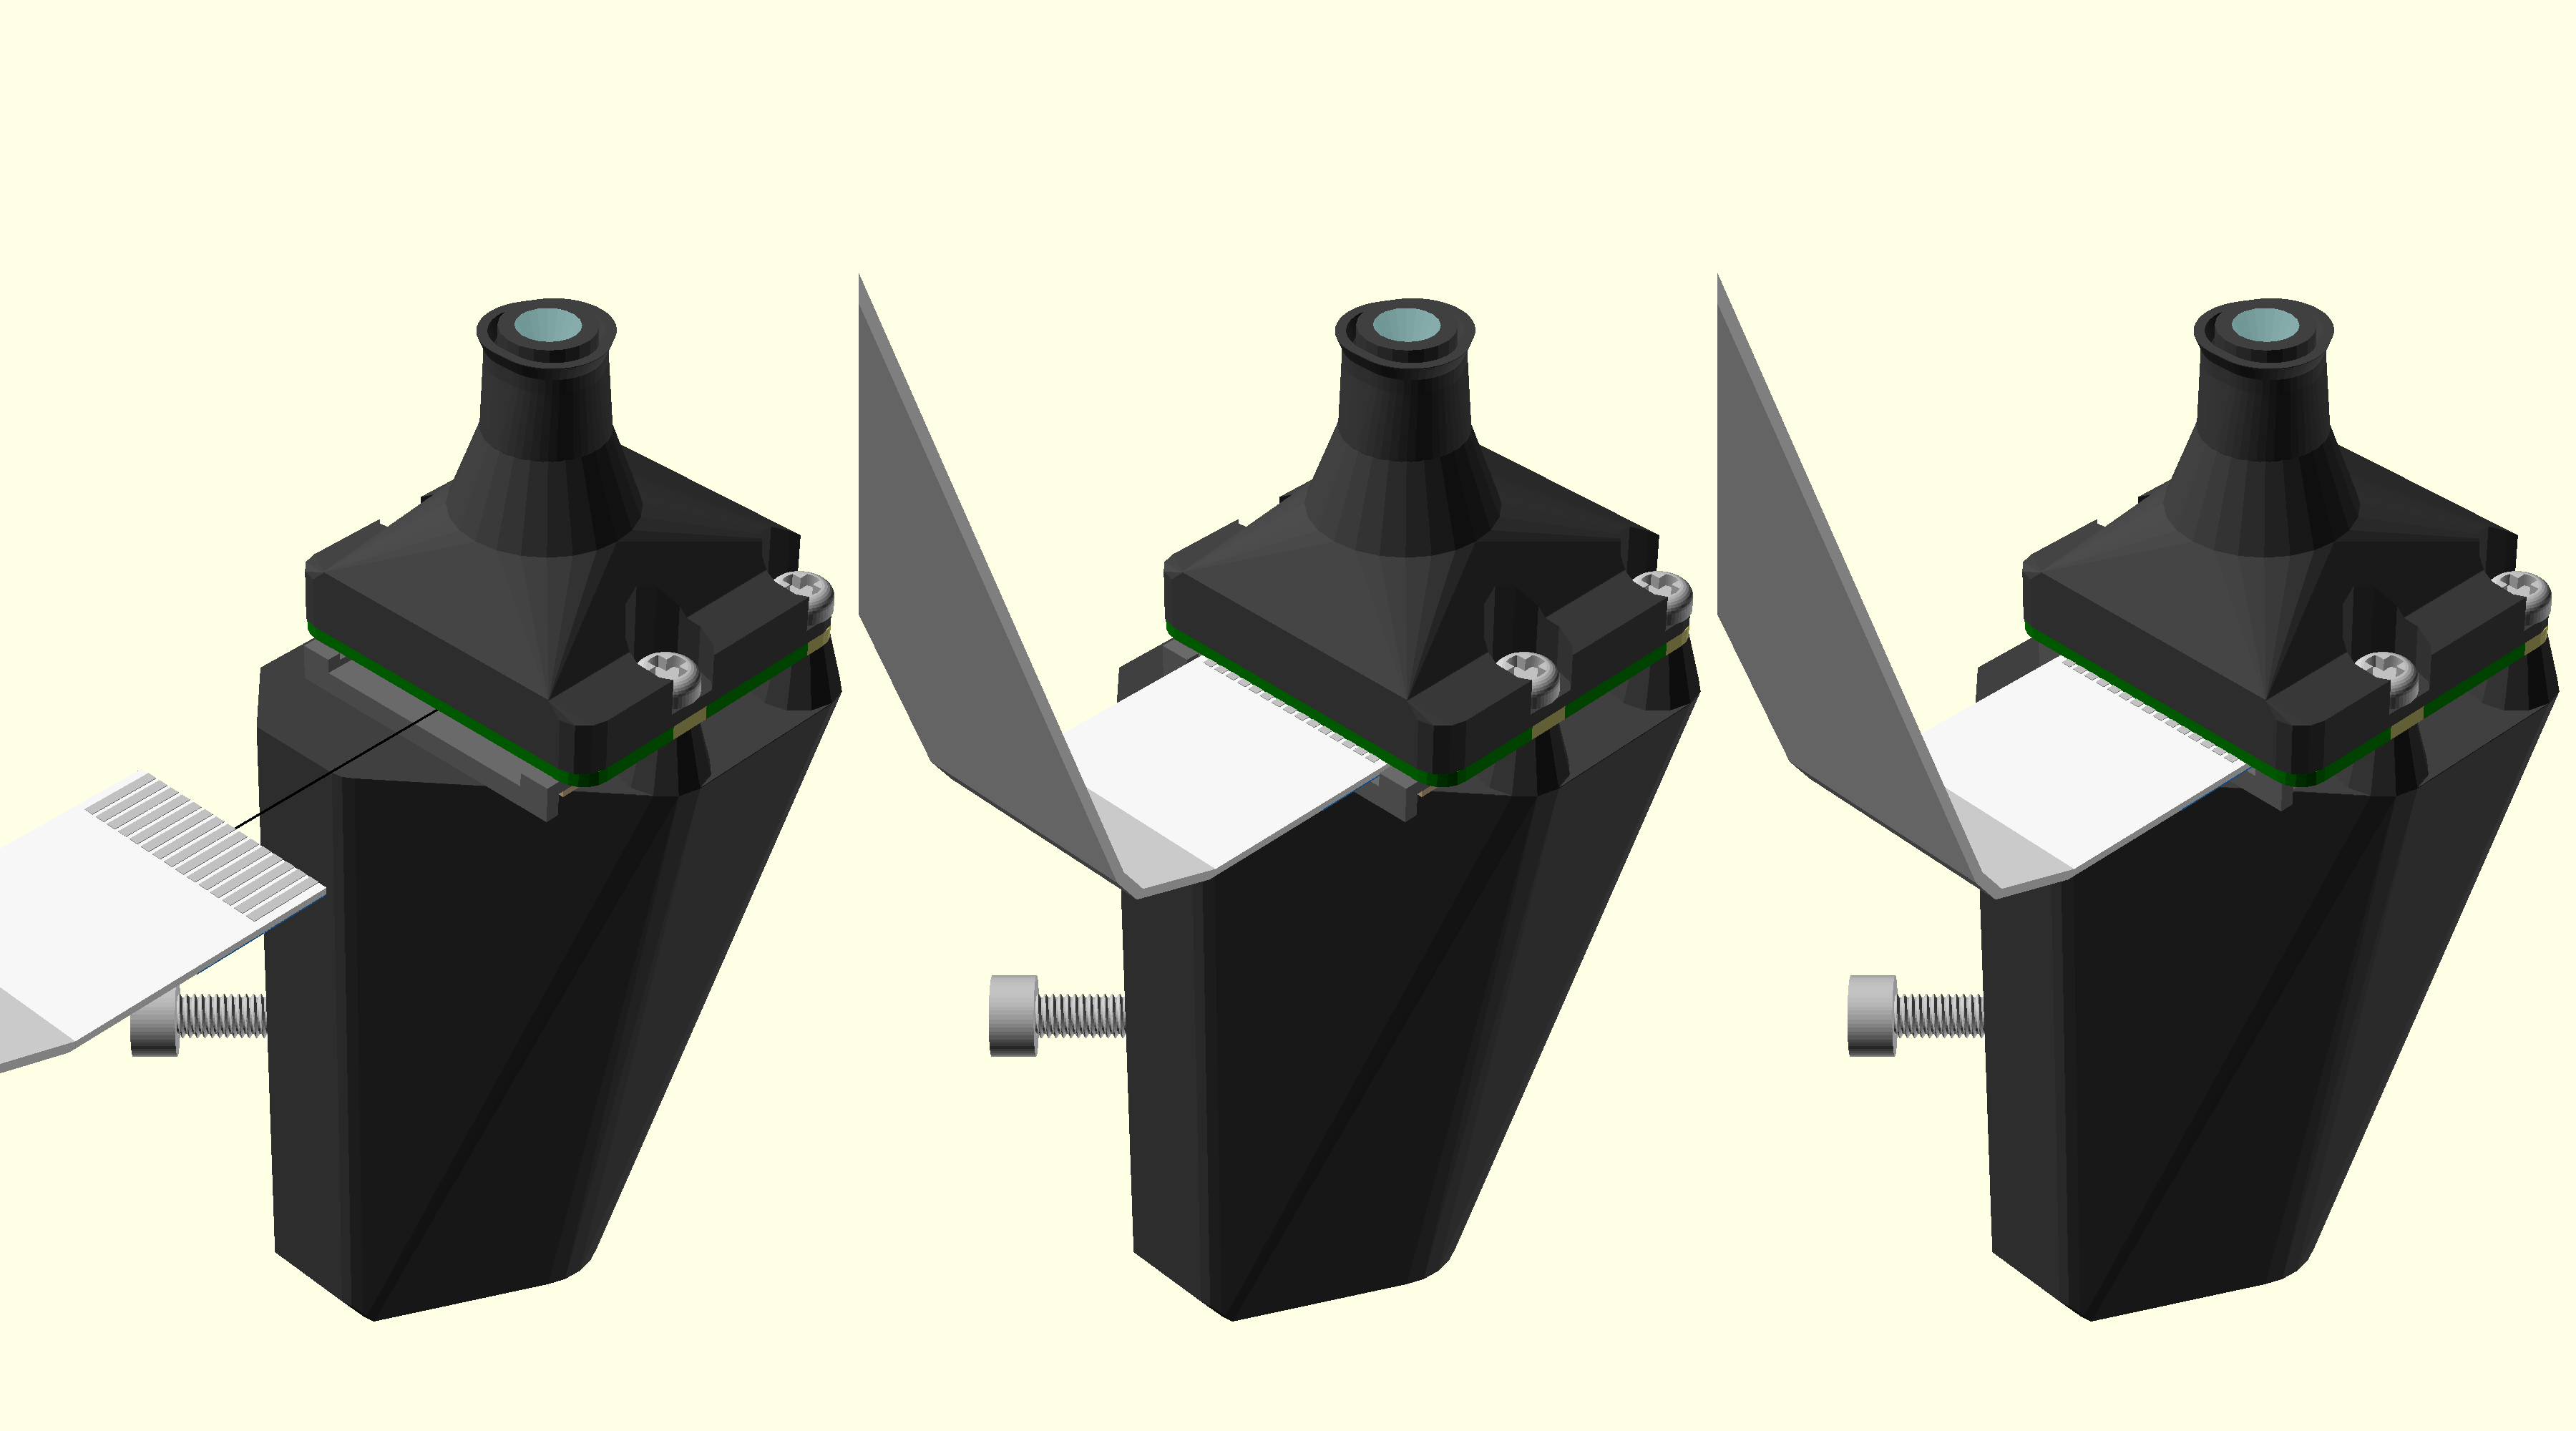
- Pull the catch forward on the exposed Pi Camera connector
- Insert the ribbon cable with the contacts towards the board
- Close the catch on the connector
Set the complete optics module aside in a safe place.