
Complete the wiring
For this section you will need:
Tools
Printed Parts
Electronic Components
Mechanical Components
Note on Sangaboard v0.5
The Sangaboard v0.5 from our preferred supplier has 11mm tall header connectors. If you purchase a board from another supplier and they use standard 8.5mm headers you will need to print a different electronics drawer
Alternative electronics options
If you are using a version of the Raspberry Pi other than v4, or Sangaboard other than v0.5, you may need a different electronics drawer.
If you do not have a Sangaboard, you can make up a compatible solution from a microcontroller and separate driver boards. This is described in the motor electronics workaround page.
Assembly video
Step 1: Prepare nuts for the electronics drawer
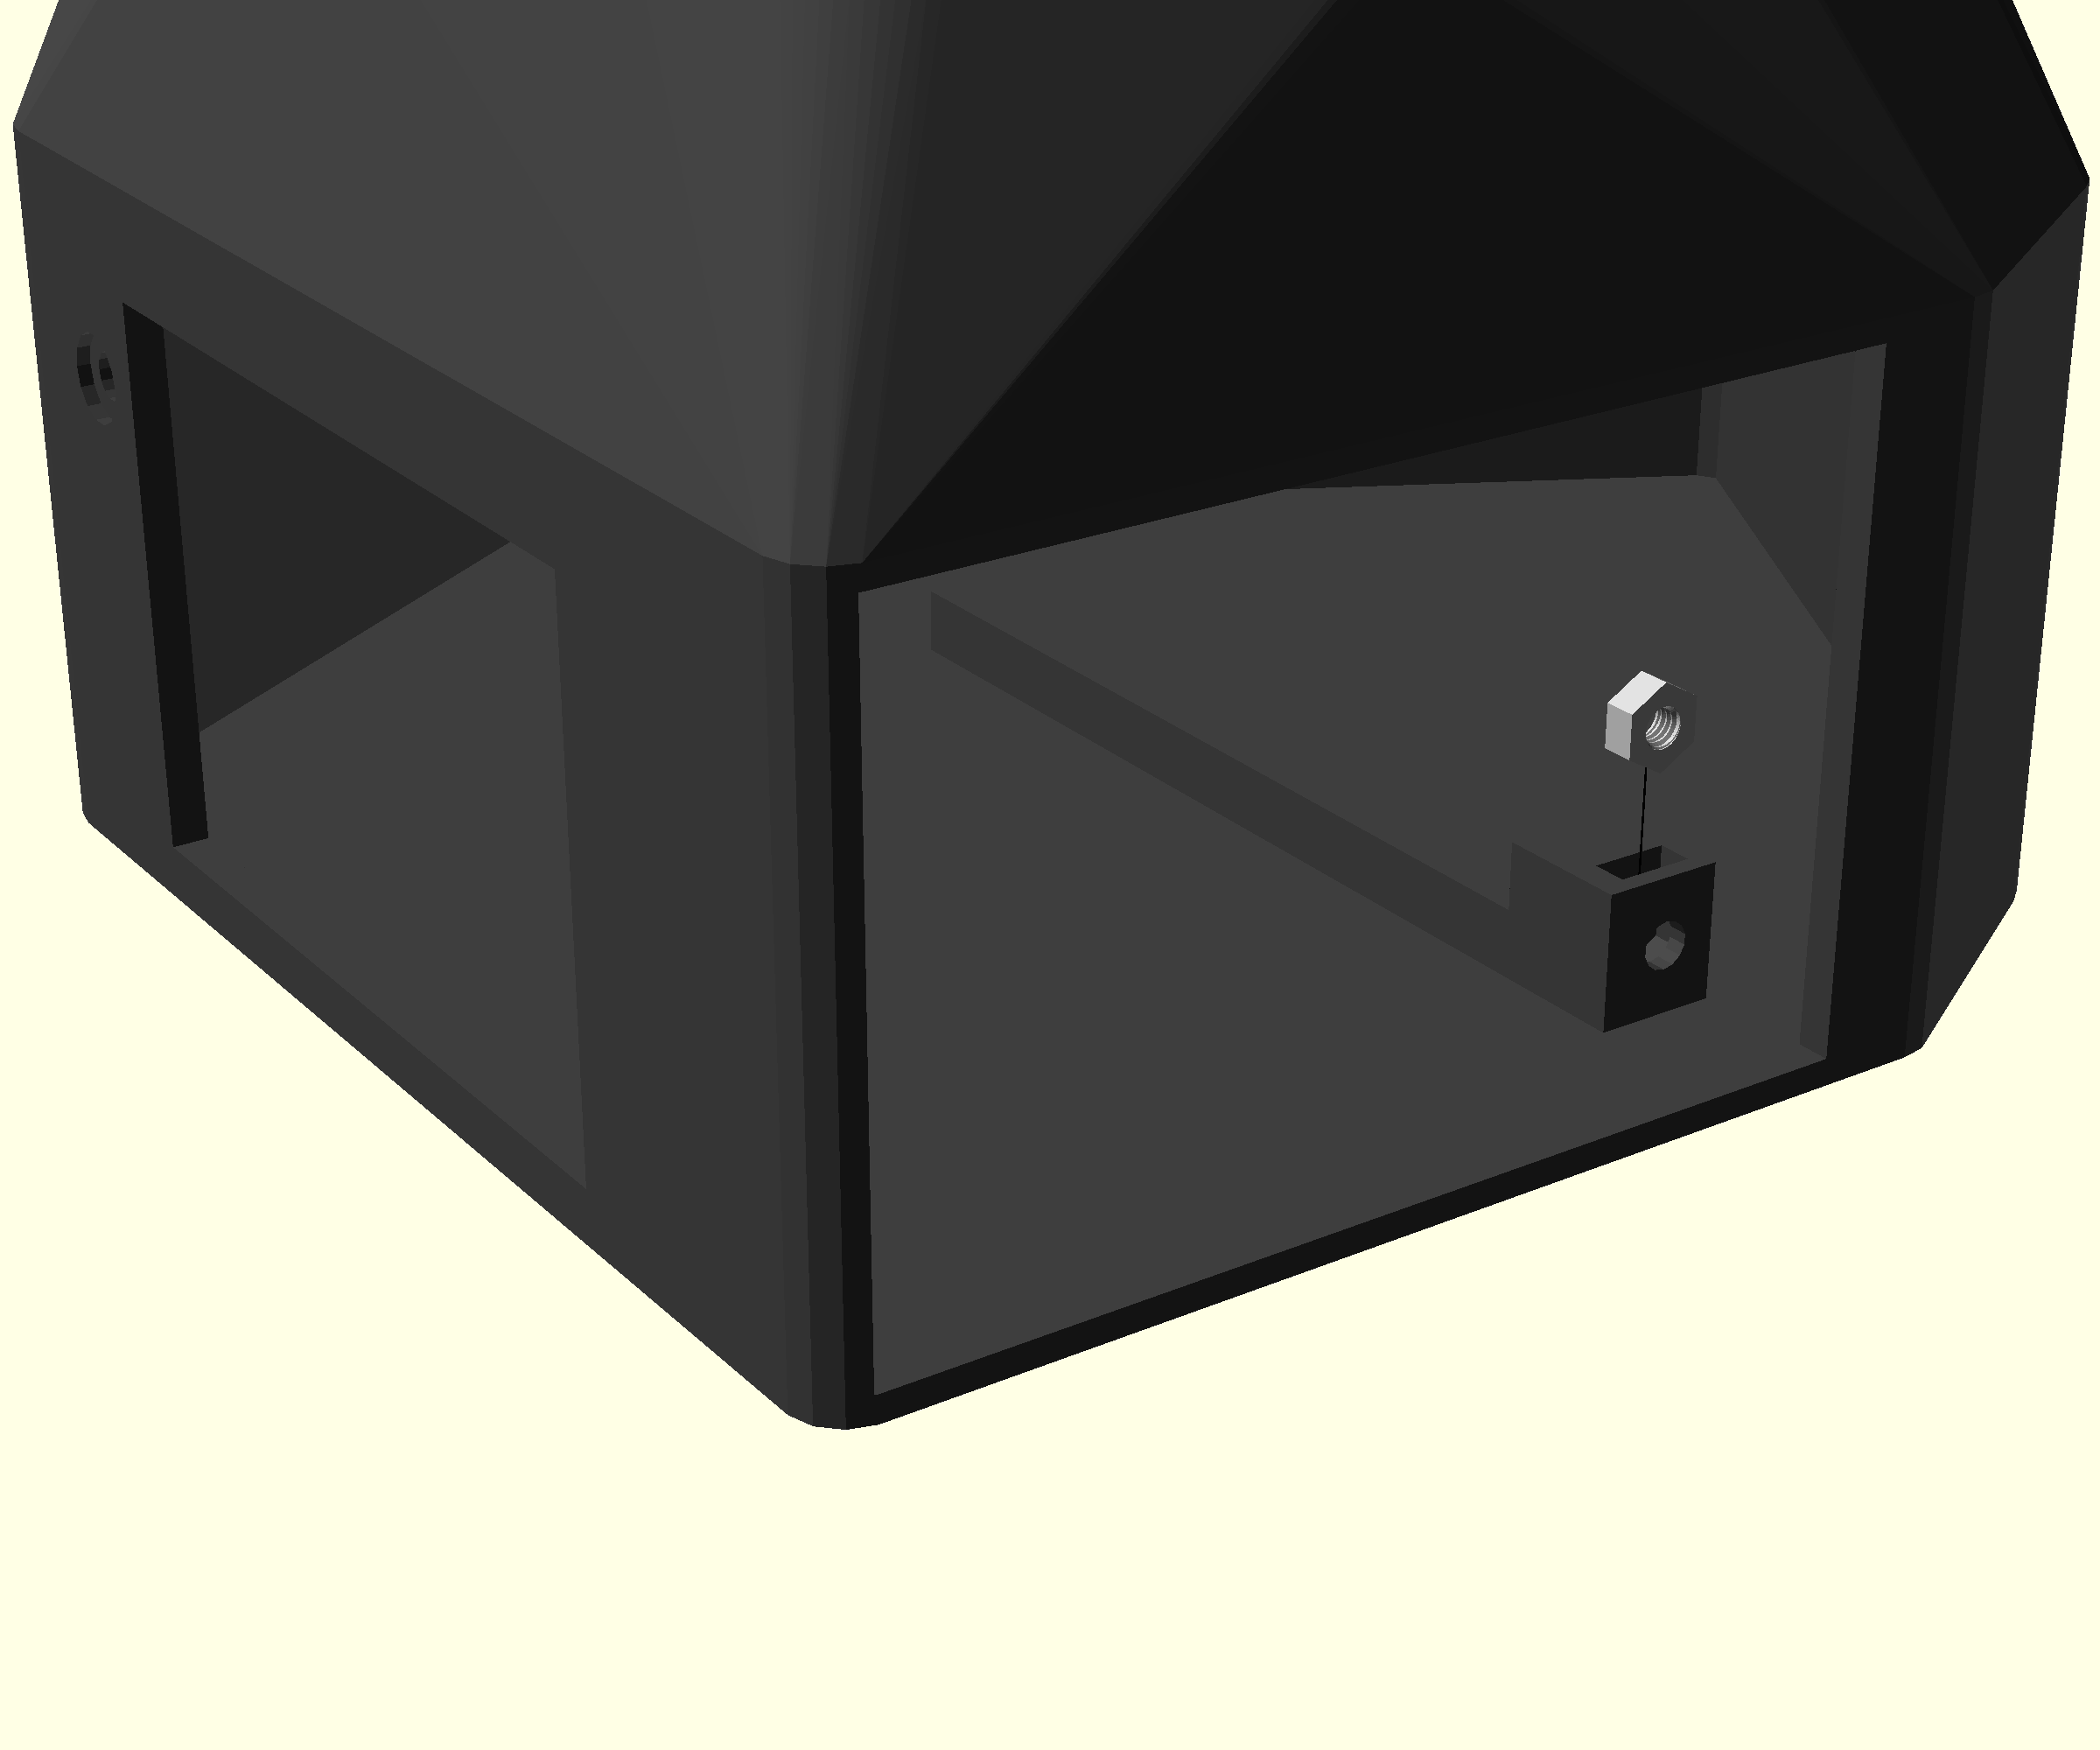


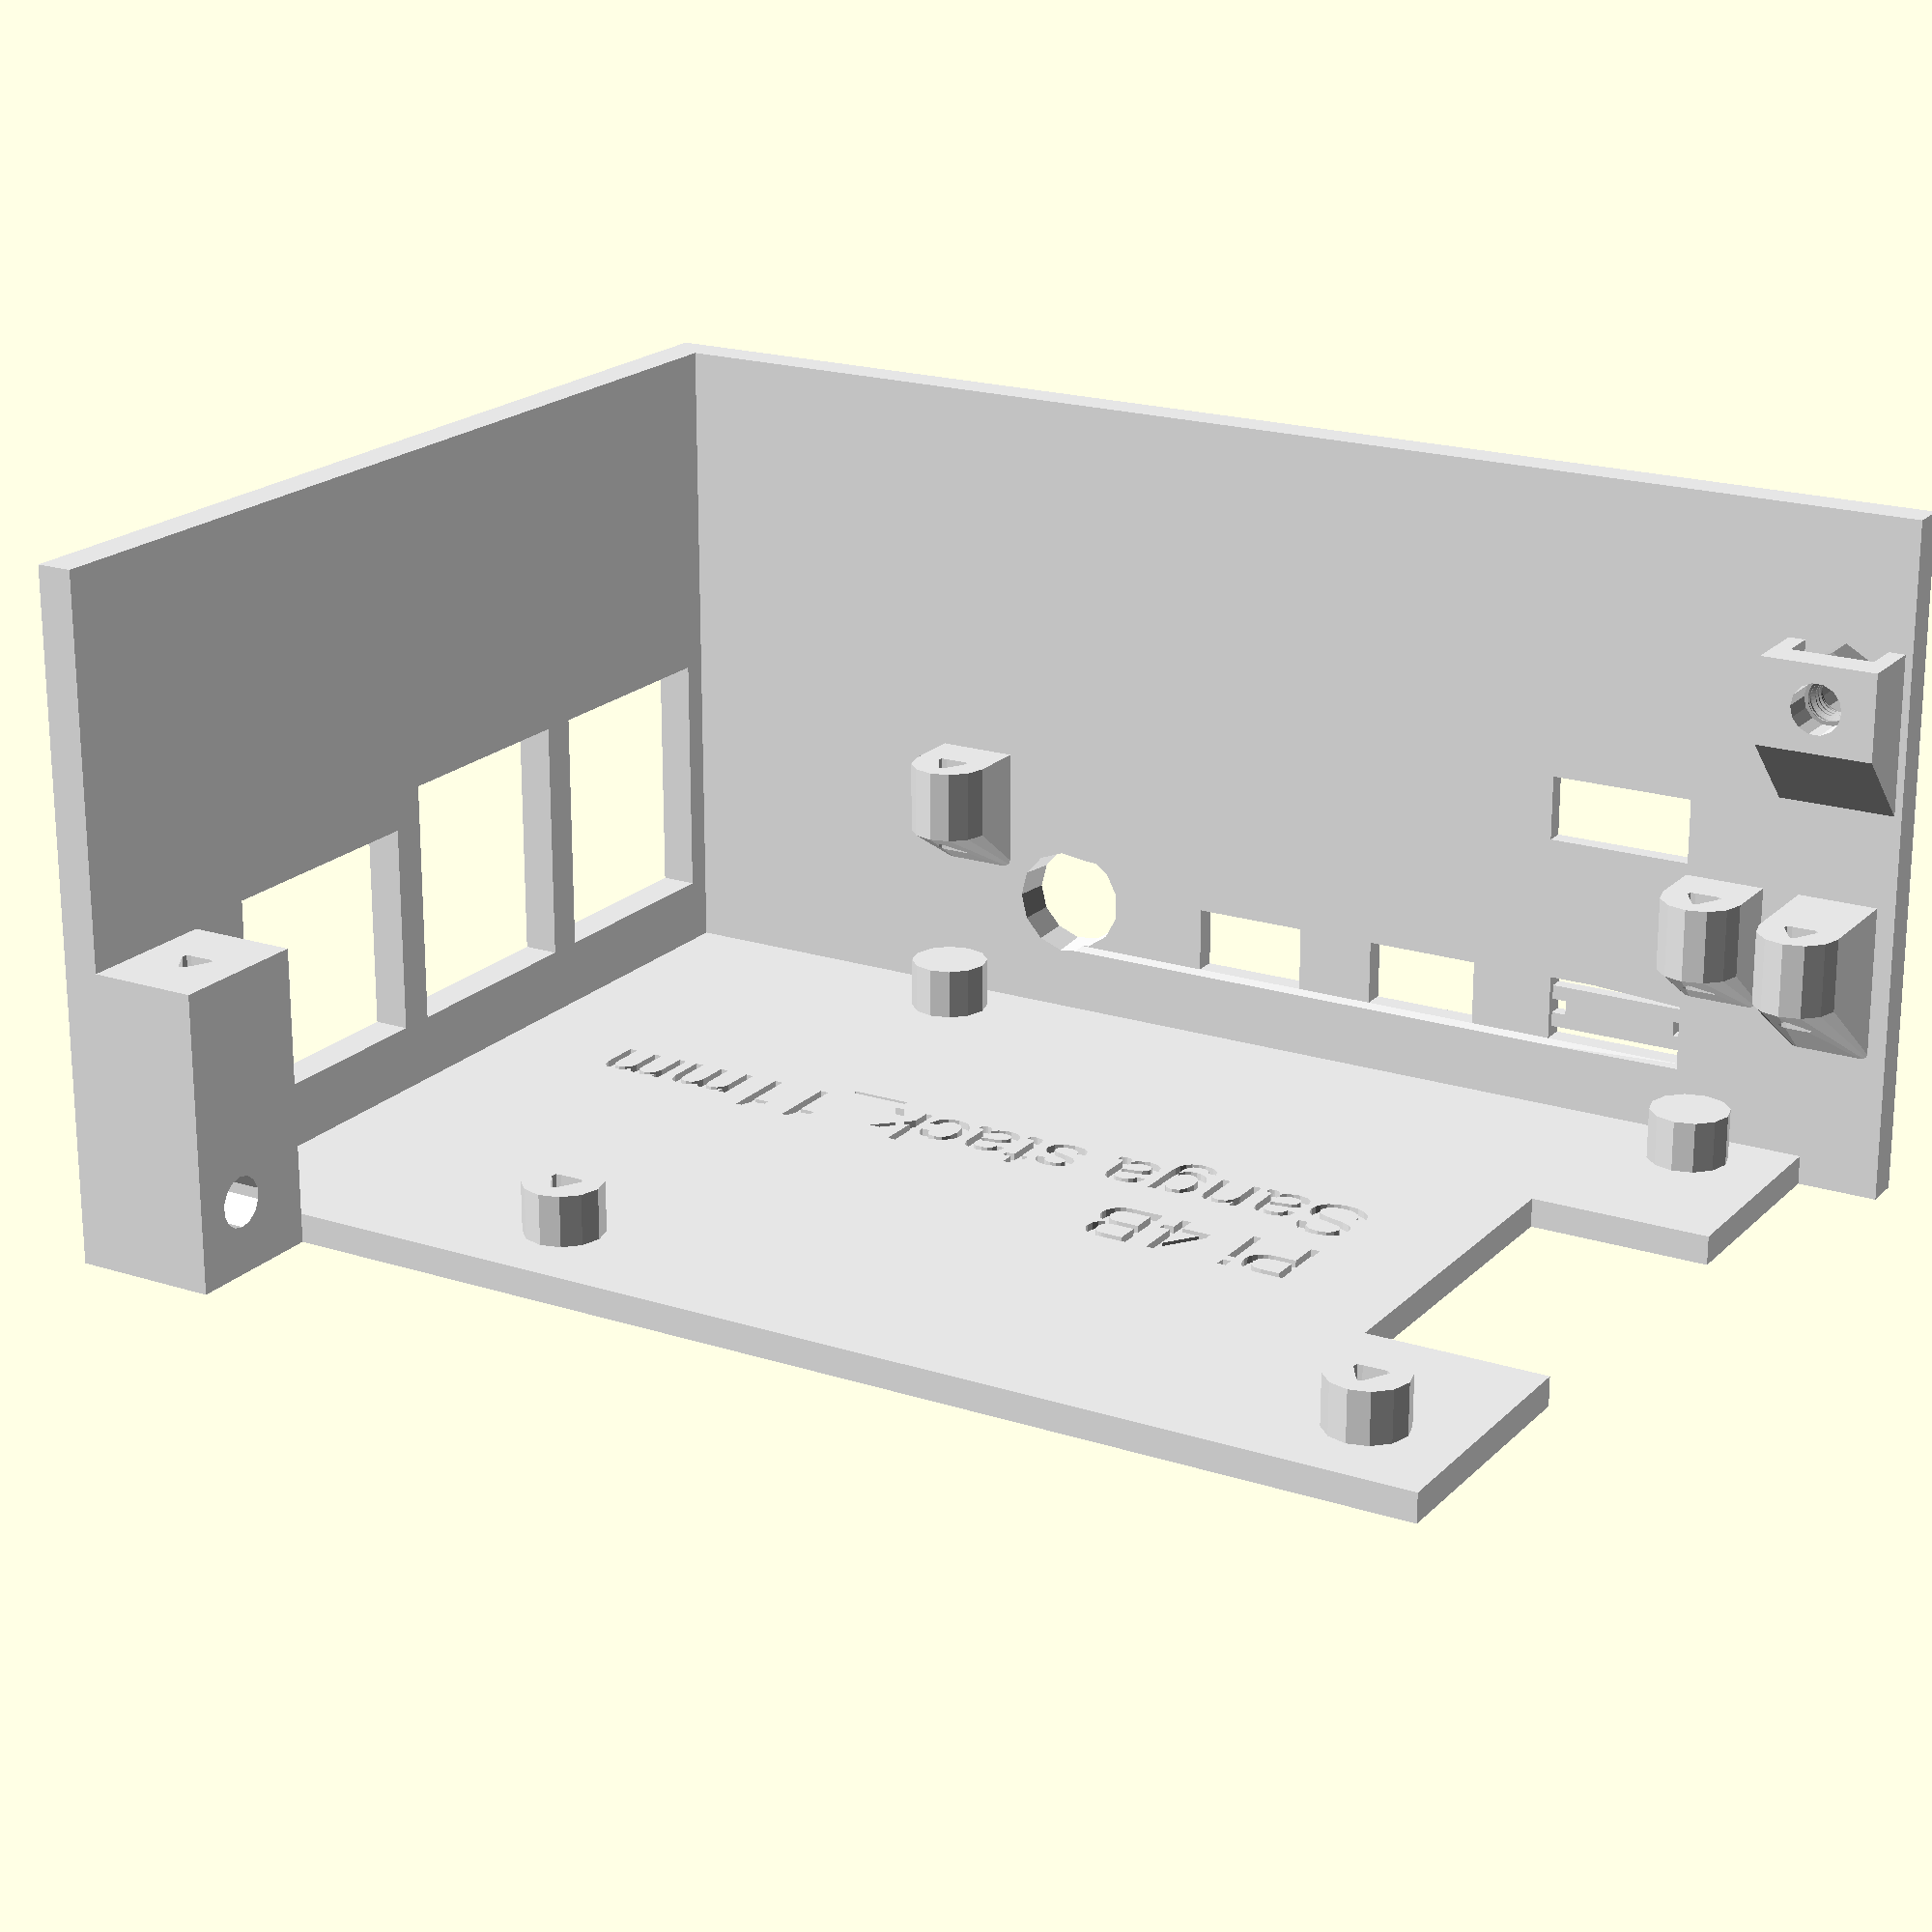
- Place an M3 nut into the slot just inside the hole in the front of the microscope stand.
- Place another M3 nut into the slot near the Sangaboard power connector on the electronics drawer you printed earlier .
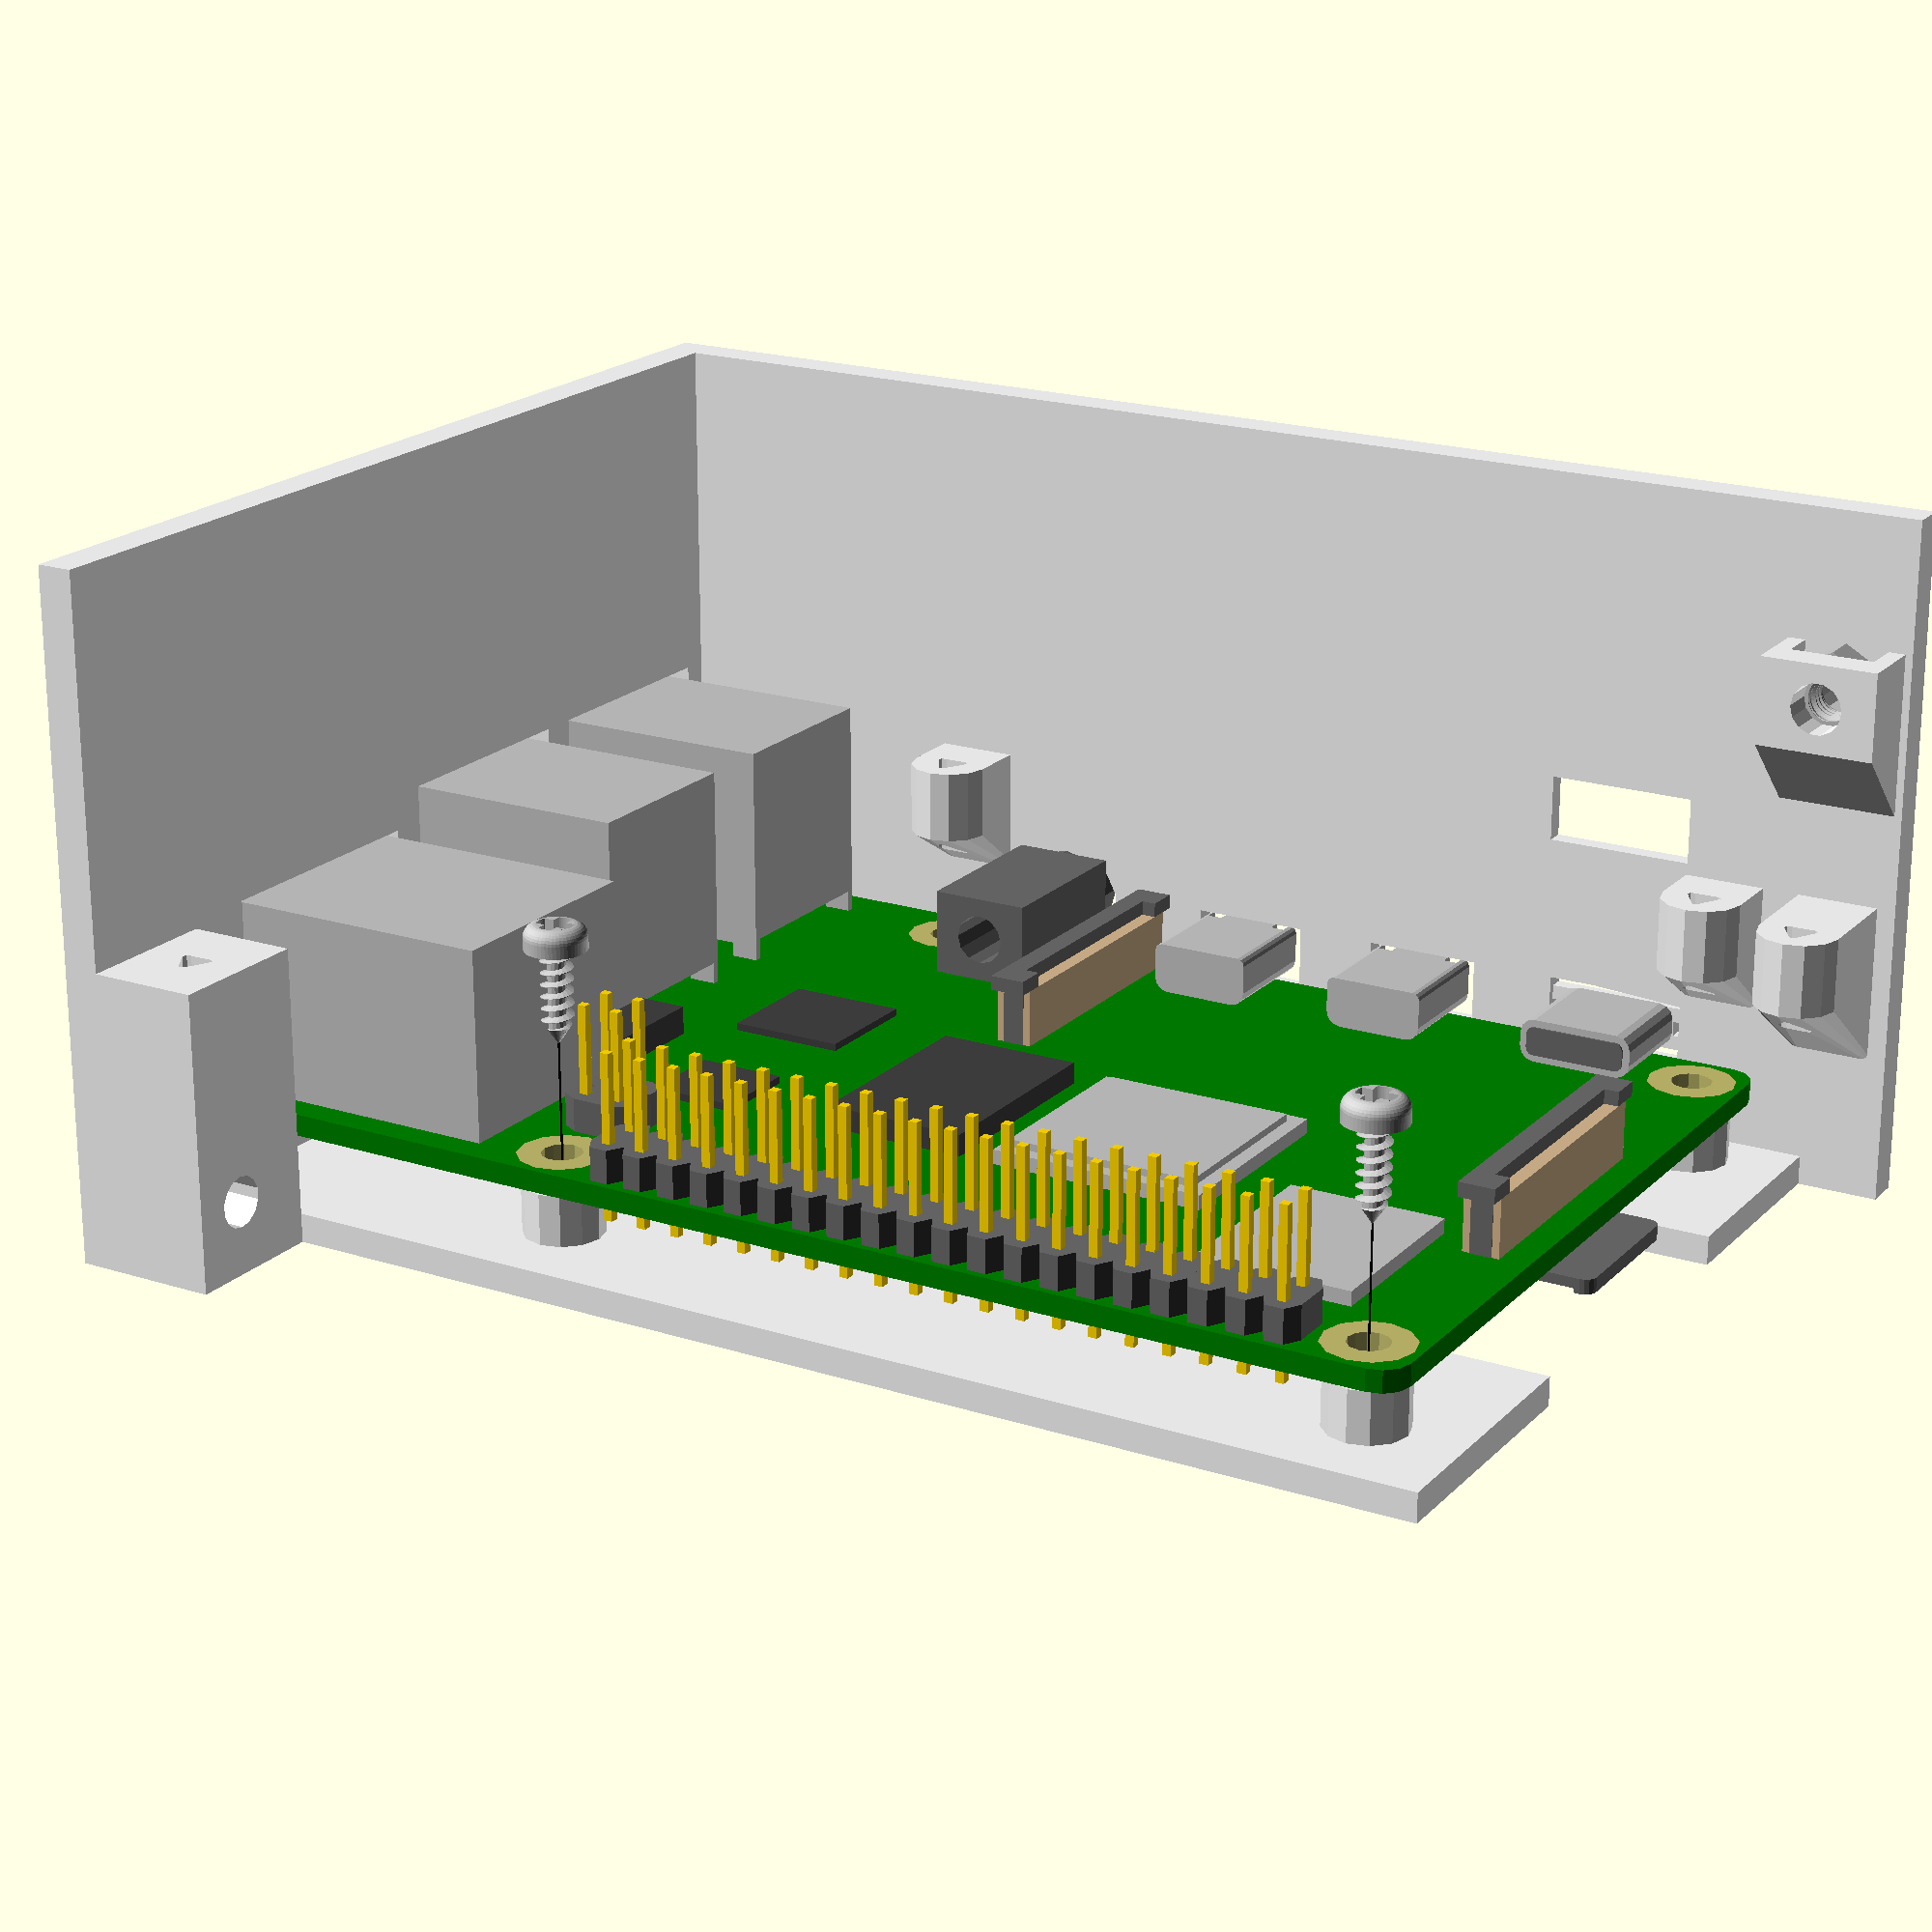
Step 2: Fit the Raspberry Pi
Your Raspberry Pi requires the OpenFlexure Server software in order to work. This is installed as an operating system image on an SD card, which must be inserted into the Pi before it is fitted in the microscope stand. Refer to this step.
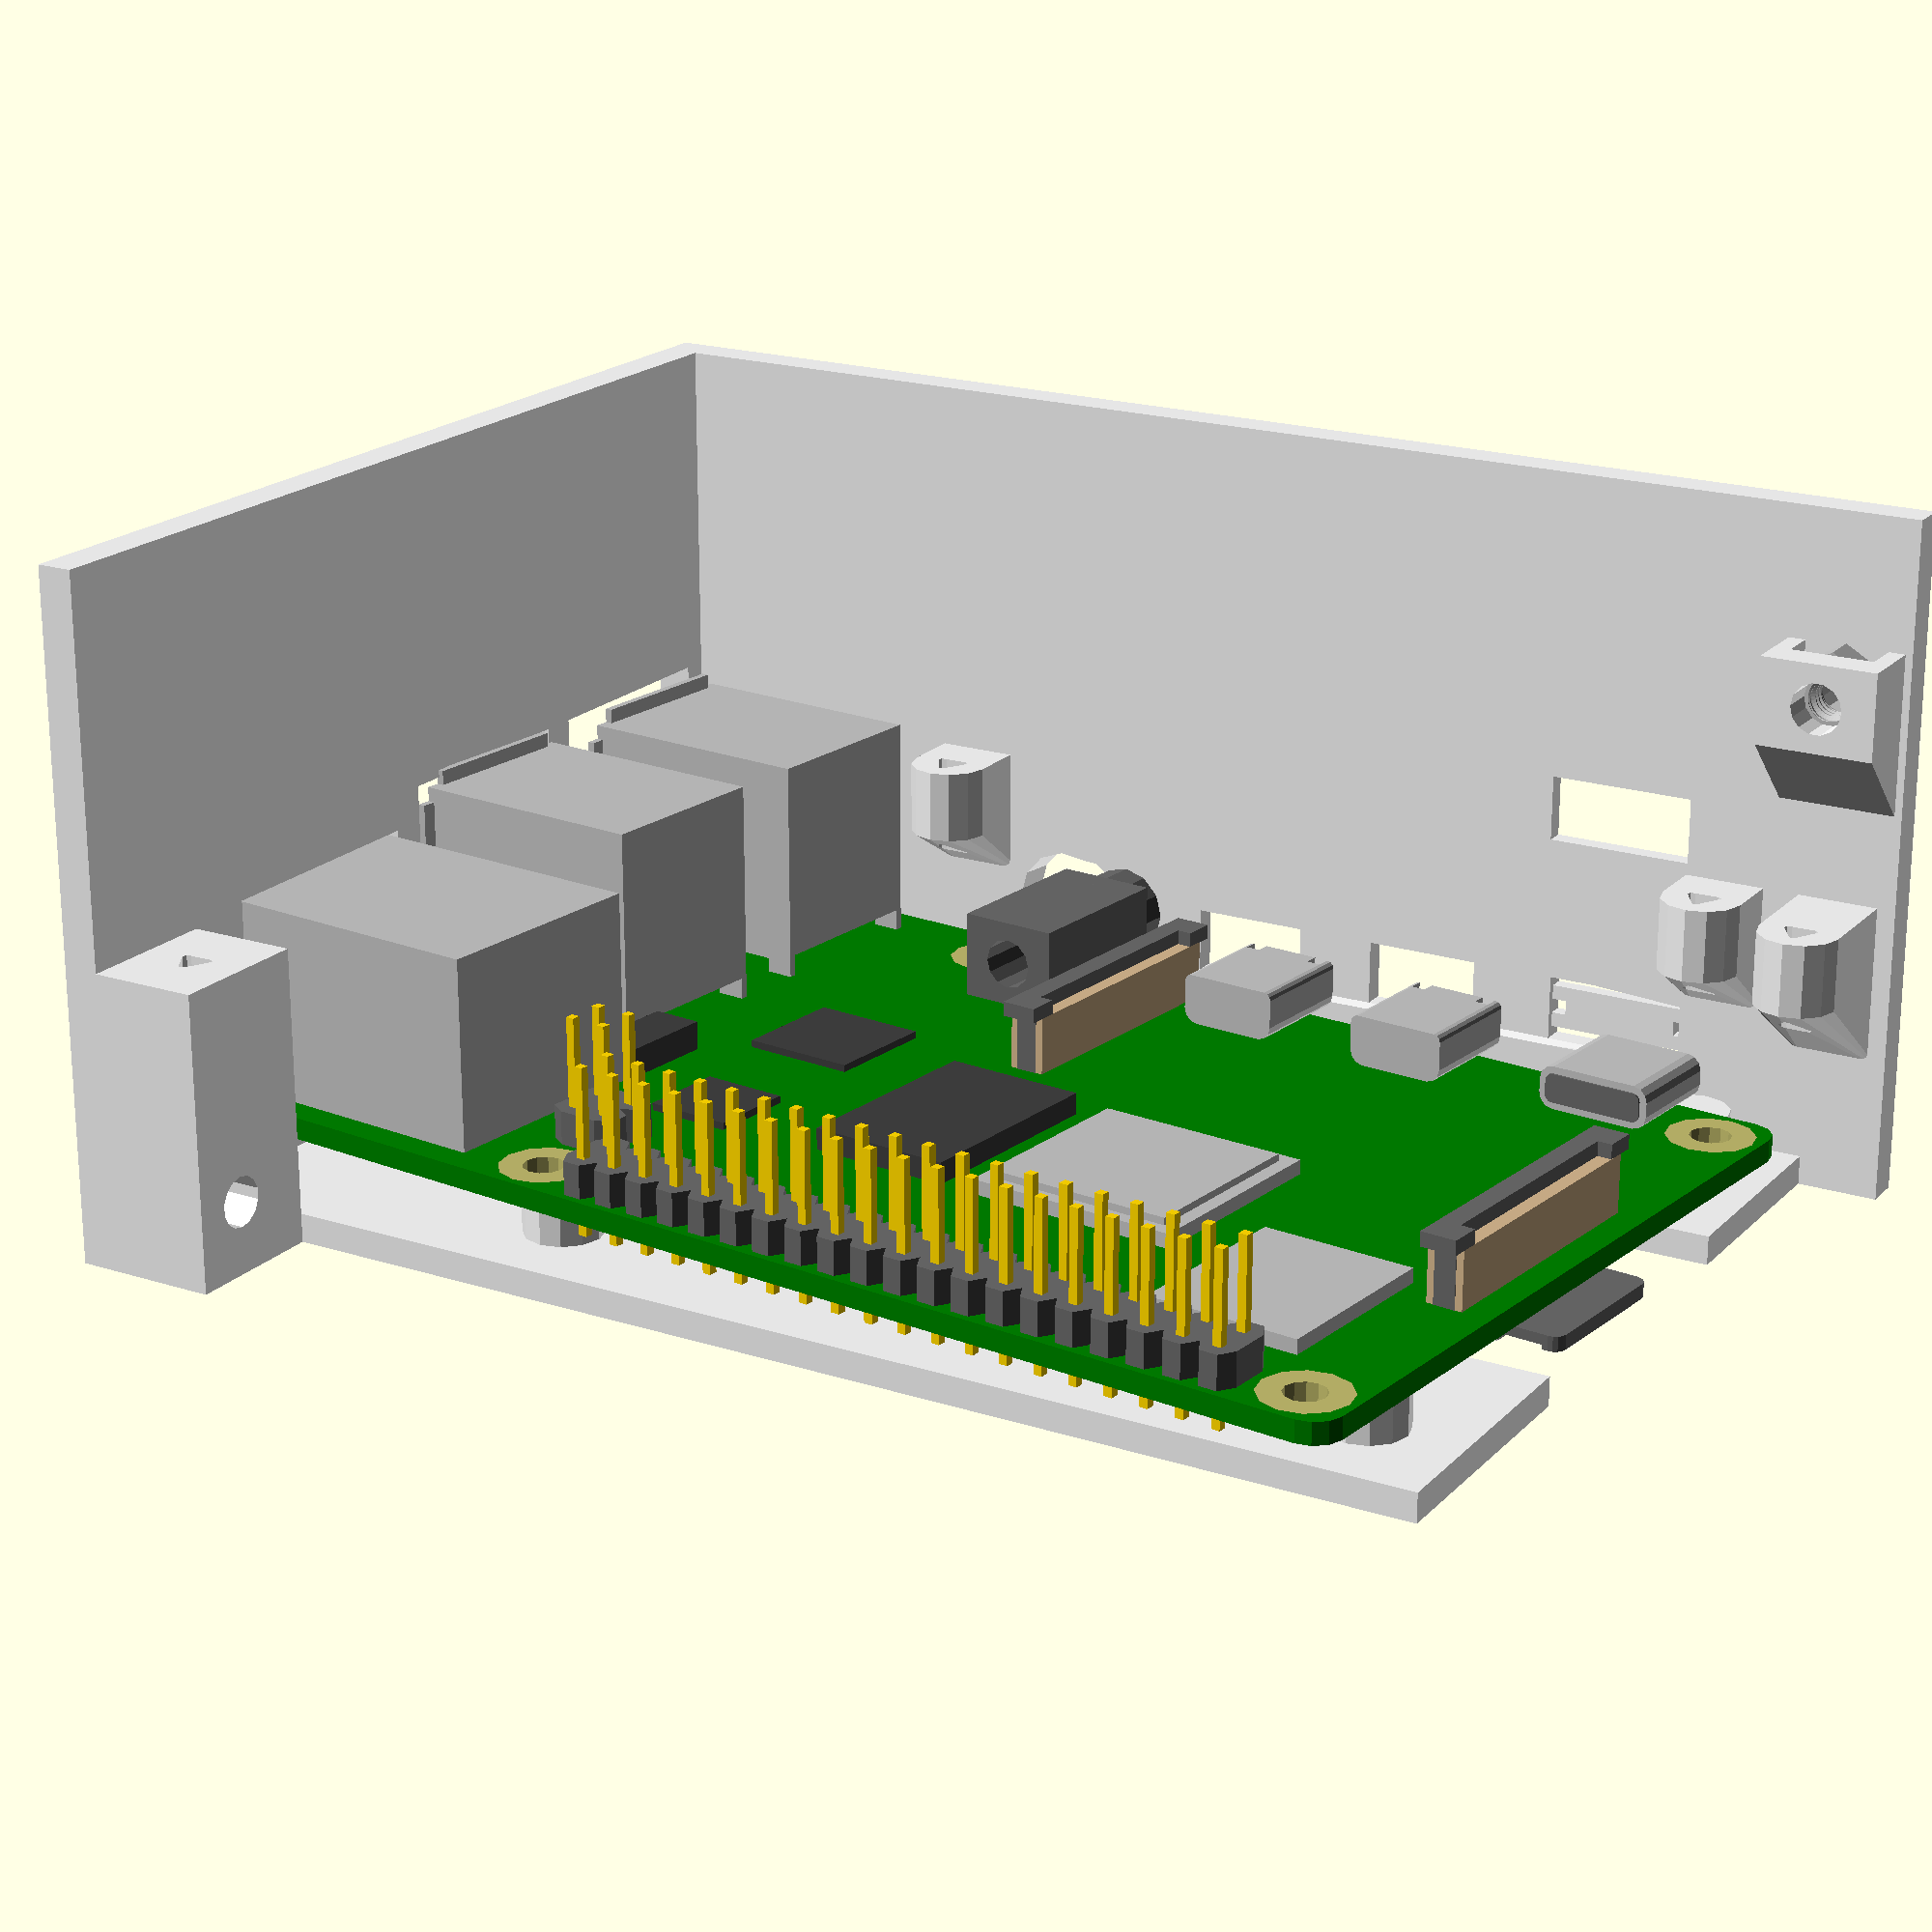

- Take the electronics drawer and push the Raspberry Pi (with SD card and software installed) into place so the connectors show through the holes. The connectors are recessed into both walls of the drawer, so a small rotation and a little force is required for this step.
- Secure the Raspberry Pi in place with two No 2 self tapping screws, using a screwdriver.
Step 3: Attach the camera ribbon cable


- Identify the 'camera' port of the Raspberry Pi, between the micro-HDMI connector and the Headphone jack.
- Insert the ribbon cable from the optics module into the camera port of the Rasberry Pi. Ensure that the contacts are on the opposite side from the clasp.
- There are detailed instructions on the Rasbperry Pi website.
Step 4: Fit the Sangaboard
Your Sangaboard requires firmware in order to work. If you have purchased the board pre-flashed with firmware, it will already be installed. If you have made the board yourself, refer to this step.
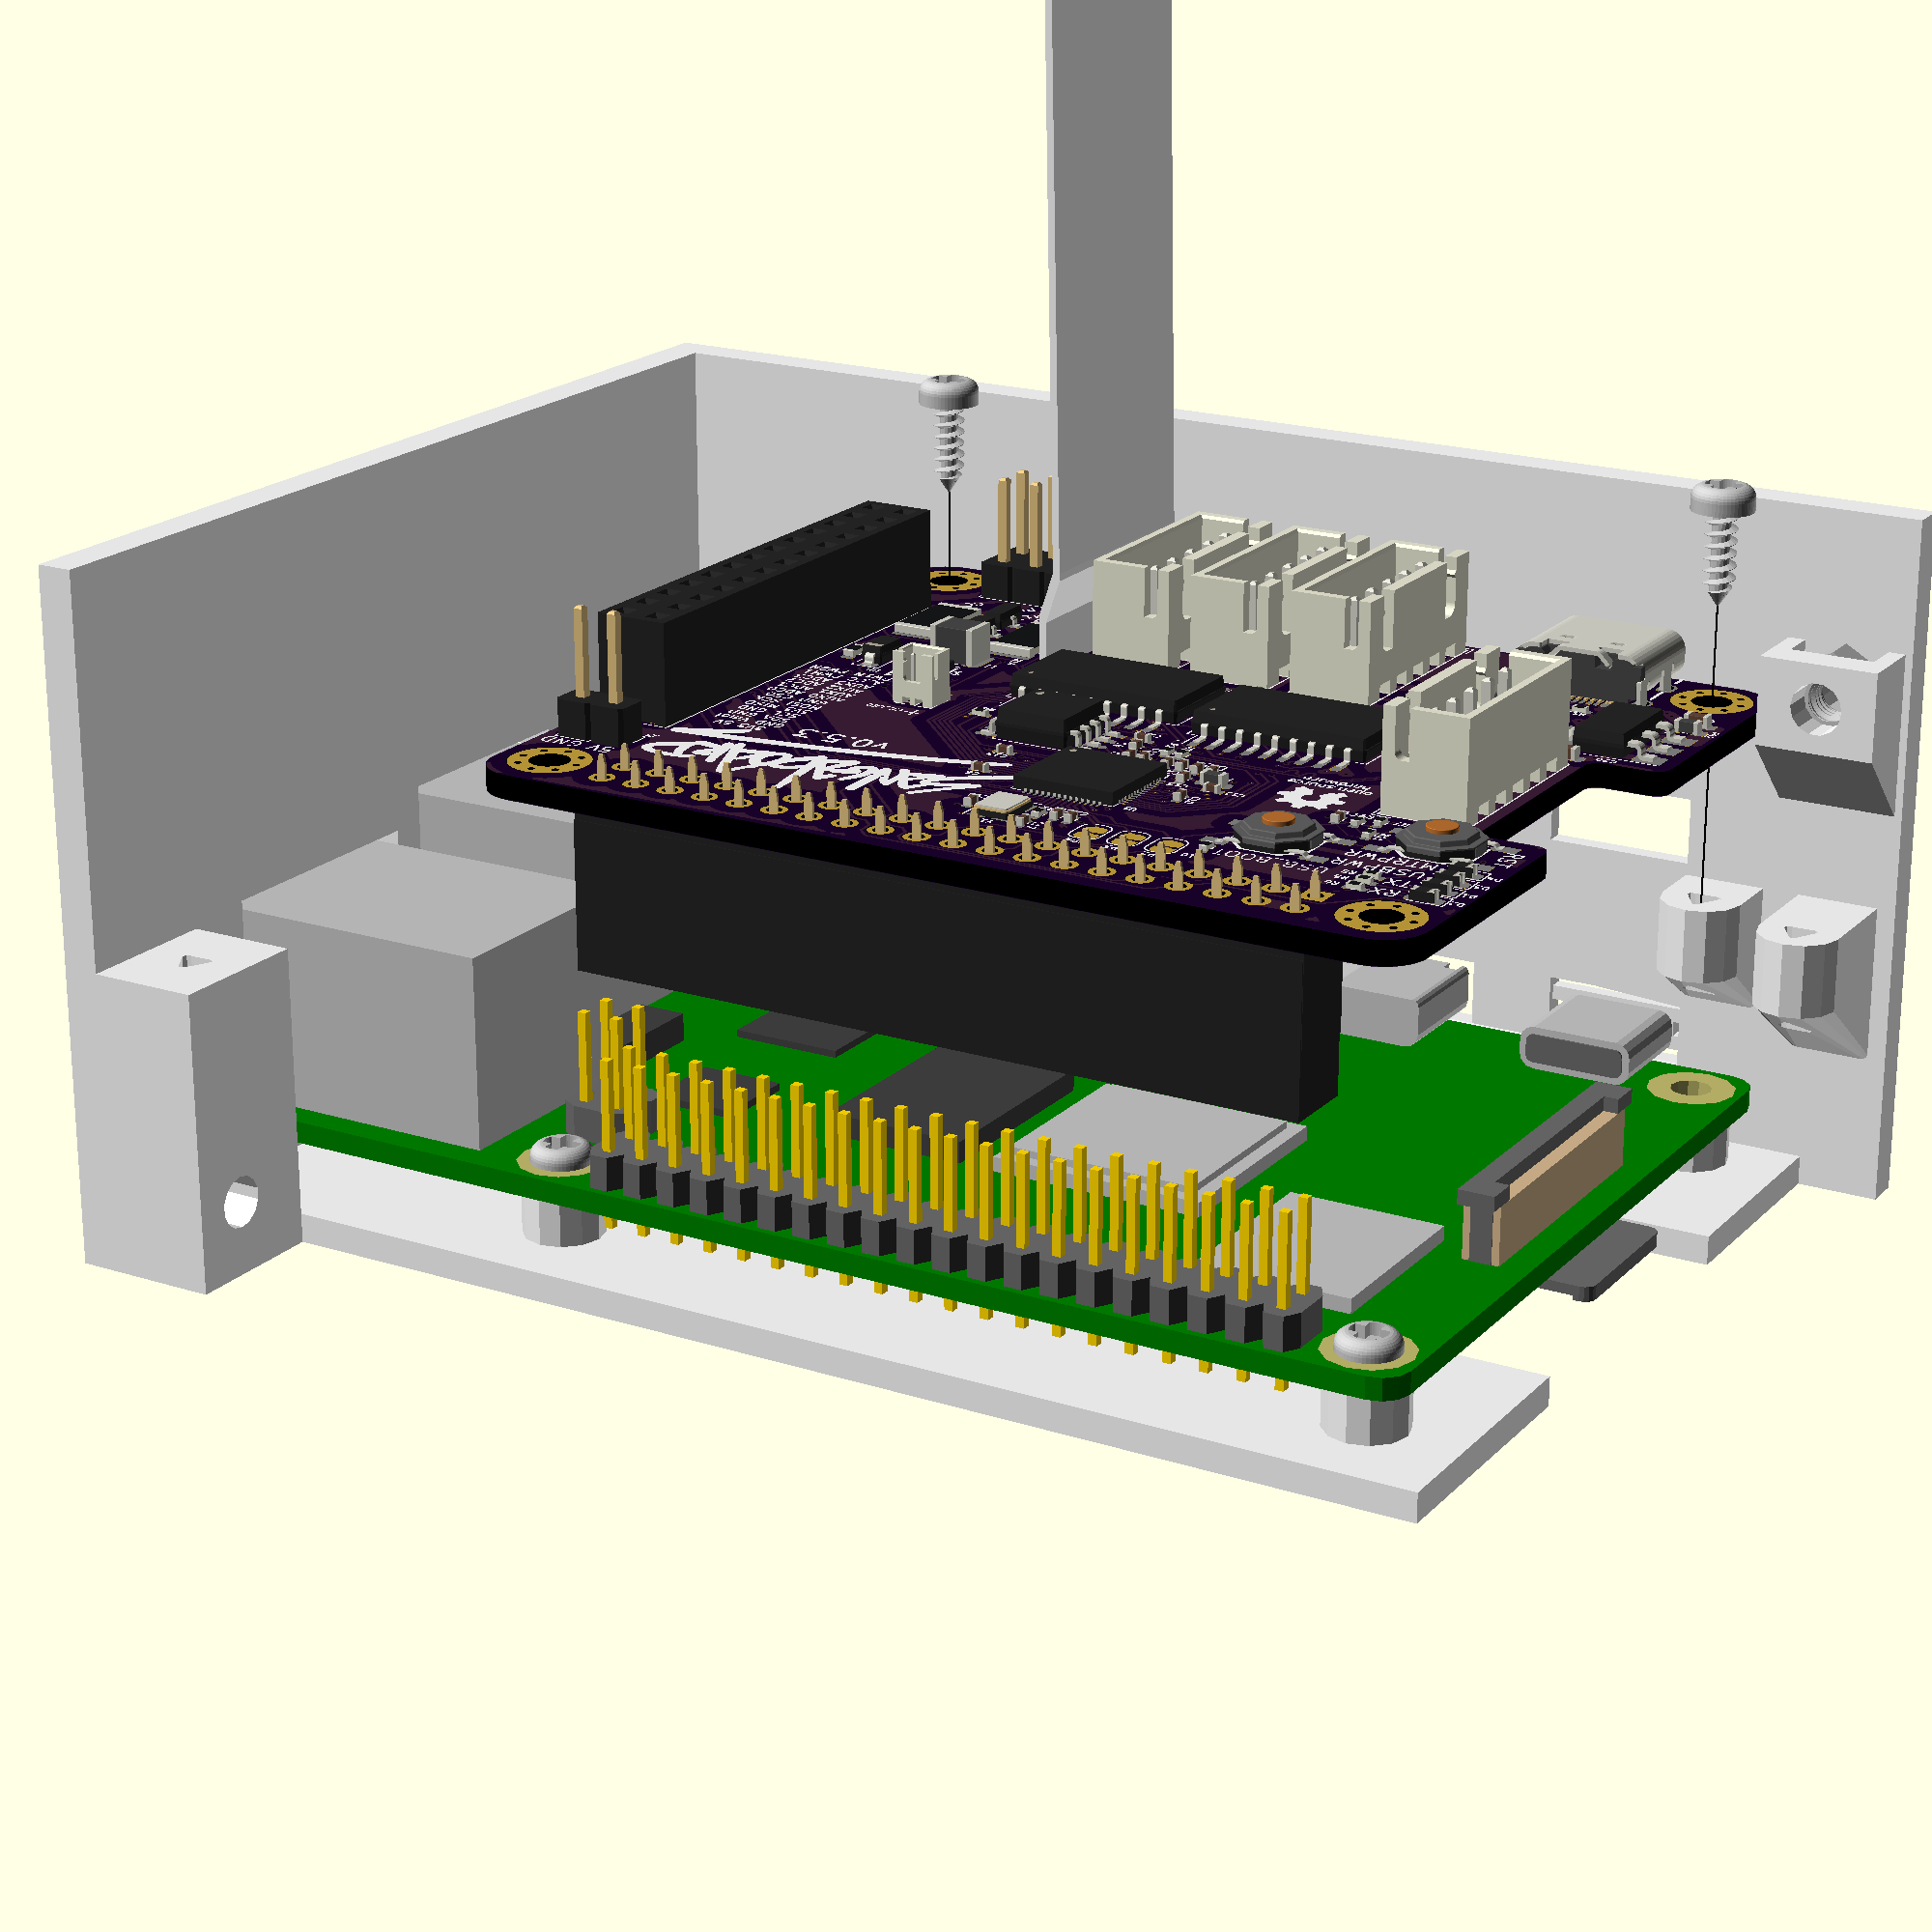
- Mount the Sangaboard (with firmware installed) onto the Raspberry Pi GPIO pins, ensuring that the ribbon cable from the optics module passes through the slot.
- Check that the connector is aligned so that it covers all of the pins on the 40-pin connector on the Raspberry Pi, and that the Sangaboard mounting holes line up with the mounting points.
- Secure the Sangaboard in place with two No 2 self tapping screws, using a screwdriver.
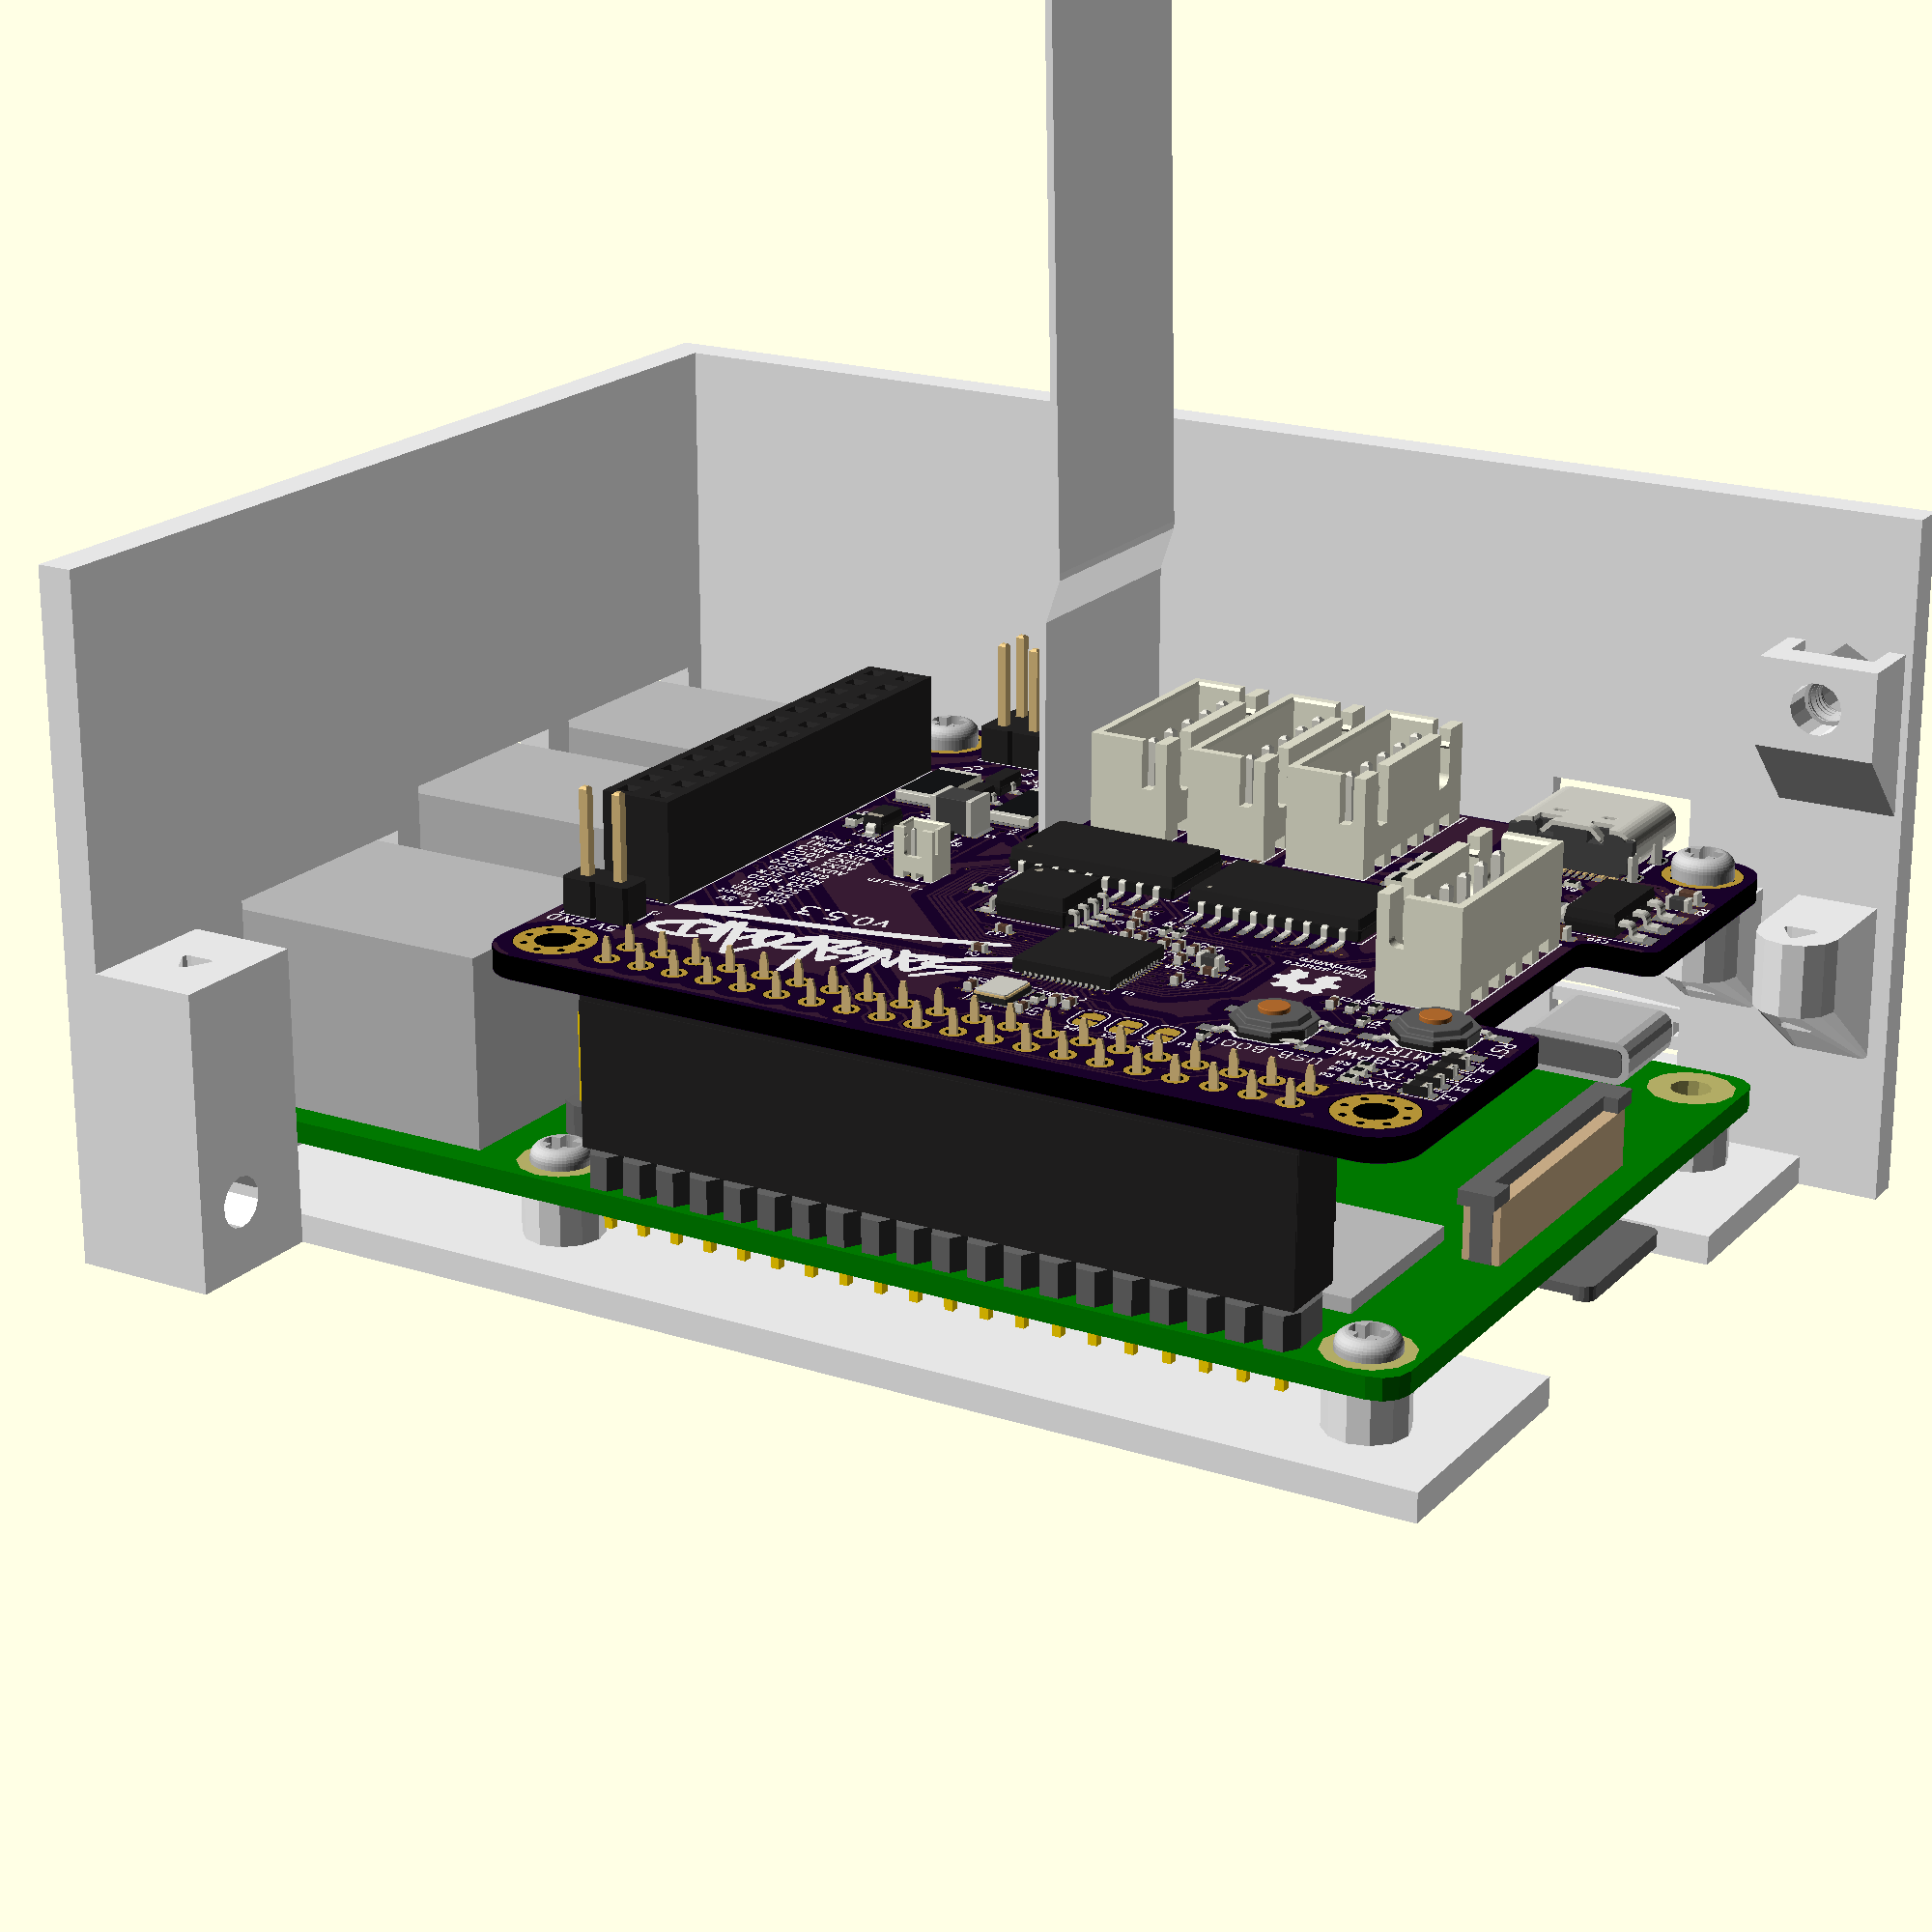
Step 5: Connect the motors to the Sangaboard
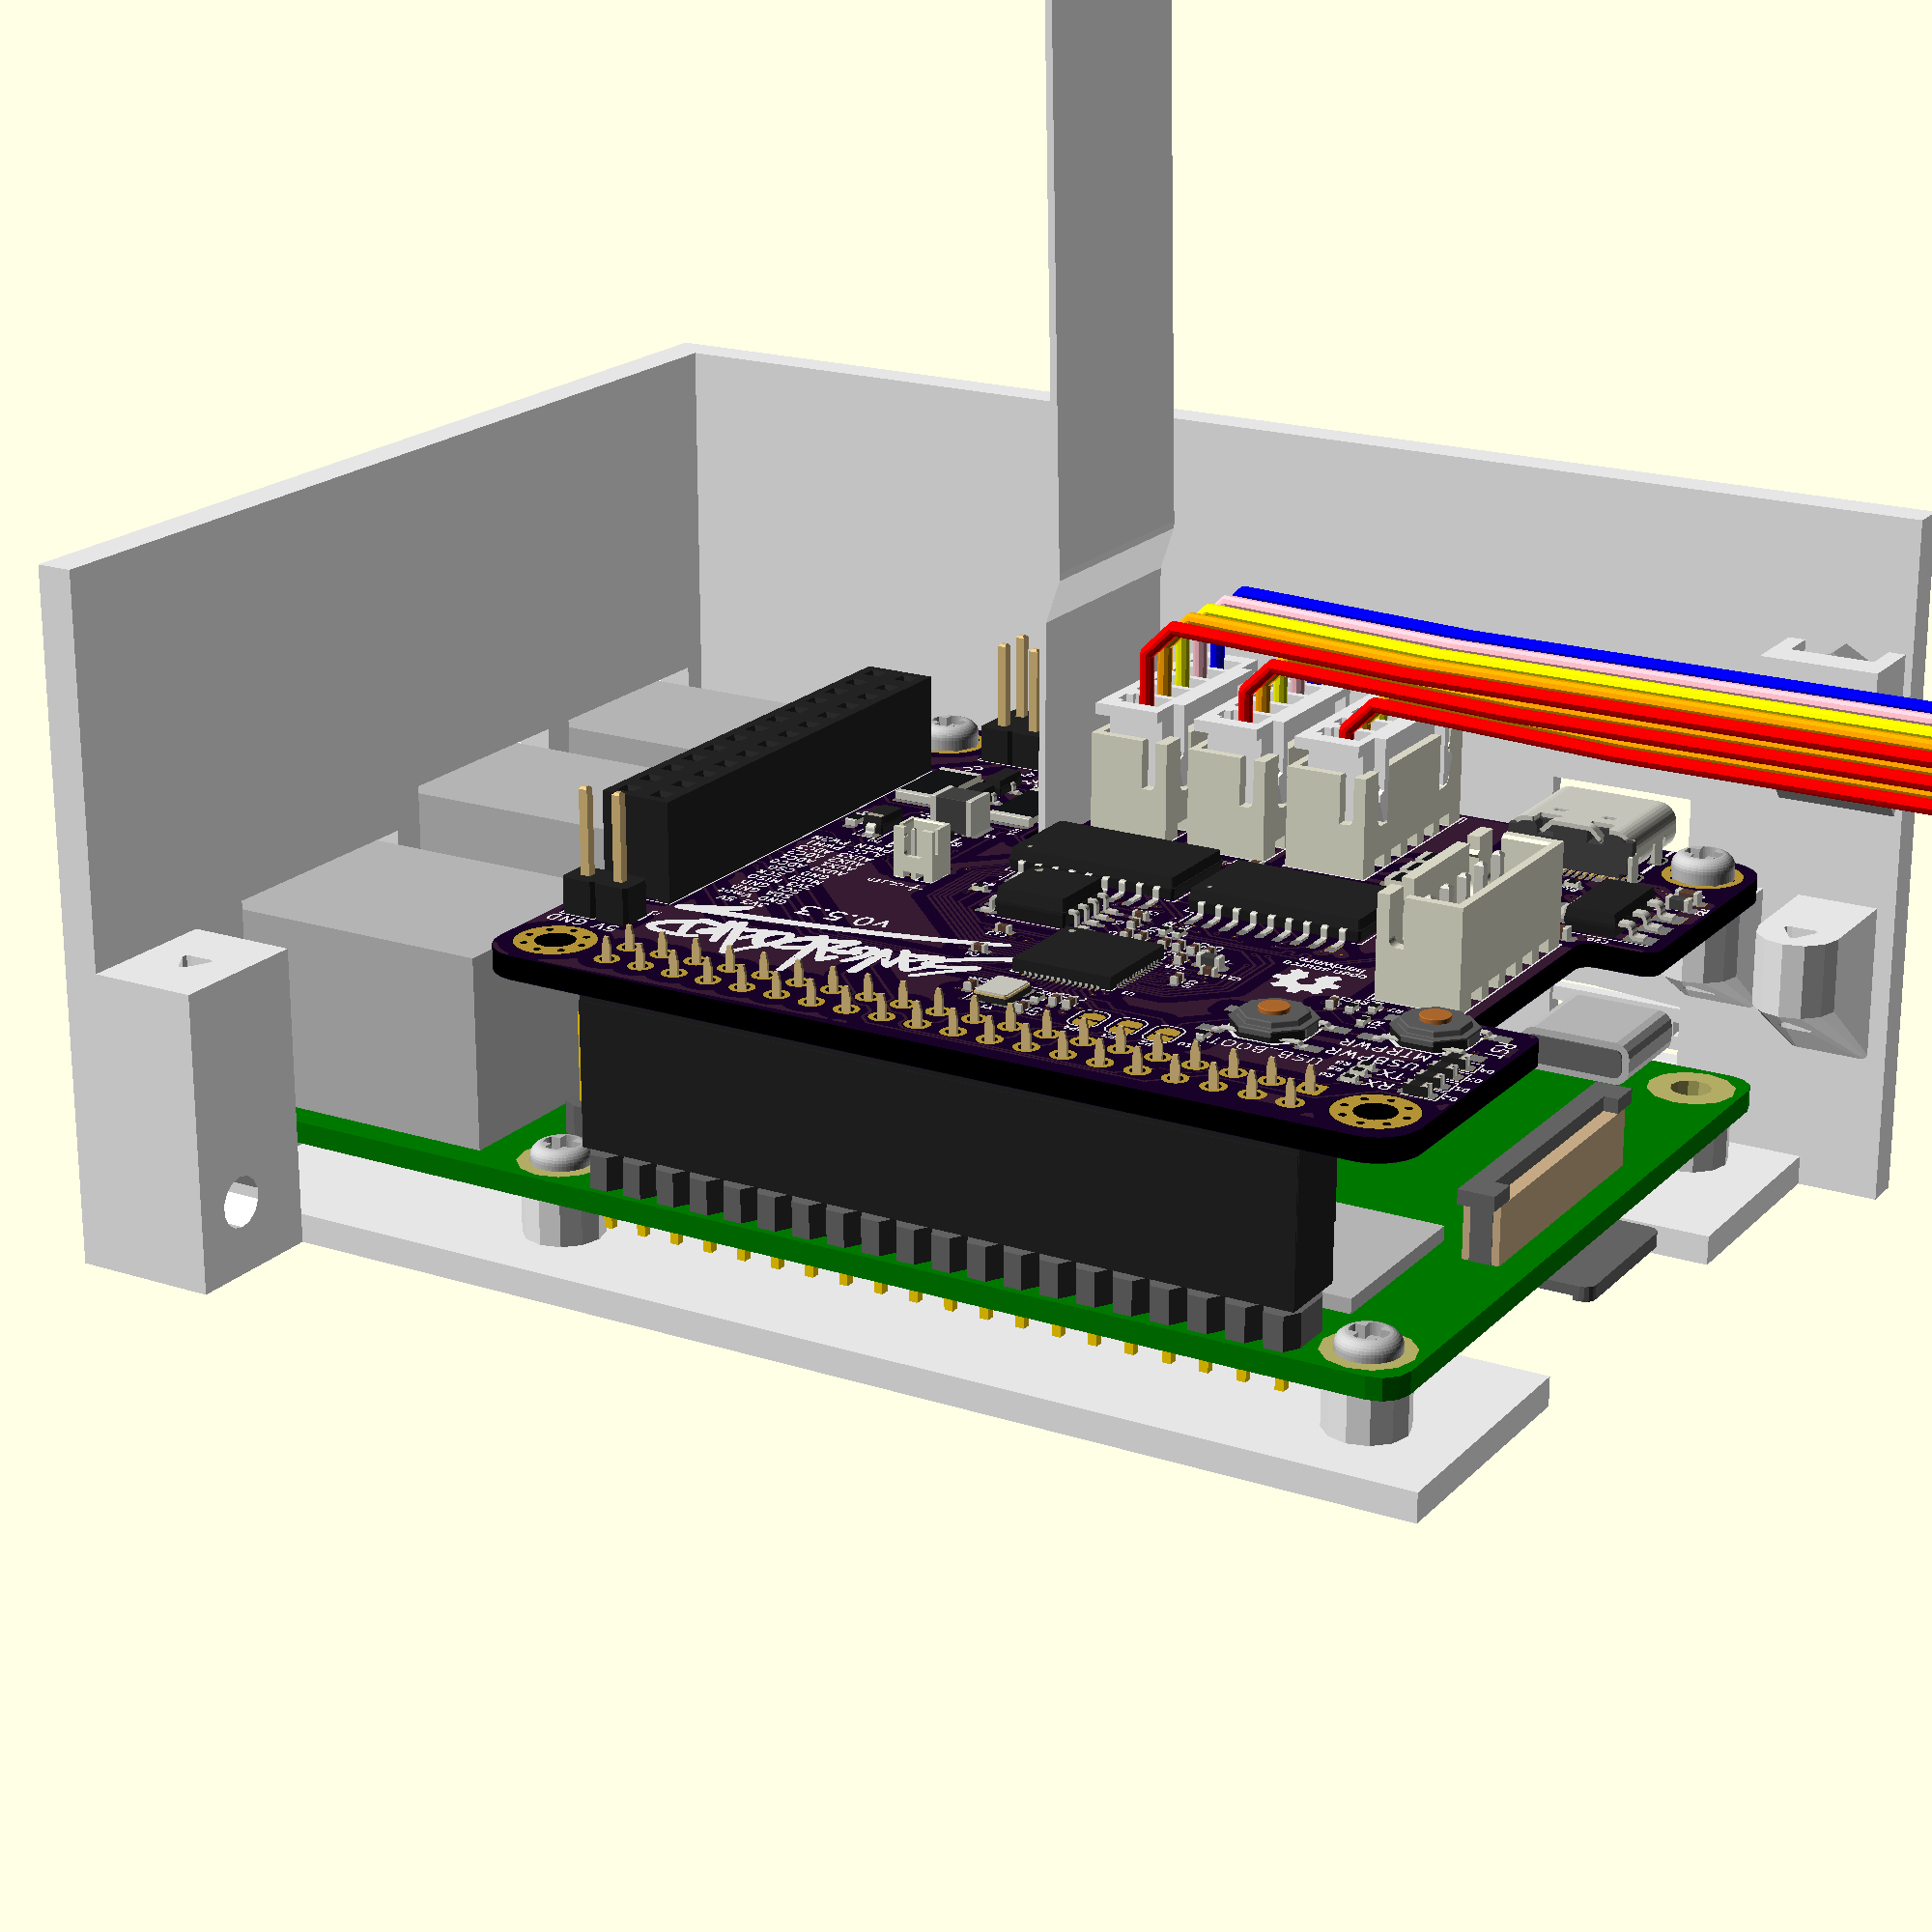
- Push the x motor cable into its labelled connector.
- Push the y and z motor cables into their labelled connectors. Make sure the motor from the correct axis on the microscope goes to the correct port.
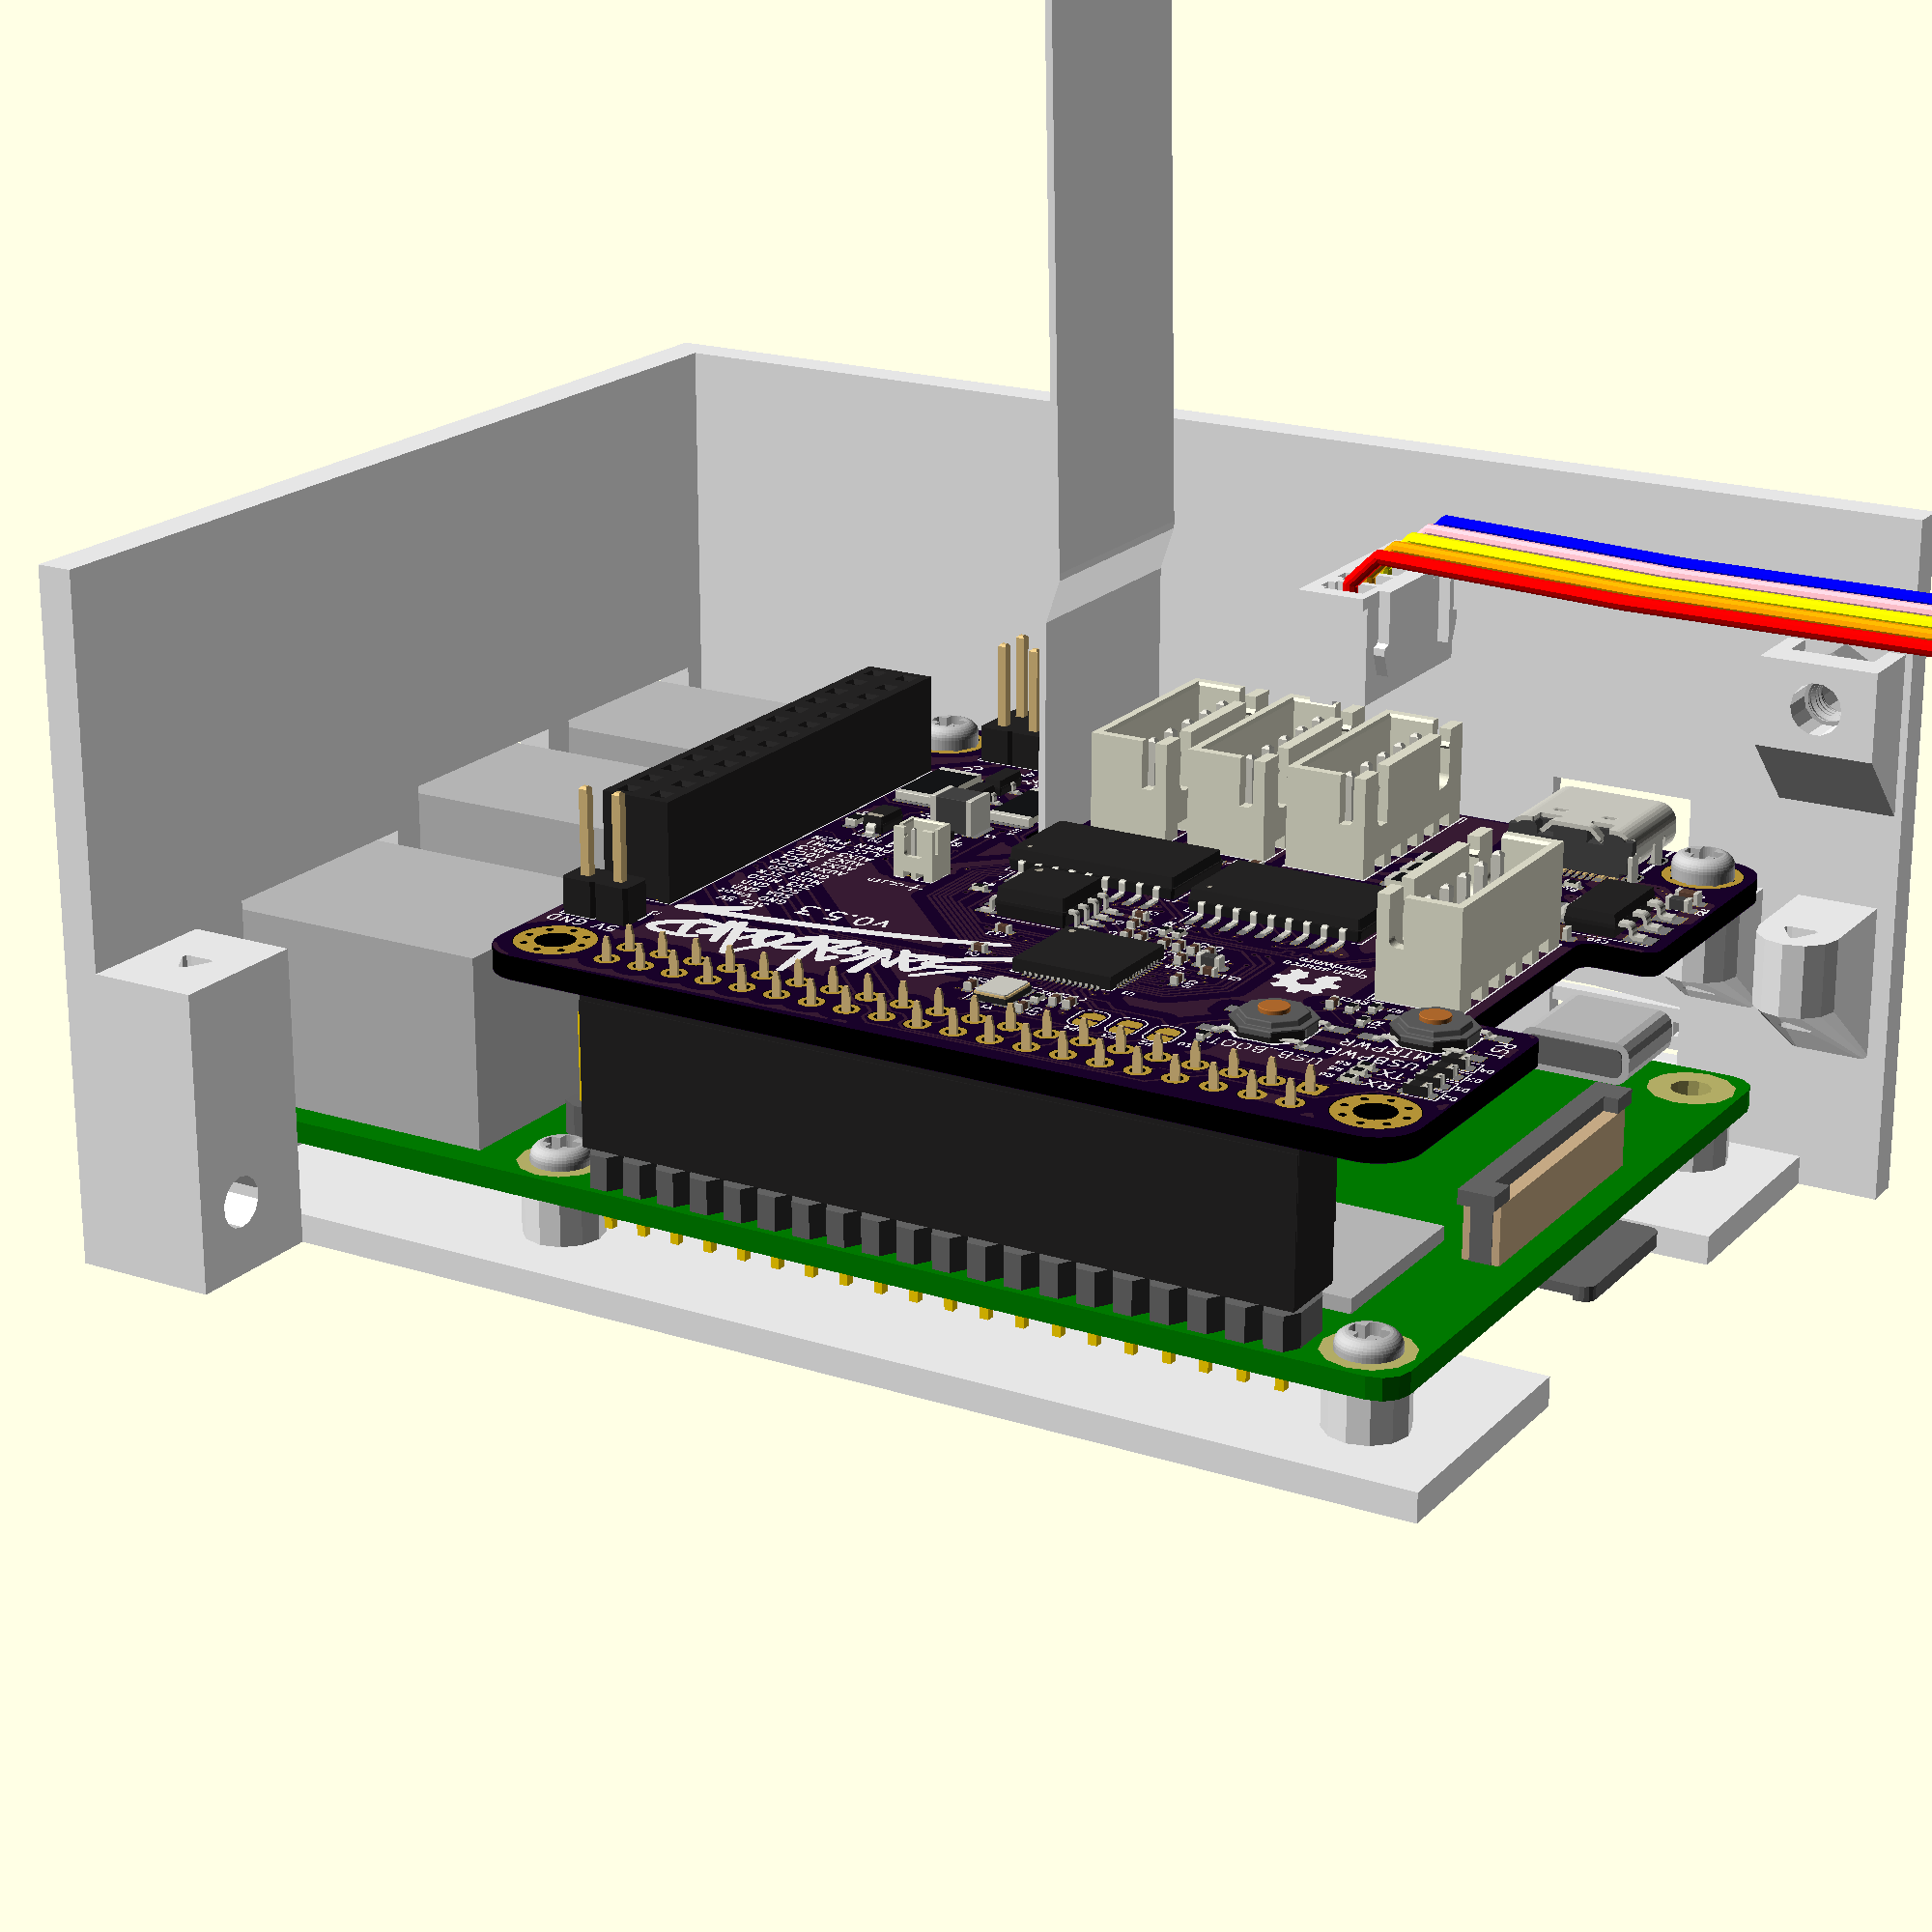
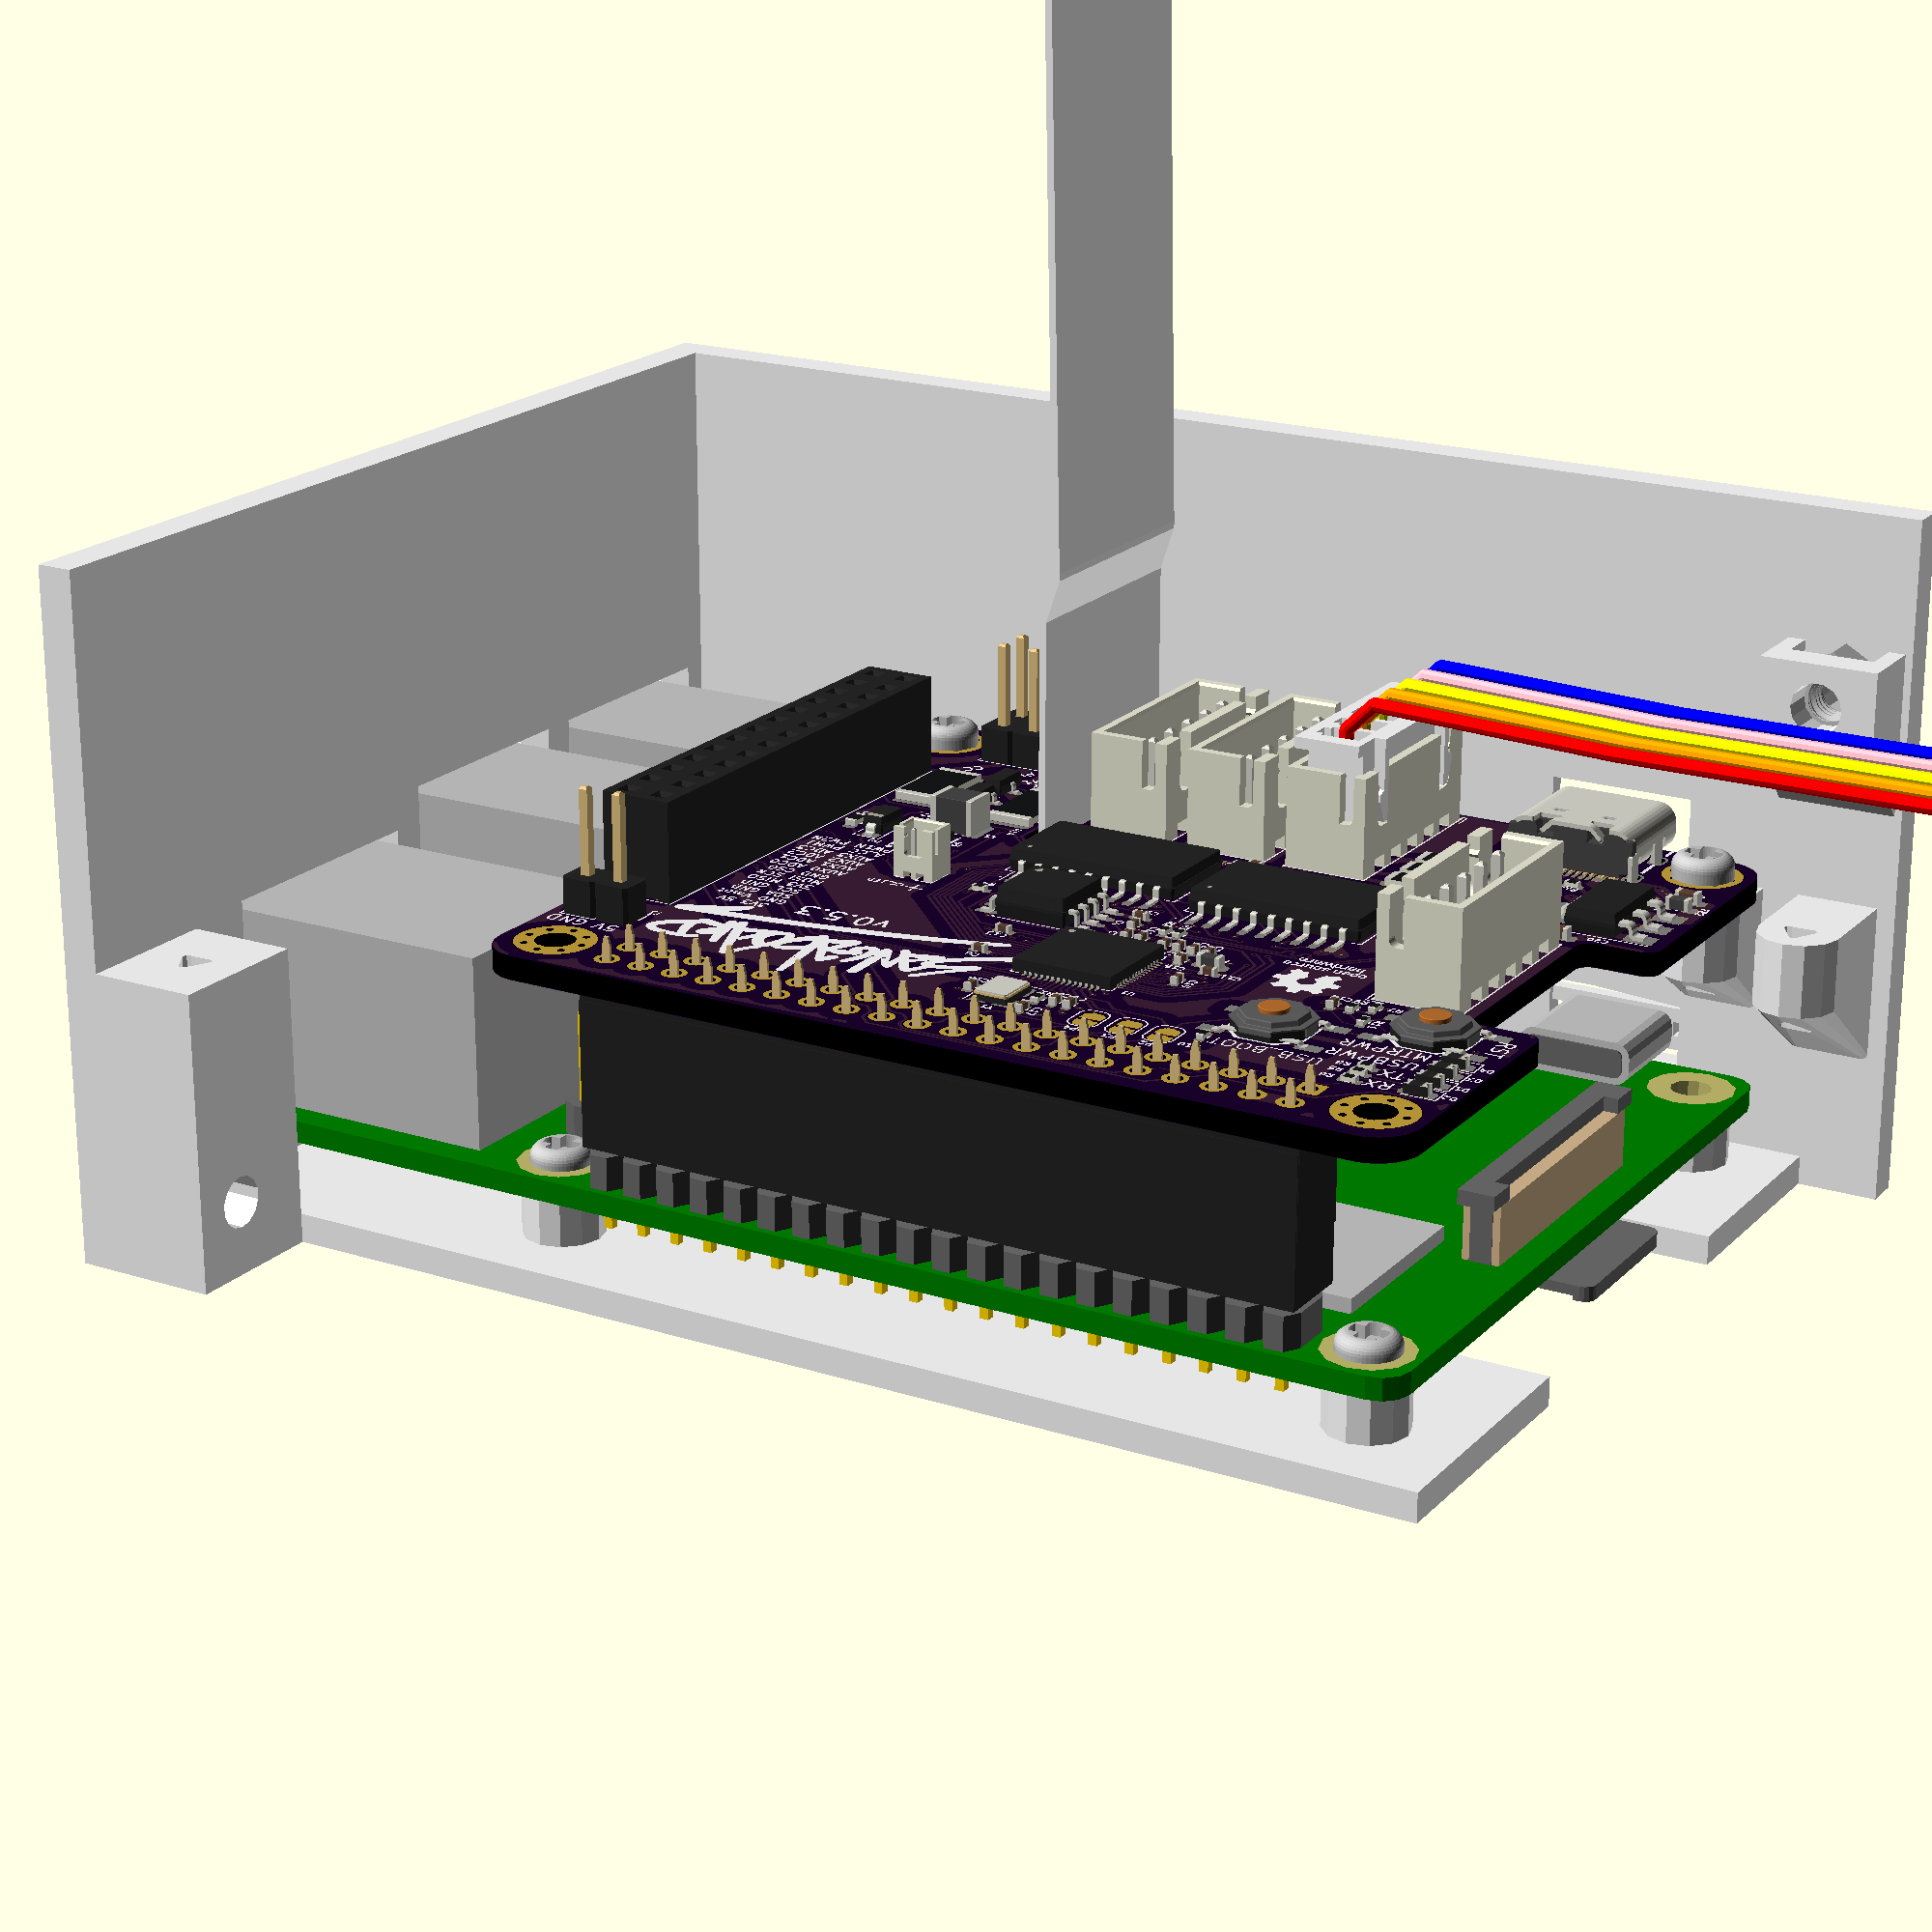
Step 6: Connect the LED to the Sangaboard
If you have used the 5mm LED workaround, or you have an older illumination PCB with a constant current driver installed you will need to follow the alternative connection instructions.
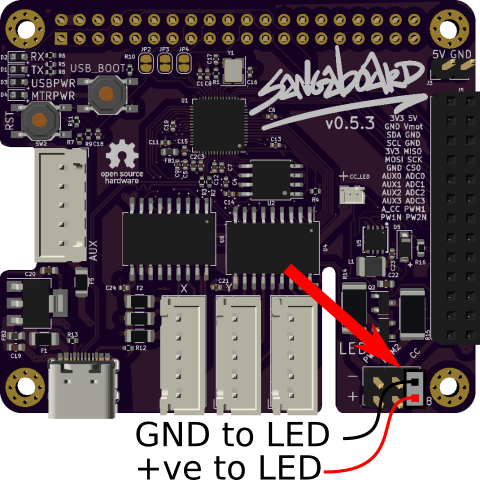
- Locate the LED cable from the microscope.
- Plug the 2-pin female connector onto the 2 way male header labelled "CC" on the Sangaboard v0.5.
"CC" stands for Constant Current, it is the best way to reliably drive the LED.
Step 7: Mount the electronics drawer
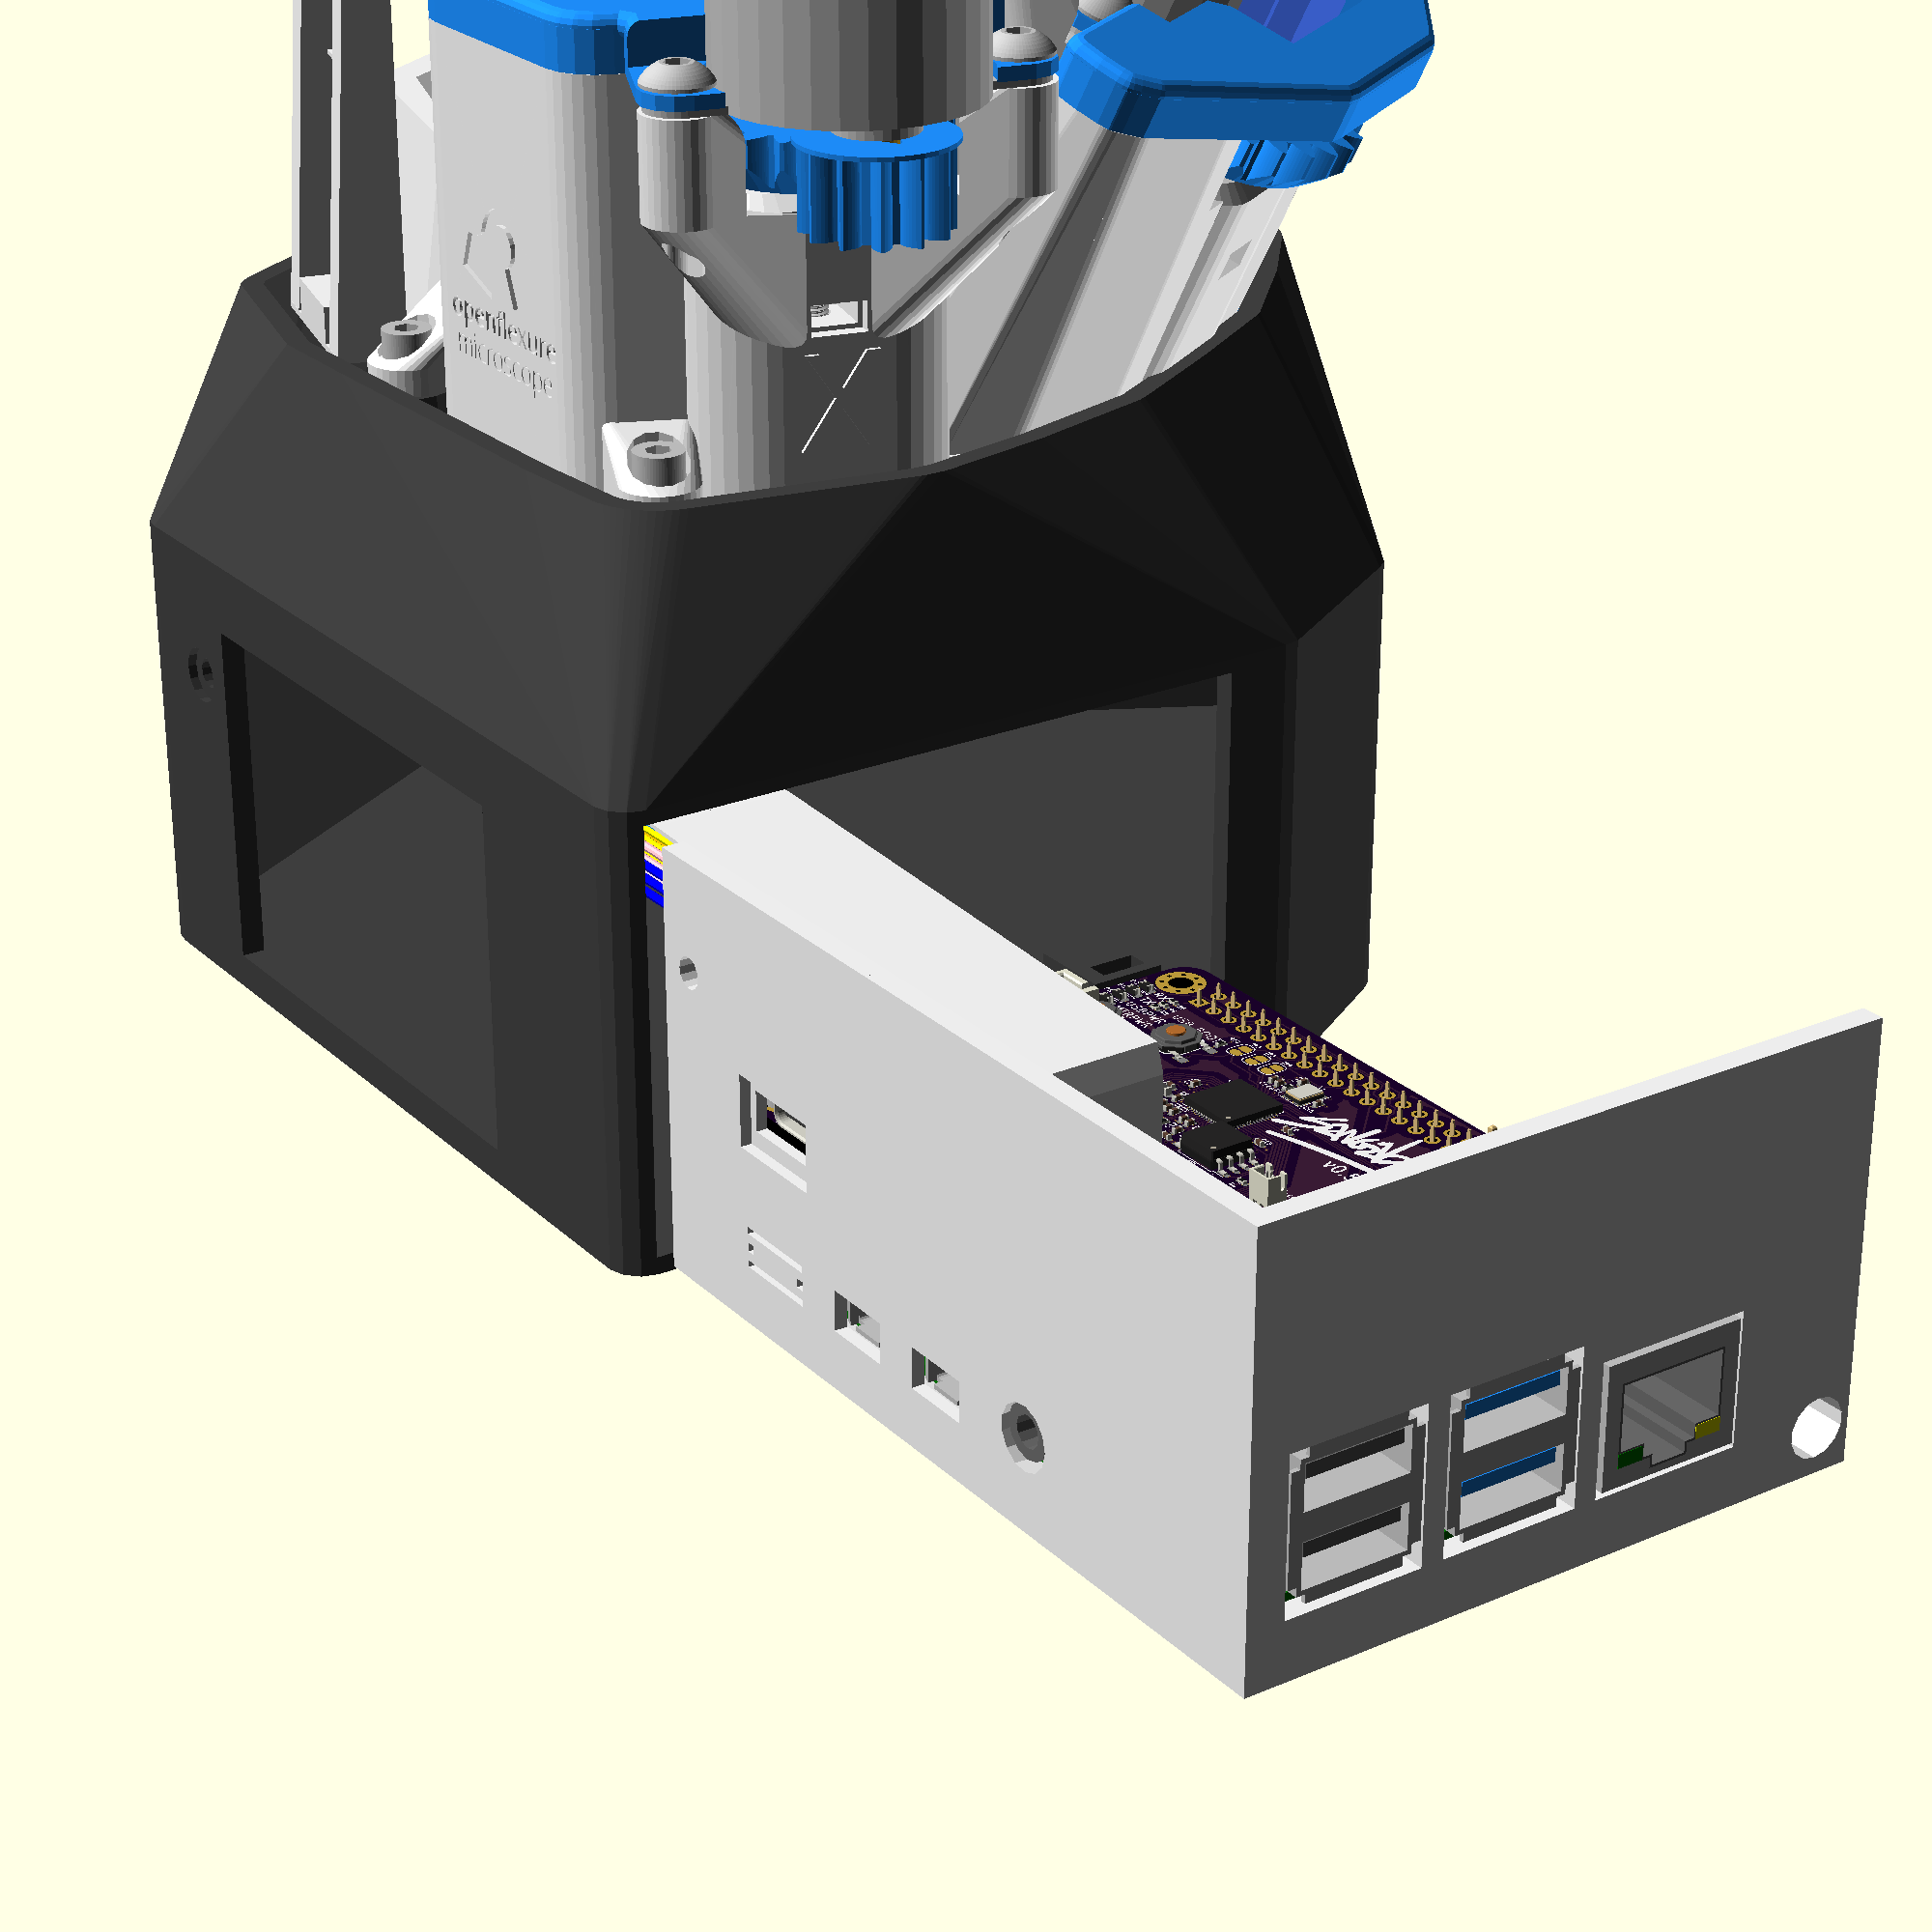
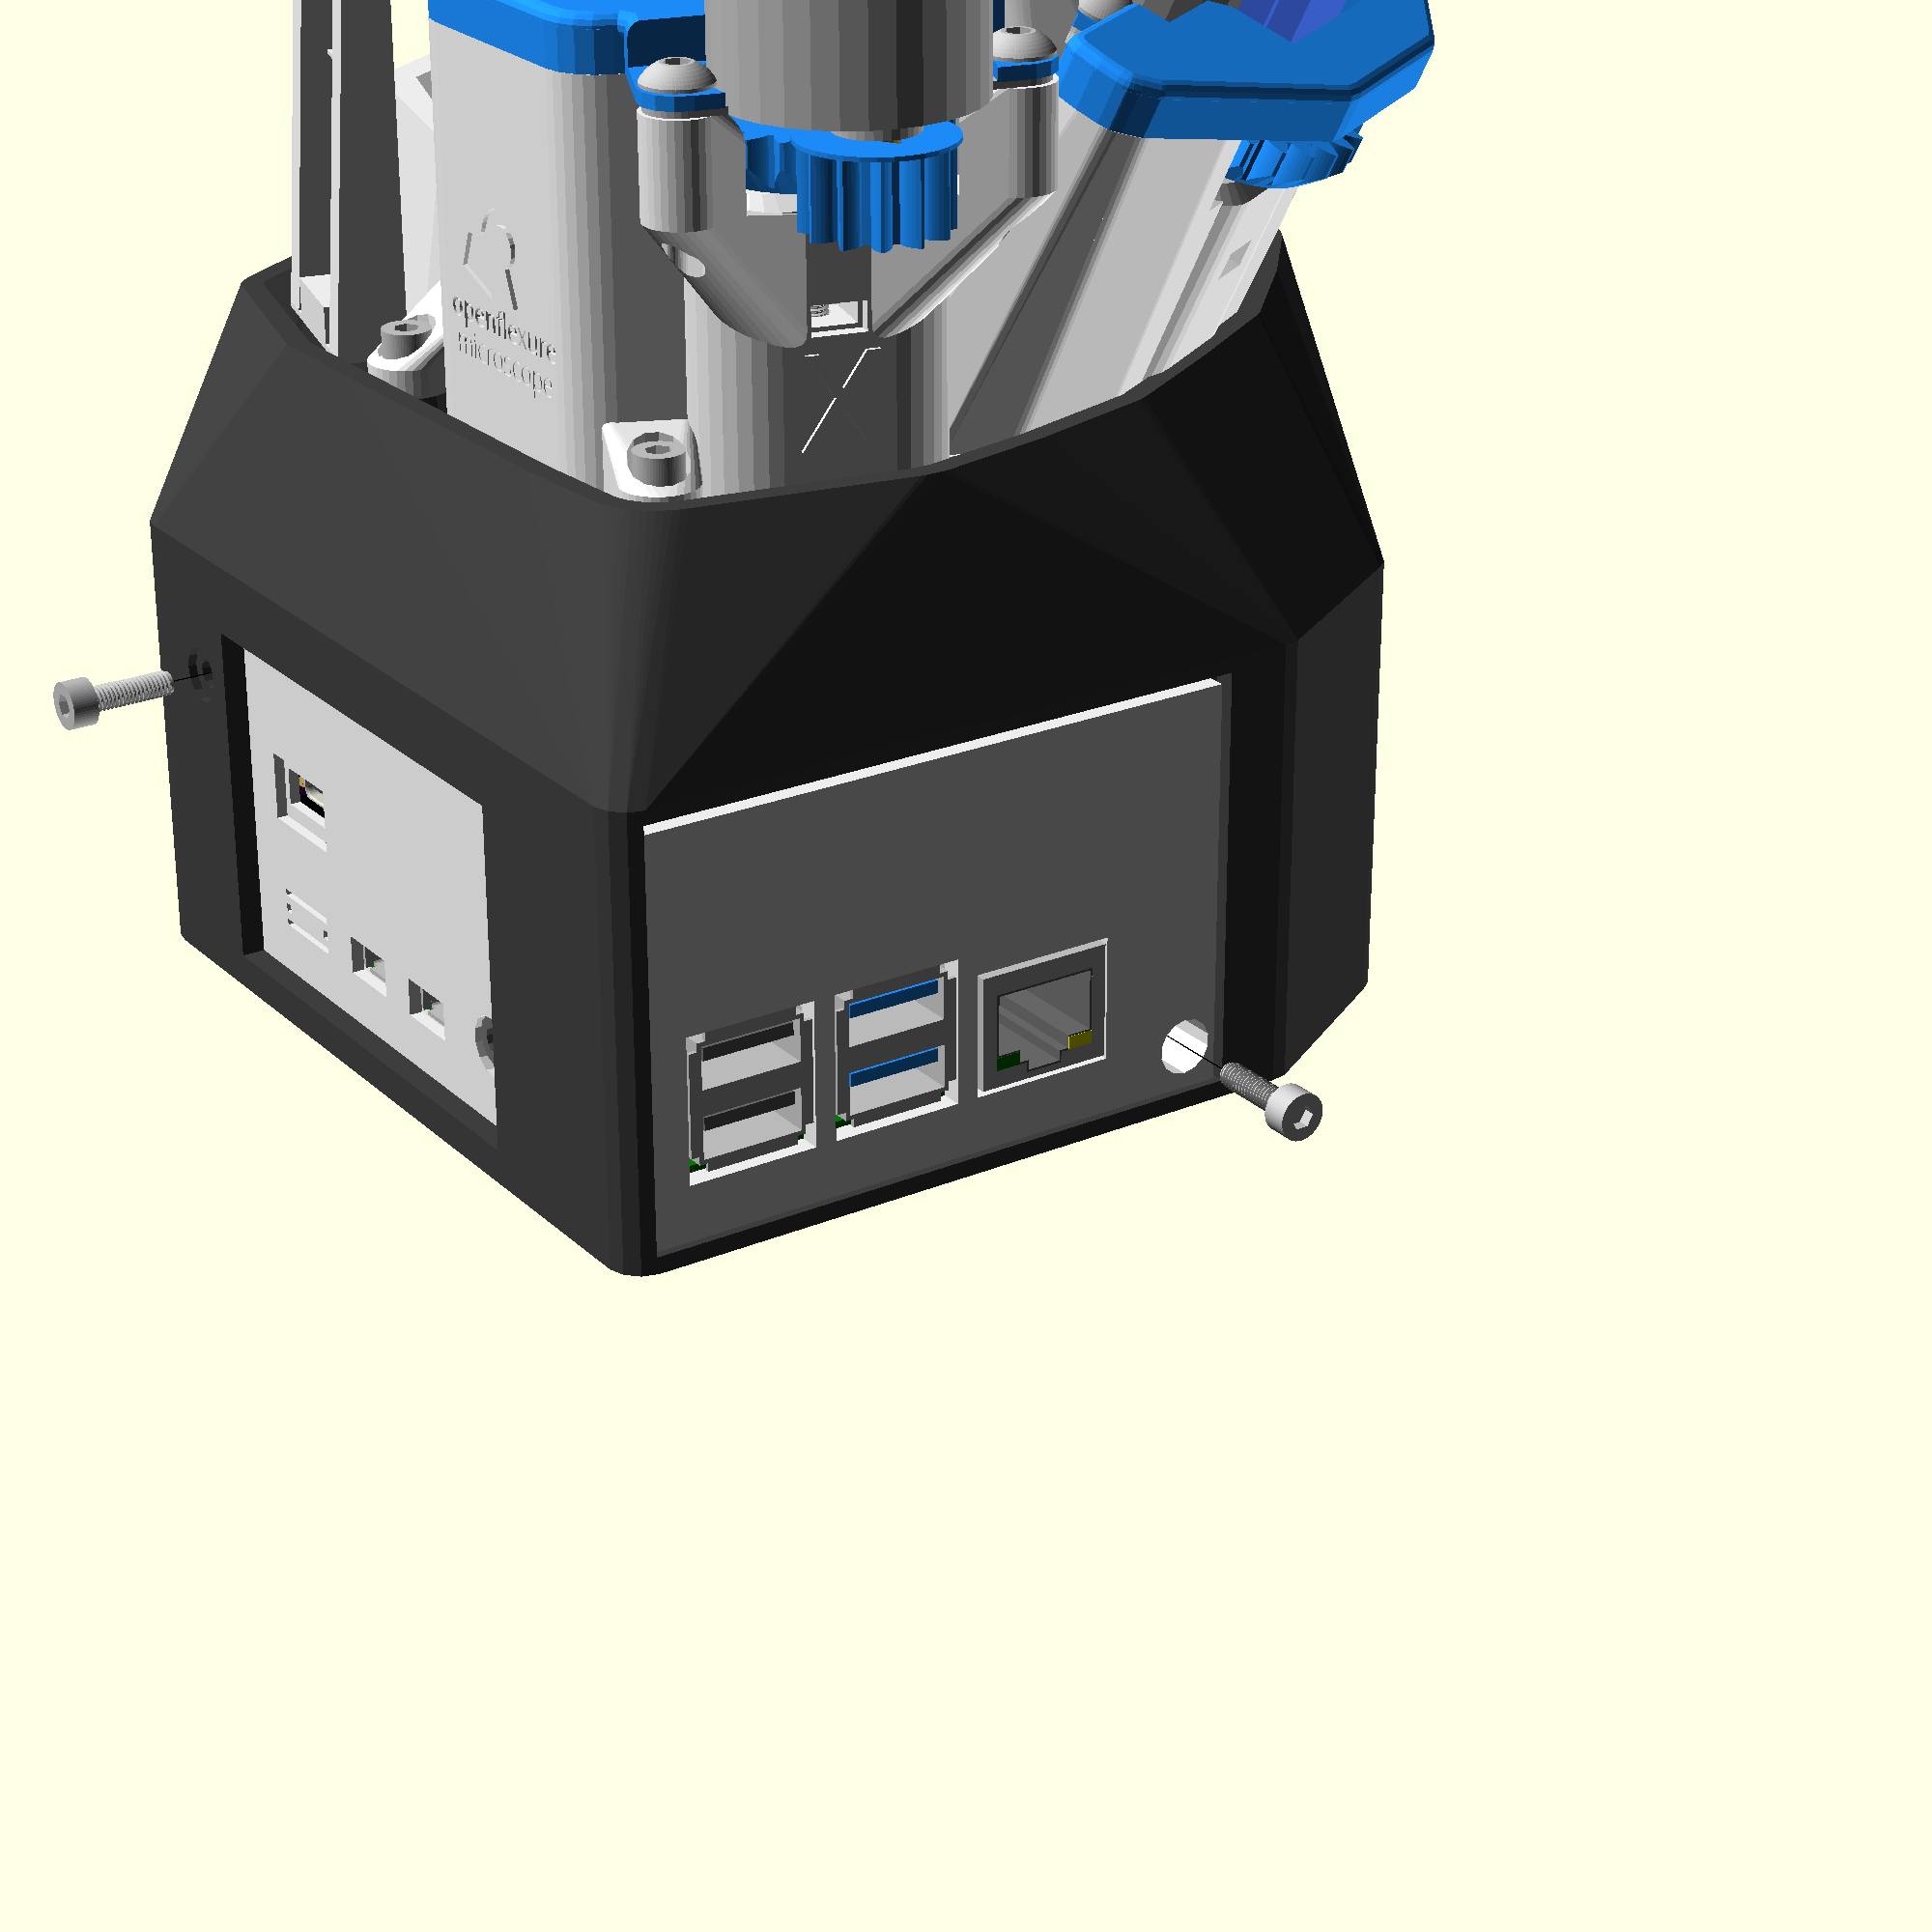

- Slide the electronics drawer into the microscope base, making sure not to pinch any wires.
- Hold the electronics drawer in place with two M3x10 cap head screws using a 2.5mm Allen key. The screws should screw into the two nuts inserted in Step 1.
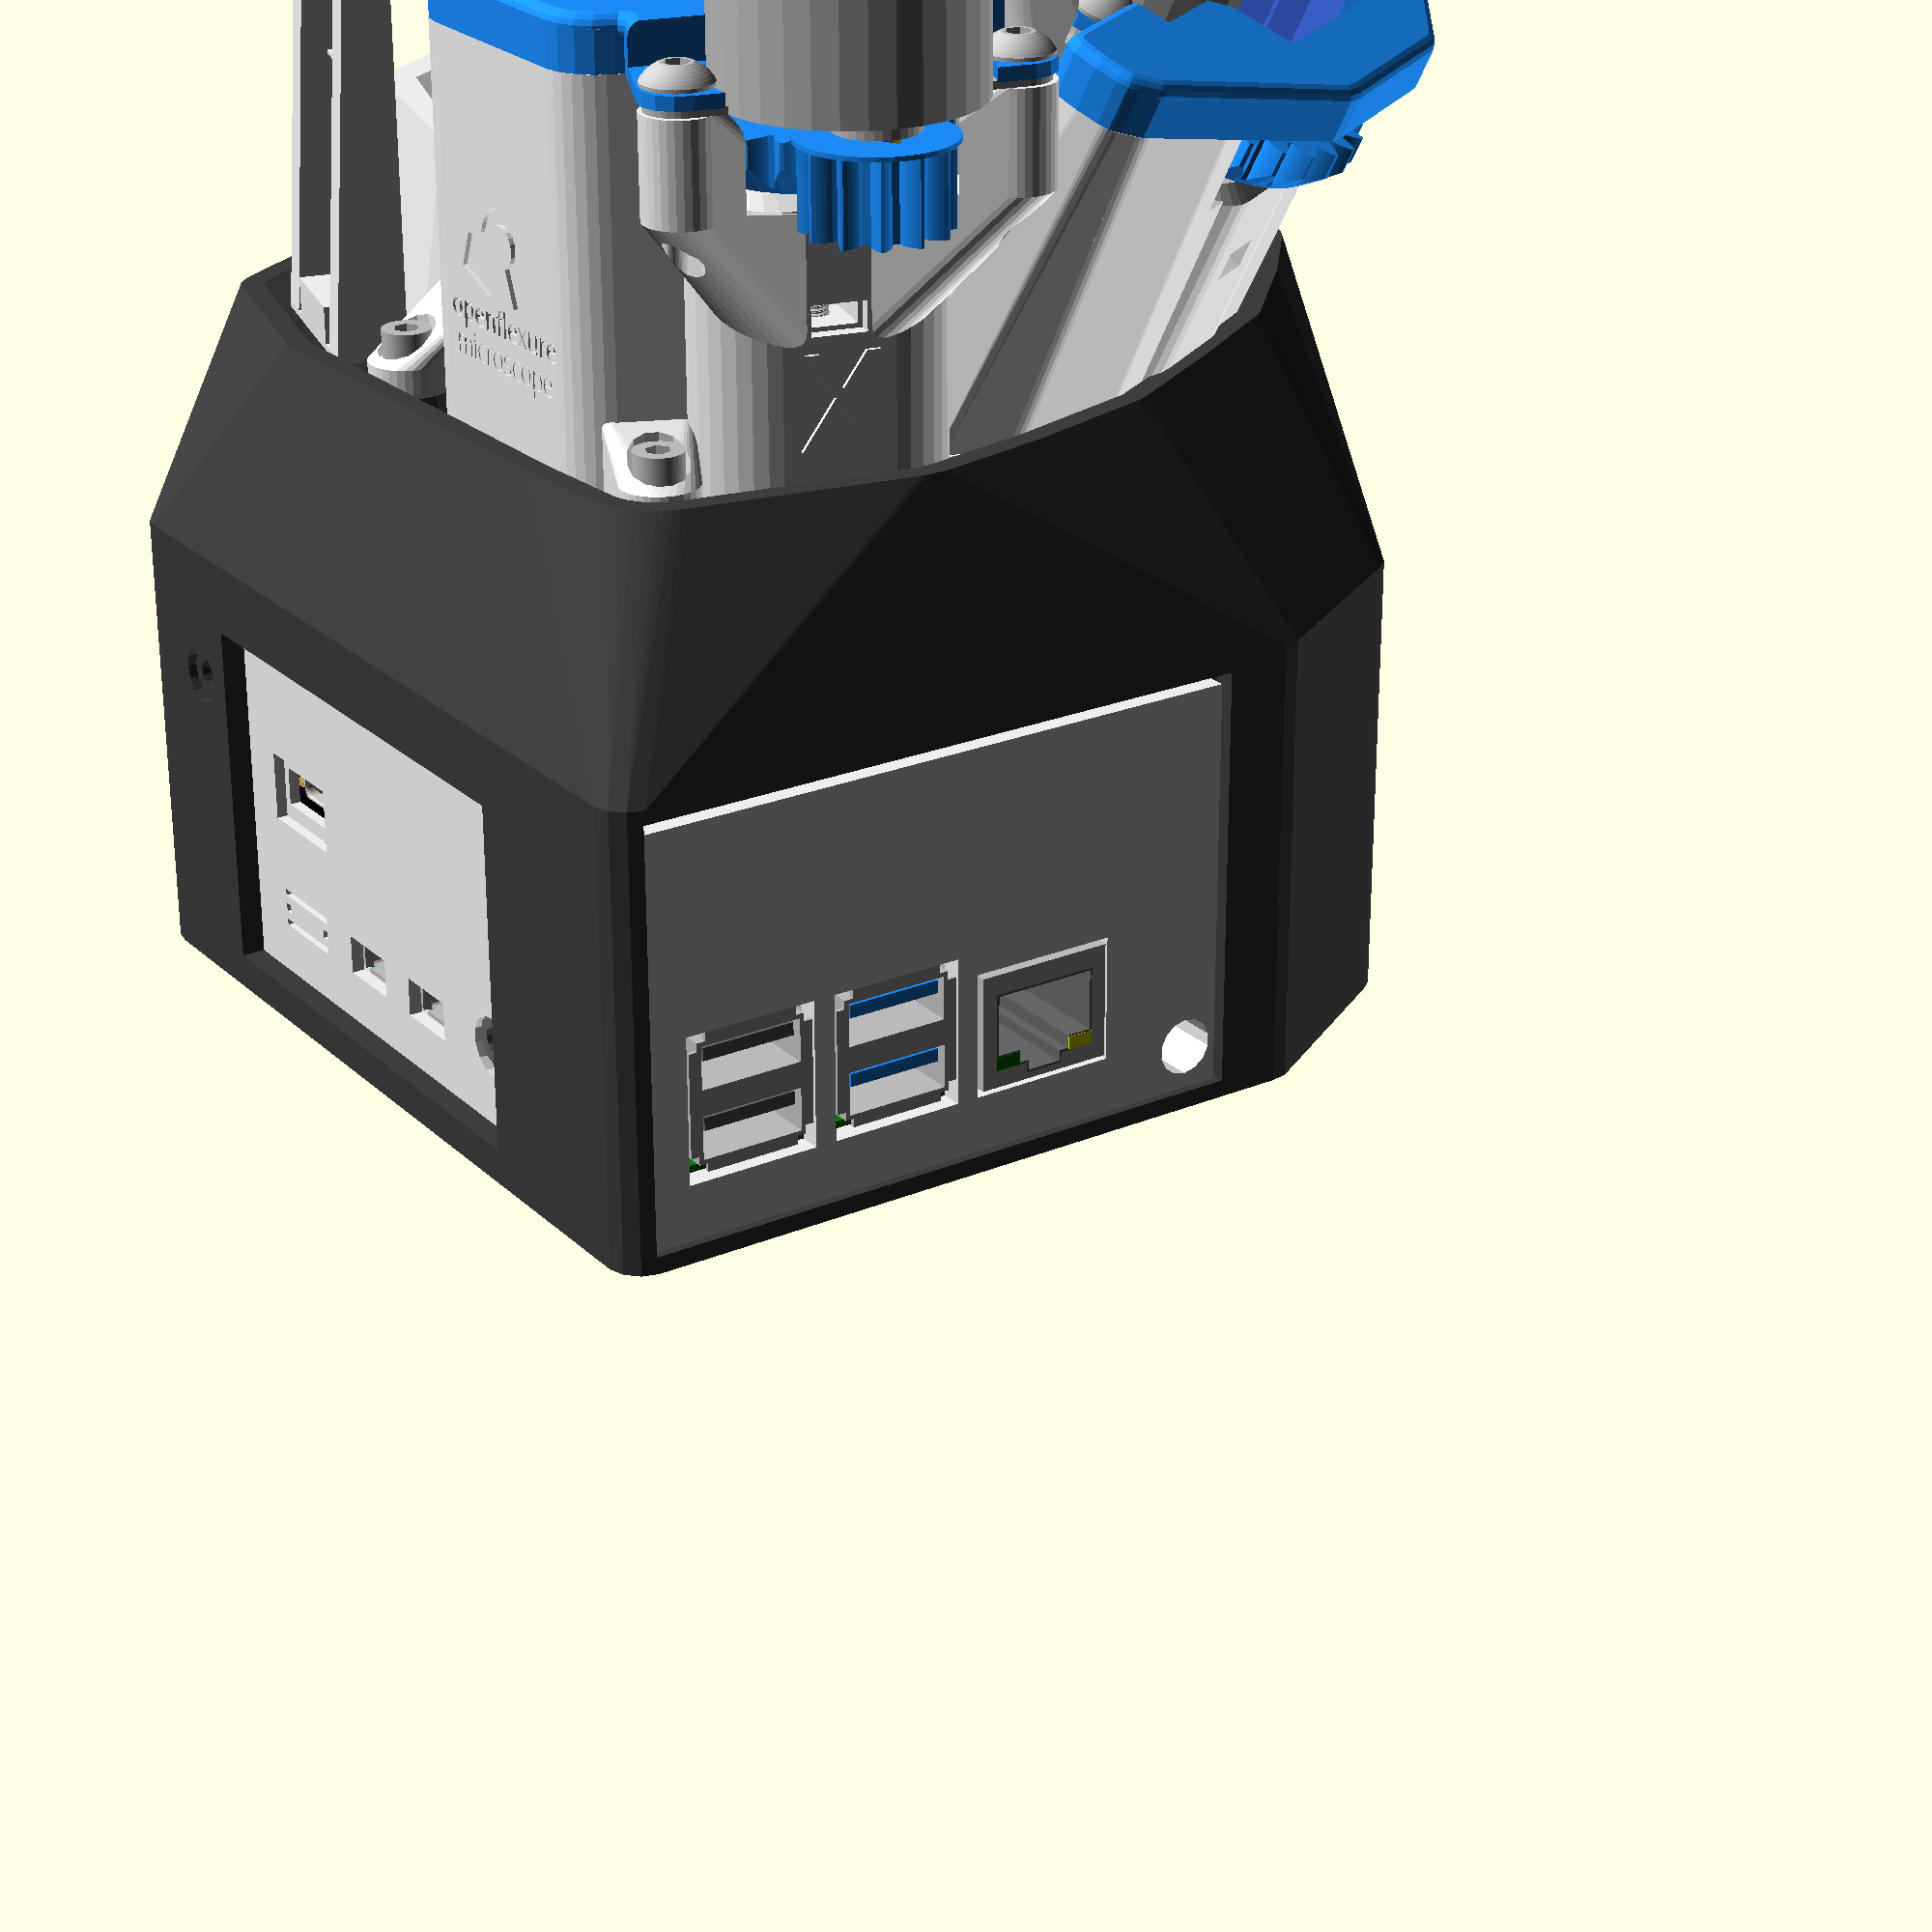
Step 8: Wiring Complete
To power up your microscope you will need a power supply. The microscope is powered through the Sangaboard v0.5 USB-C socket.