Powering the LED
You can carry on assembling your microscope until the assembly instructions asks you to connect the illumination PCB.
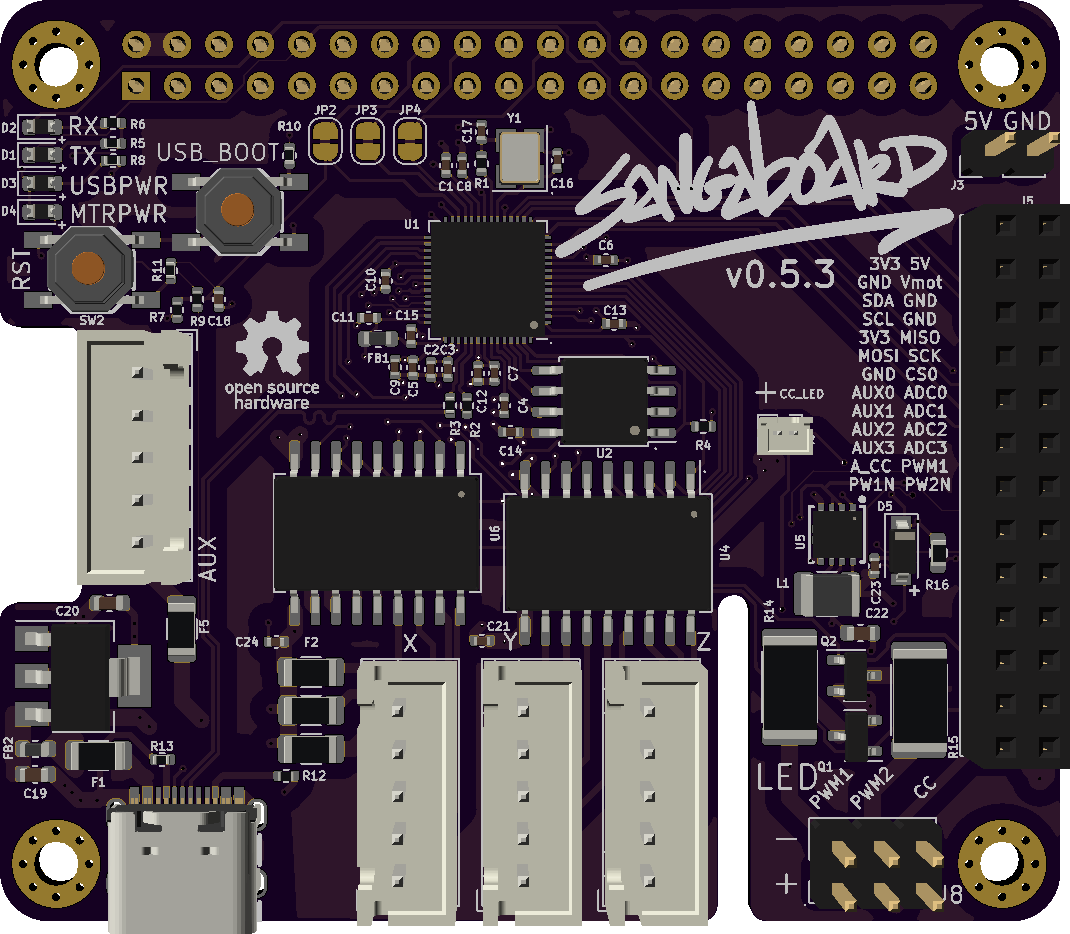
As our LED has a resistor, if you have access to a Sangaboard v0.5 you shouldn't use the same pins as are used for the illumination PCB
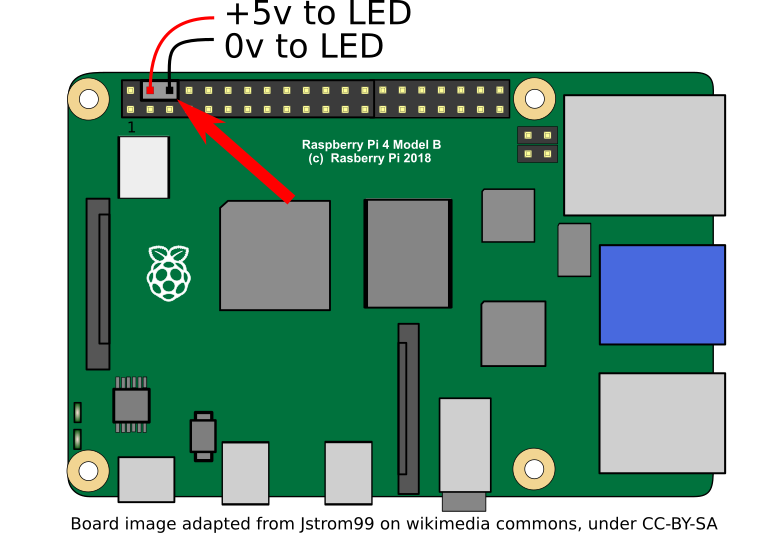
Step 1: Locate +5v and ground on your electronics
- You need to attach the black wire to ground
- You need to attach the red wire to +5v
As you are customising your microscope electronics, where you connect the LED will depend on what combination of electronics boards you have.
Some options are below:
For the Raspberry Pi:

For the Sangaboard v0.5:
Use the connector in the top right corner of this image:
