Print the plastic parts
If you have bought the plastic parts you can skip this step!
For this section you will need:
Tools
- 1 precision wire cutters
- 1 RepRap-style printer
- 1 utility knife - Not a scalpel!
Materials
- 50 g of Black PLA filament
- 200 g of PLA filament - Of any colour you want. Two contrasting colours may look best.
Step 1: Check your printer settings
Check your printer is configured as suggested in the Test your printer page.
The recommended printer settings are given in the Test your printer page. It's also a good idea to try the test print if you have not printed the microscope before.
Step 2: Printing
The microscope body has a custom brim included in the STL. This may require custom print settings.
Now you have tested your printer and filament you can print the following parts:
- Actuator assembly tools (nut tool, band tool, and band tool cover): actuator_assembly_tools.stl
- Lens tool: lens_tool.stl
- Main body: main_body.stl - The smart brim may require custom print settings.
- 3 cable tidy caps: cable_tidies.stl
- Sample clips: sample_clips.stl
- Microscope stand: microscope_stand.stl
- Electronics drawer: electronics_drawer-pi4_sanga_stack_11mm.stl - This electronics drawer is for a Pi 4 and HAT-style Sangaboard with 11mm tall headers. For all other combinations of electronics, refer to the customisation page
- 3 small gears: small_gears.stl
- Separate z-actuator: separate_z_actuator.stl - The smart brim may require custom print settings.
- Upright z-actuator mount: upright_z_actuator_mount.stl
- 4 feet: upright_feet.stl
- 4 large gears: upright_large_gears.stl
- Upright condenser: upright_condenser.stl - The condenser may require custom print settings as used for the smart brim.
- Upright condenser platform: upright_condenser_platform.stl
- Condenser board spacer: condenser_board_spacer.stl
- Lens spacer: lens_spacer_picamera_2_pilens.stl - This must be printed in black!

- pi camera platform: camera_platform_picamera_2_pilens.stl
You can download all of the STLs as a single zipfile
Optional accessories
Taller upright z-actuator mounts are available for use with thicker samples:
- accessories/upright_z_actuator_mount_5mm_sample.stl
- accessories/upright_z_actuator_mount_10mm_sample.stl
Step 3: Clean-up of printed parts
Be careful when removing brim
To avoid injury first remove the bulk of the brim without a knife. Remove the remaining brim with a peeling action as described below.
Carefully remove the printing brim from all parts (except the main body).
To remove brim:
- Use precision wire cutters to remove most of the brim from the part.
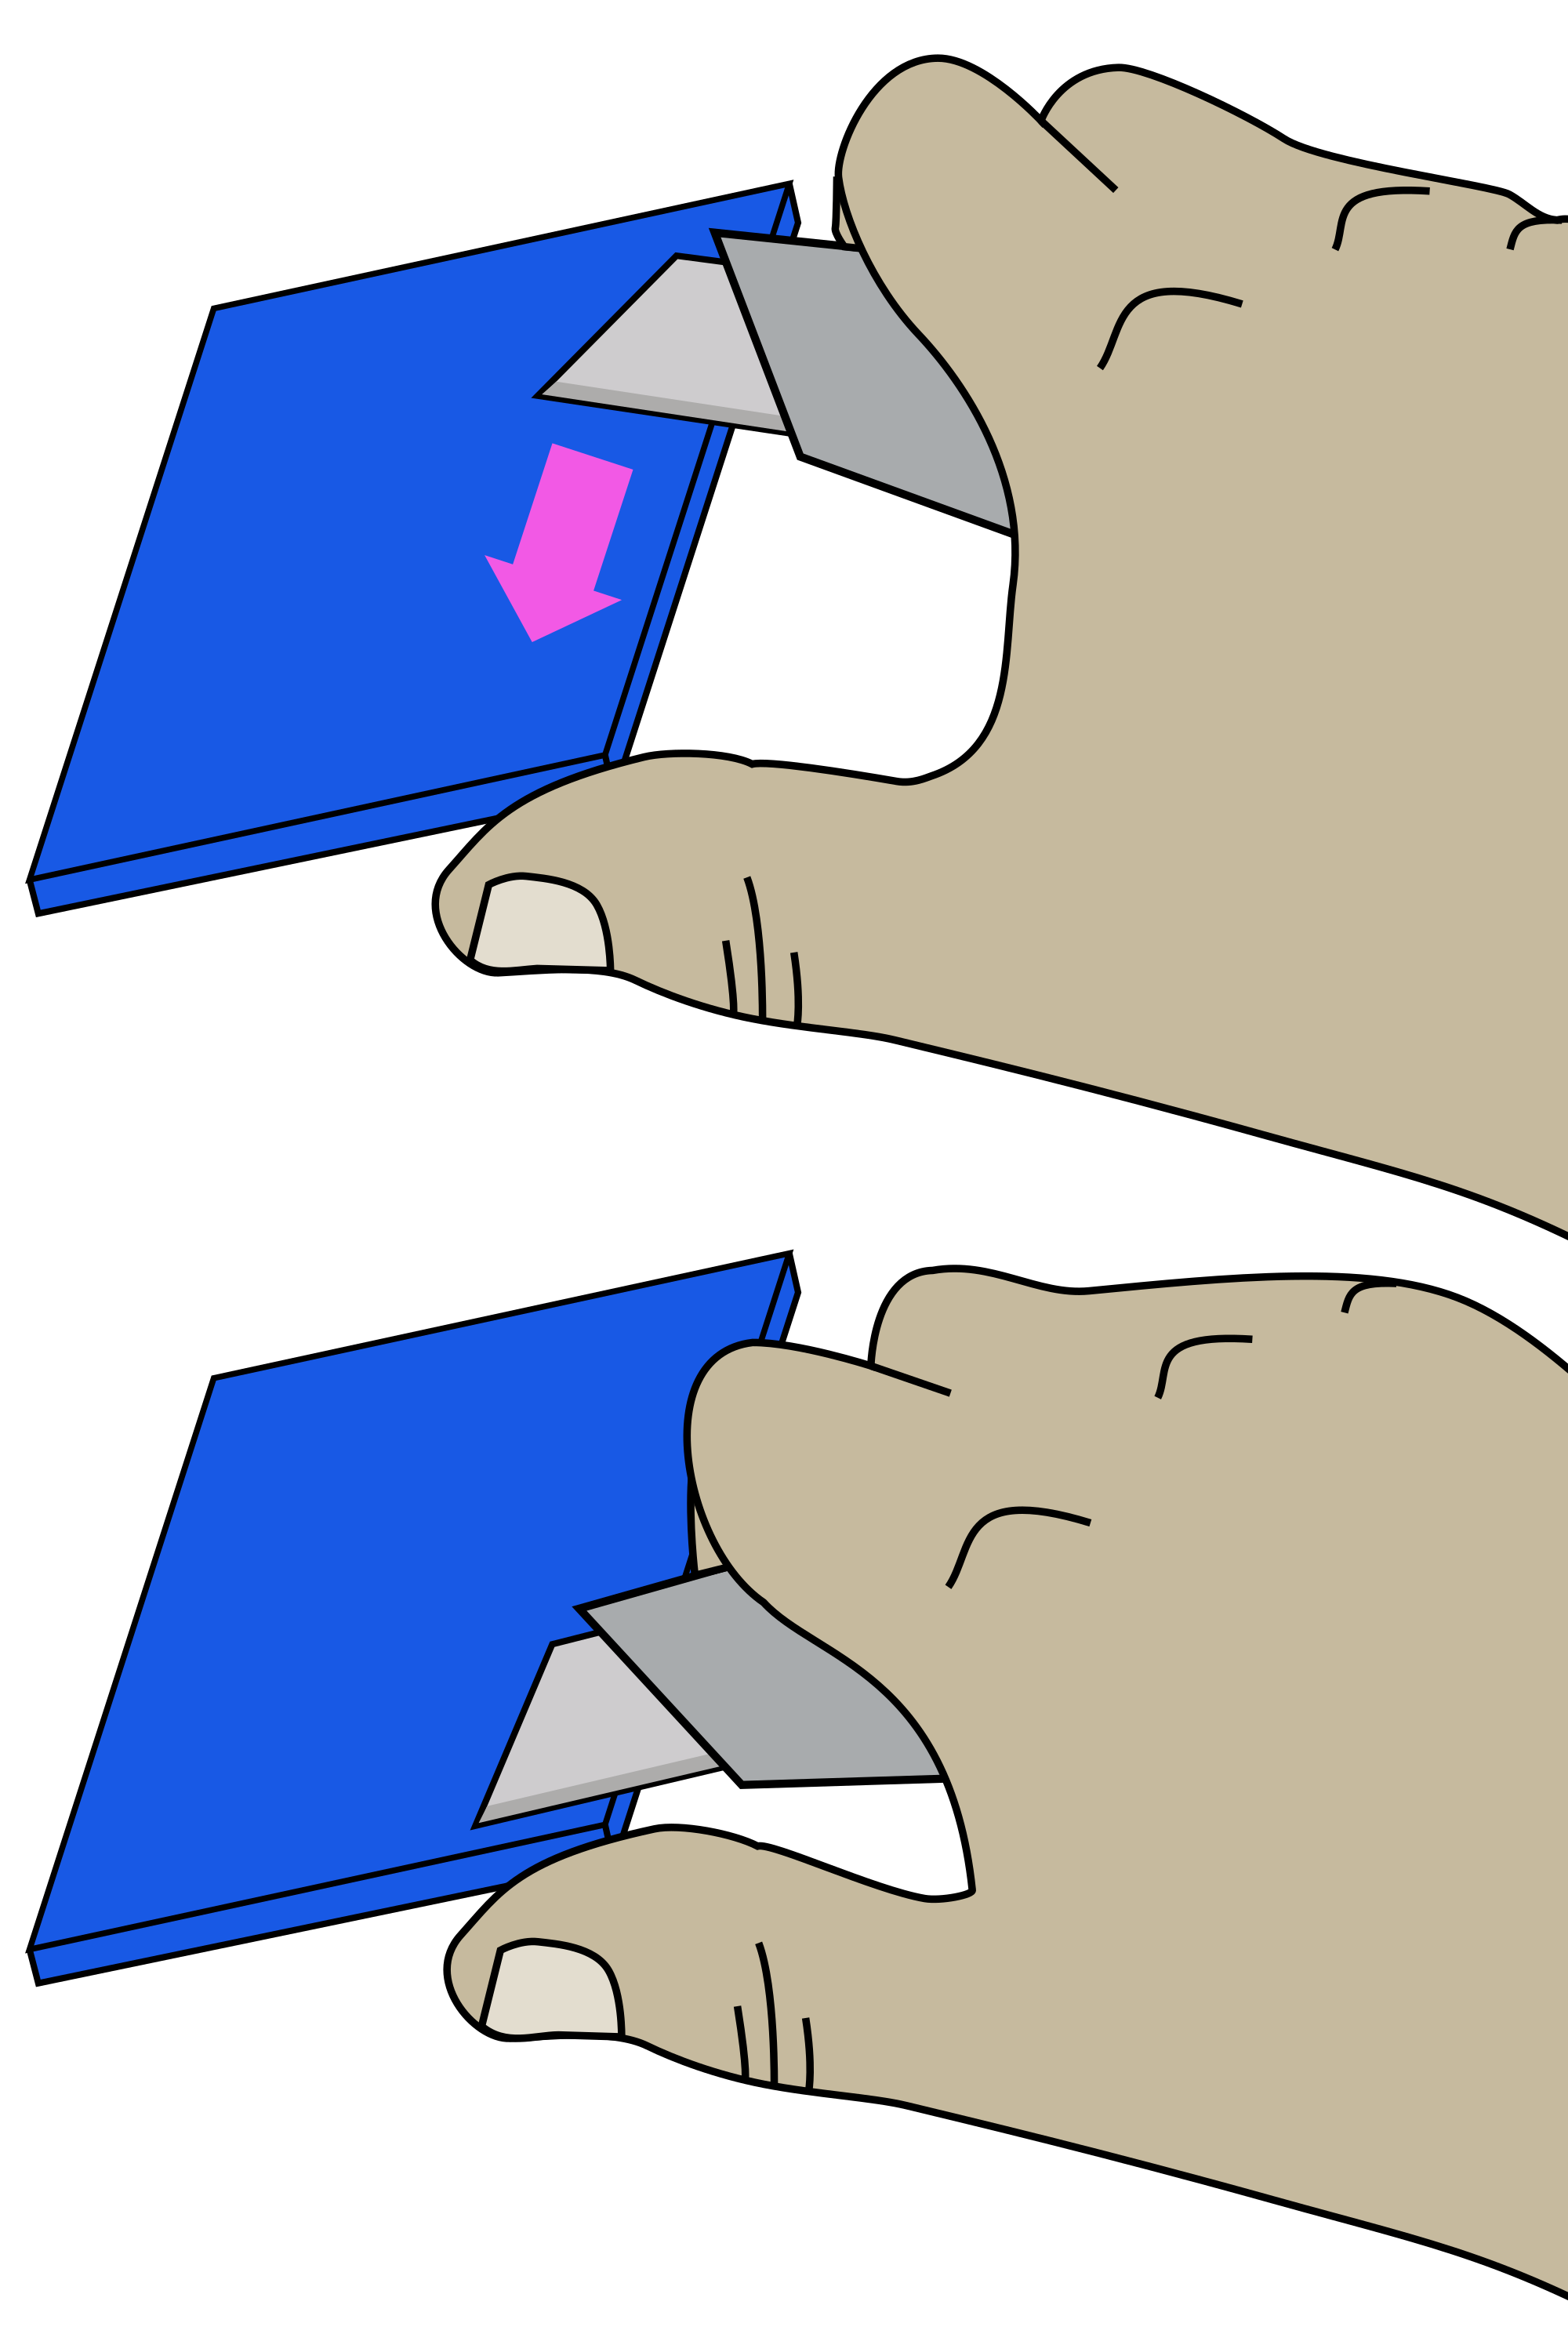
- Clean up remaining brim with a utility knife:
- Hold the knife in your dominant hand with 4 fingers curled around the handle, leaving thumb free.
- Hold the part in your other hand, as far away from the surface to be cut as possible.
- Support the part with the thumb of your dominant hand.
- Place blade on surface to be cut, and carefully close your dominant hand moving the blade, under control, towards your thumb.
