
Complete the wiring
The microscope illumination must be connected to power and the camera must be connected to a computer.
In these instructions we have used a Raspberry Pi camera, but the manual microscope is also well suited to use with a webcam.
How you wire your microscope will depend on the camera and computer that you have used.
Step 1: Connect the camera
- For a USB webcam, plug the USB cable into a USB port on a PC or a Raspberry Pi. Open a camera app to view the camera preview and capture pictures.
- For a Raspberry Pi camera, insert the ribbon cable from the optics module into the camera port of a Raspberry Pi, ensuring the contacts are on the opposite side from the clasp. There are detailed instructions on the Raspberry Pi website. Use the Raspberry Pi camera app or the Openflexure software to view the camera preview and capture pictures.
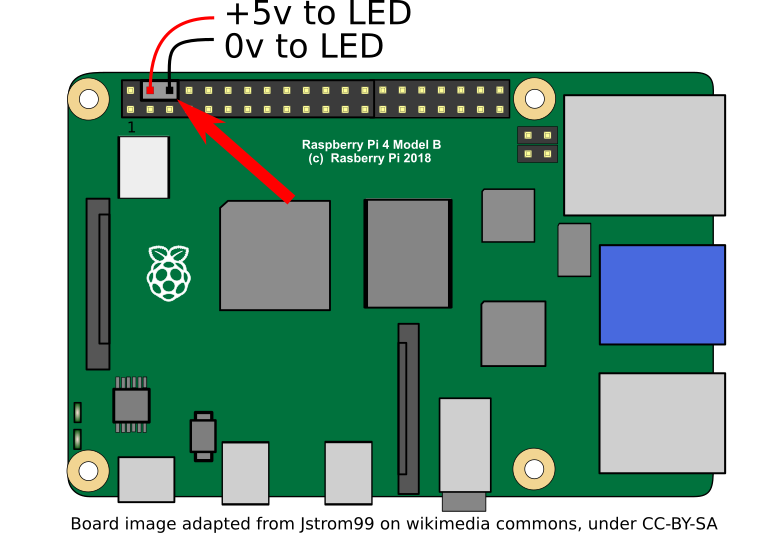
Step 2: Connect the LED power
- The LED workaround needs to be connected to Ground and 5V from any source. USB cables with bare ends or breakout boards with USB connectors are available.
- If you are using a Raspberry Pi, connect to the 0V and 5V pins on the 40-pin connector:
- The illumination PCB needs to be connected to a constant current power supply (20-50mA). Alternatively a resistor can be added in the cable, as in the LED workaround, and then connected to Ground and 5V.