Assemble the illumination
In this section we are assembling the sample illumination. This is for transmission illumination.
For this section you will need:
Tools
- 1 2.5mm Ball-end Allen key
- 1 heatgun - If you don't have a heatgun the soldering iron can be used
- 1 precision wire cutters
- 1 soldering iron
- 1 wire strippers
Printed Parts
Printed Tools
Consumables
- a little solder
Optical Components
Electronic Components
- 1 150 Ohm Resistor - - The exact value will depend on the current rating of your LED.
- 1 2 pin Du Pont connector female housing
- 40 mm of Black heatshrink - 4.8mm ID
- 1 Black pre-crimped Female-Female jumper cable (30 cm)
- 35 mm of Red heatshrink - 2.4mm ID
- 1 Red pre-crimped Female-Female jumper cable (30 cm)
- 1 Warm white 5mm LED
Mechancial Components
Step 1: Solder the LED
If you have purchased a kit you may already have an assembled soldered LED cable
- Tun on your soldering iron so it can heat up
- Take the LED
- Cut the longest leg down to about 5mm long using precision wire cutters
- Tin this leg with solder
- Take a 150 Ohm Resistor and cut each leg down to about 5mm long
- Tin both legs with solder
- Solder one side of the resistor to the cut leg of the LED.
- Cut the other leg of the LED to be the same height as the end of the resistor.
- Tin the end of this leg
- Take the red and black precrimped jumper cables and cut off one end with wire strippers
- Strip about 5mm of cable on each, and tin the cable with wire strippers
- Solder the red wire to the leg with the resistor
- Solder the black wire to the other leg
- Take the red heatshrink and slide it over the red cable up to the LED.
- Use a heatgun to shrink the heatshrink
- Take the black heatshrink and slide it over both cables up to the LED.
- Use a heatgun to shrink the heatshrink
Step 2: Add the connector
- Take the DuPont housing
- Push both connectors from the LED cable into the connector
Step 3: Mount the dovetail

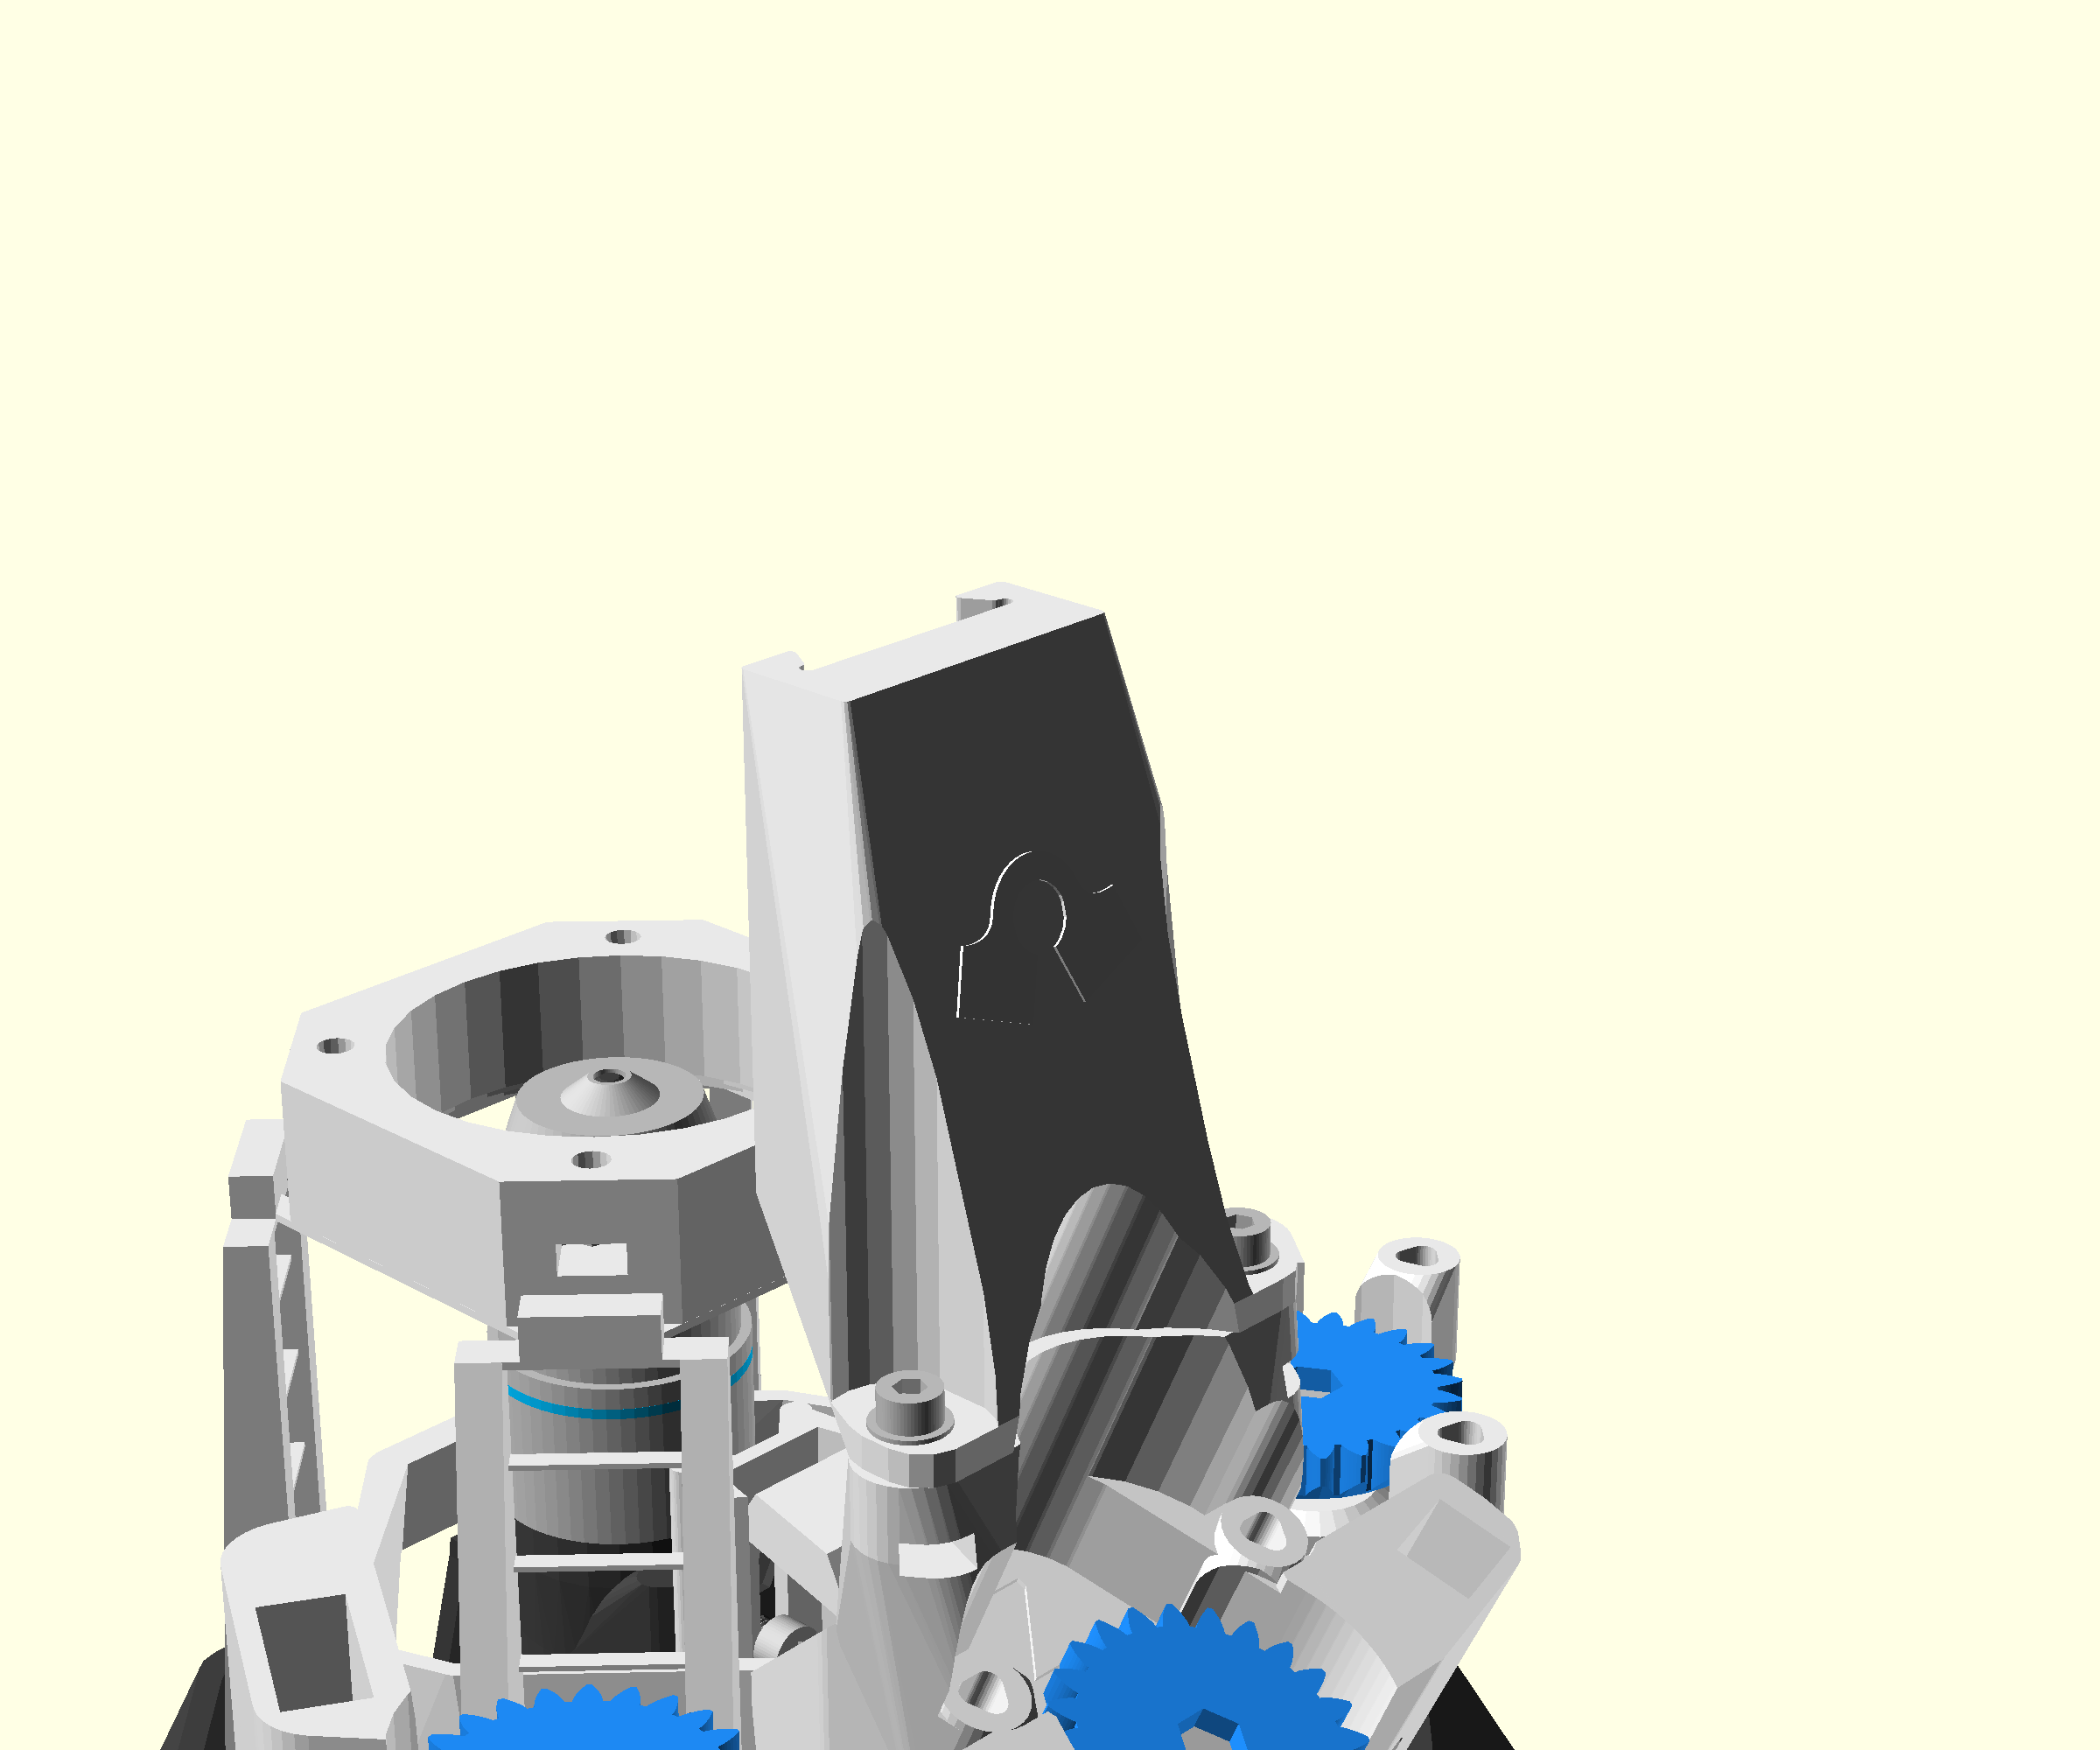
- Place the illumination dovetail onto the stage above the z-actuator of the main body.
- Secure in place with two M3x10 cap head screws and 2 M3 Washers (using 2.5mm Ball-end Allen key)
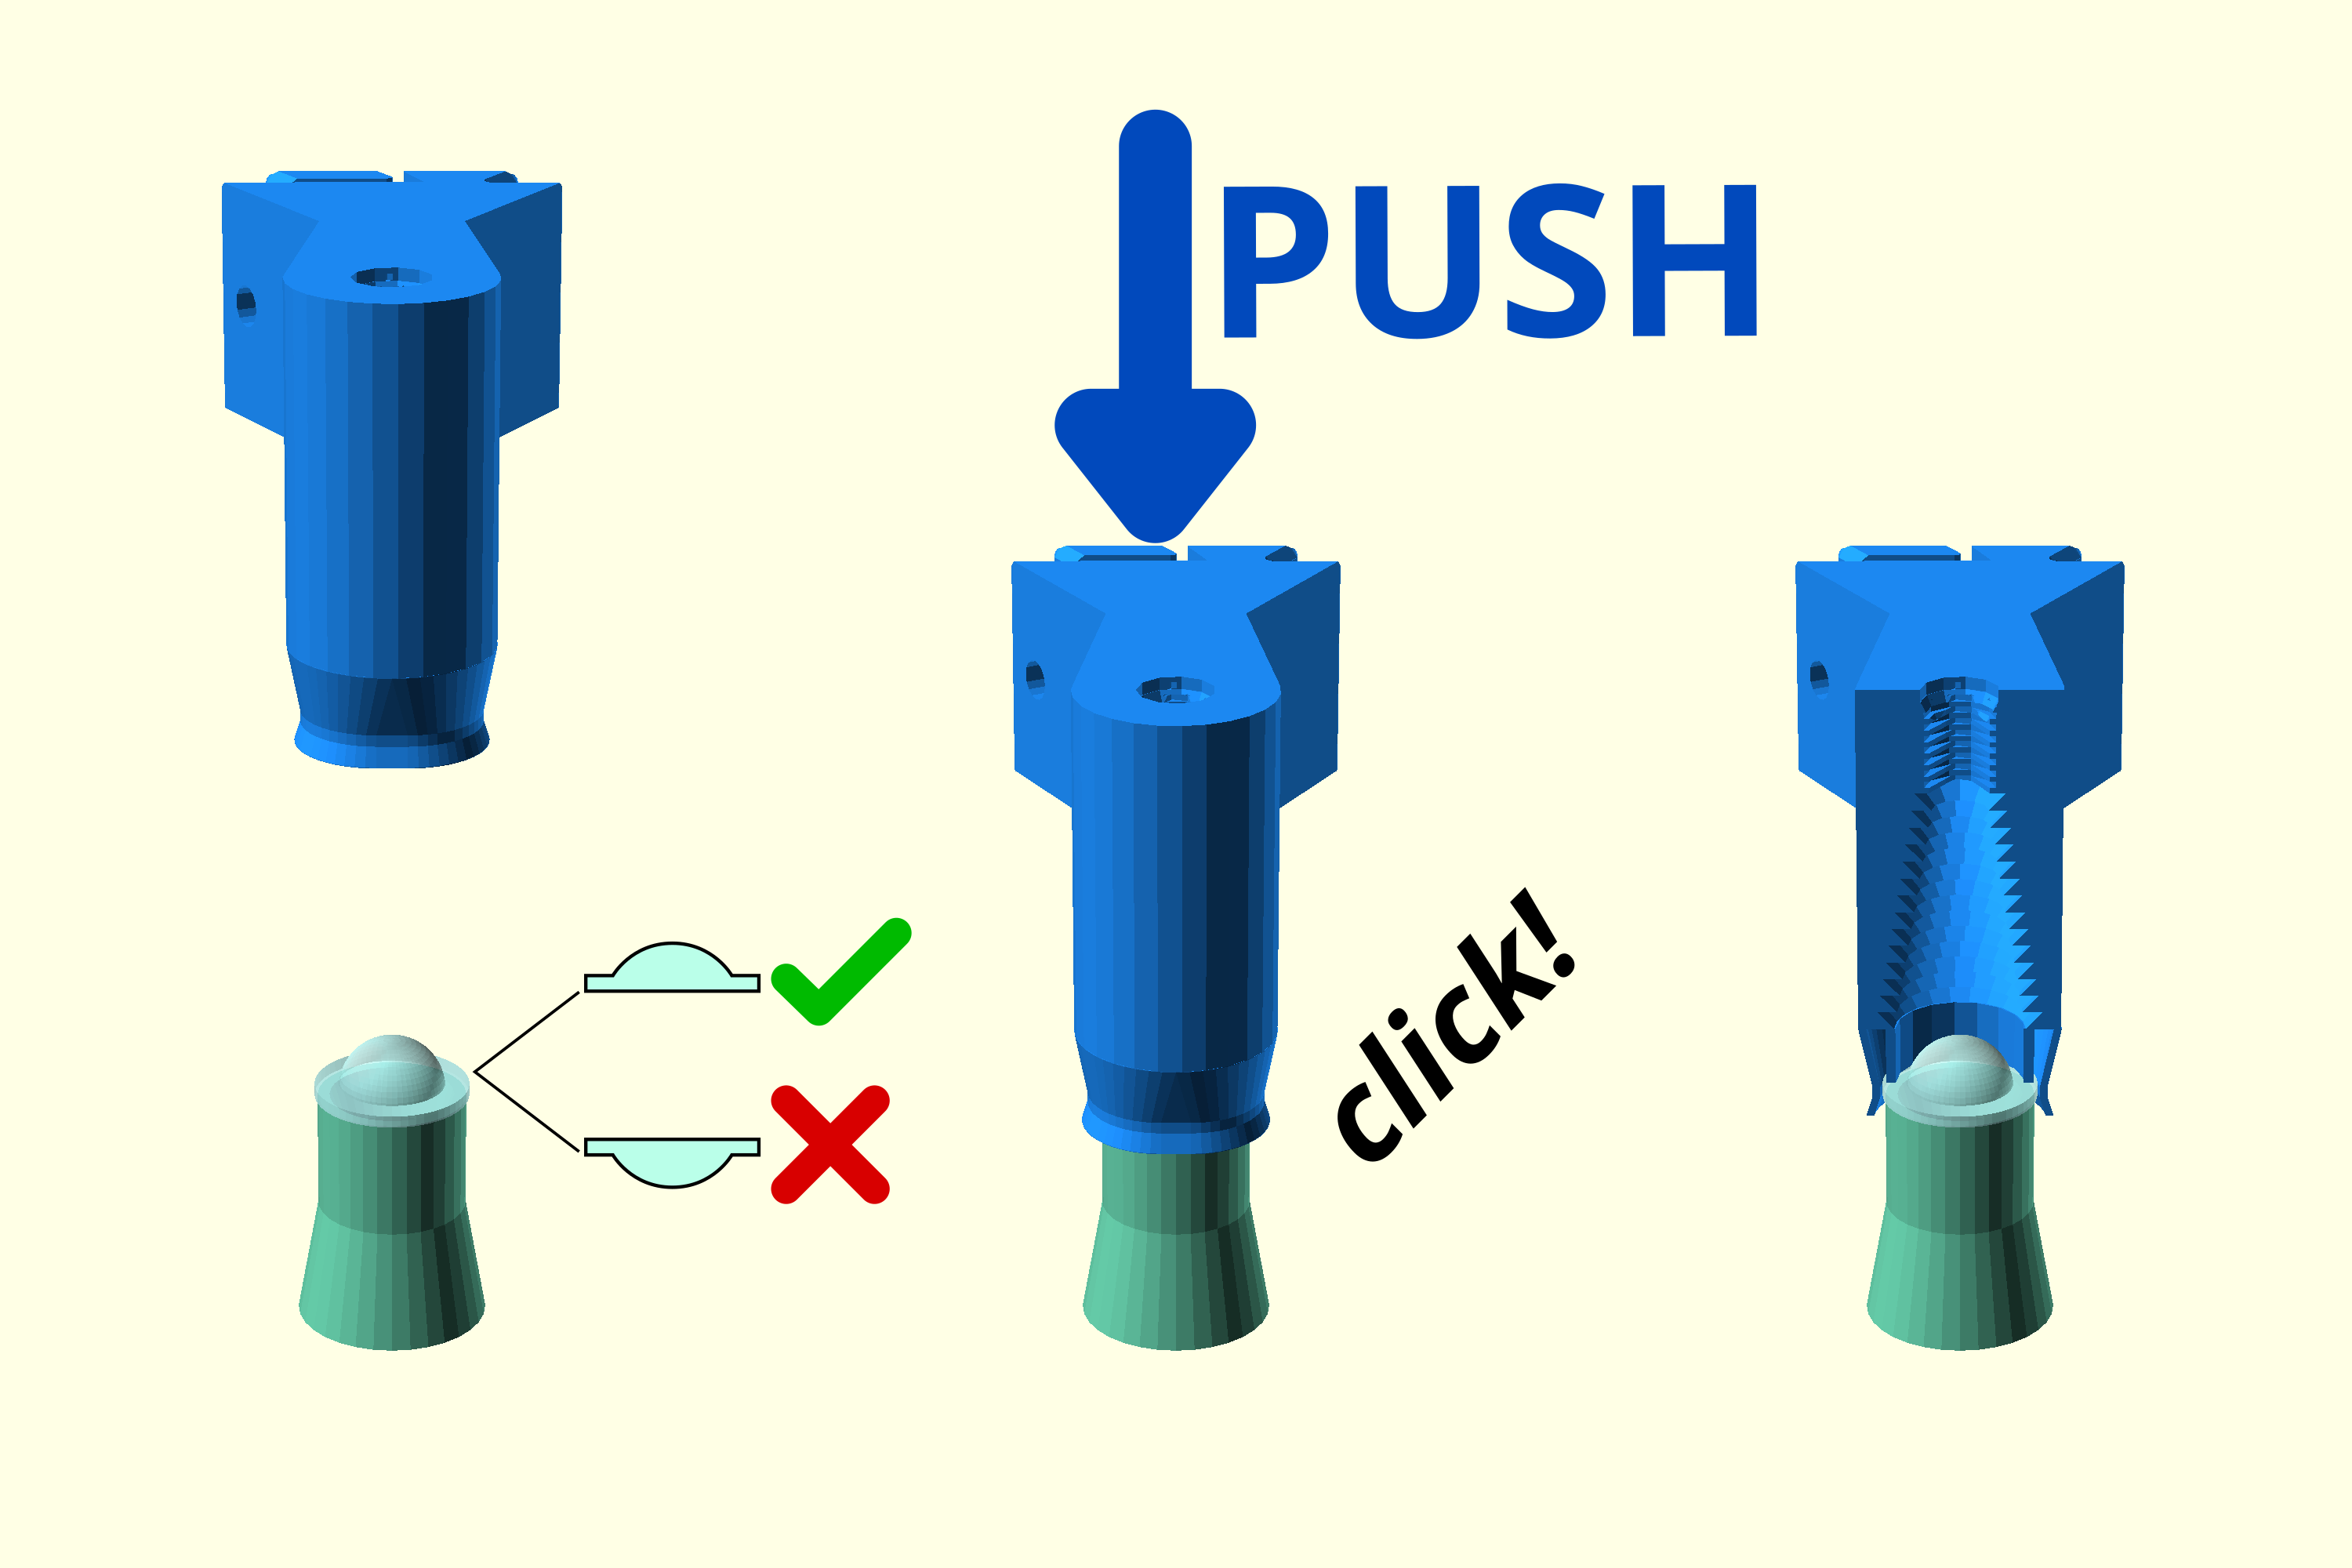
Step 4: Push-fit the lens
- Place the condenser lens on the lens tool flat side down
- Take the condenser arm and align the opening over the lens
- Push down until the lens clicks into place.
Step 5: Add the condenser retaining screw
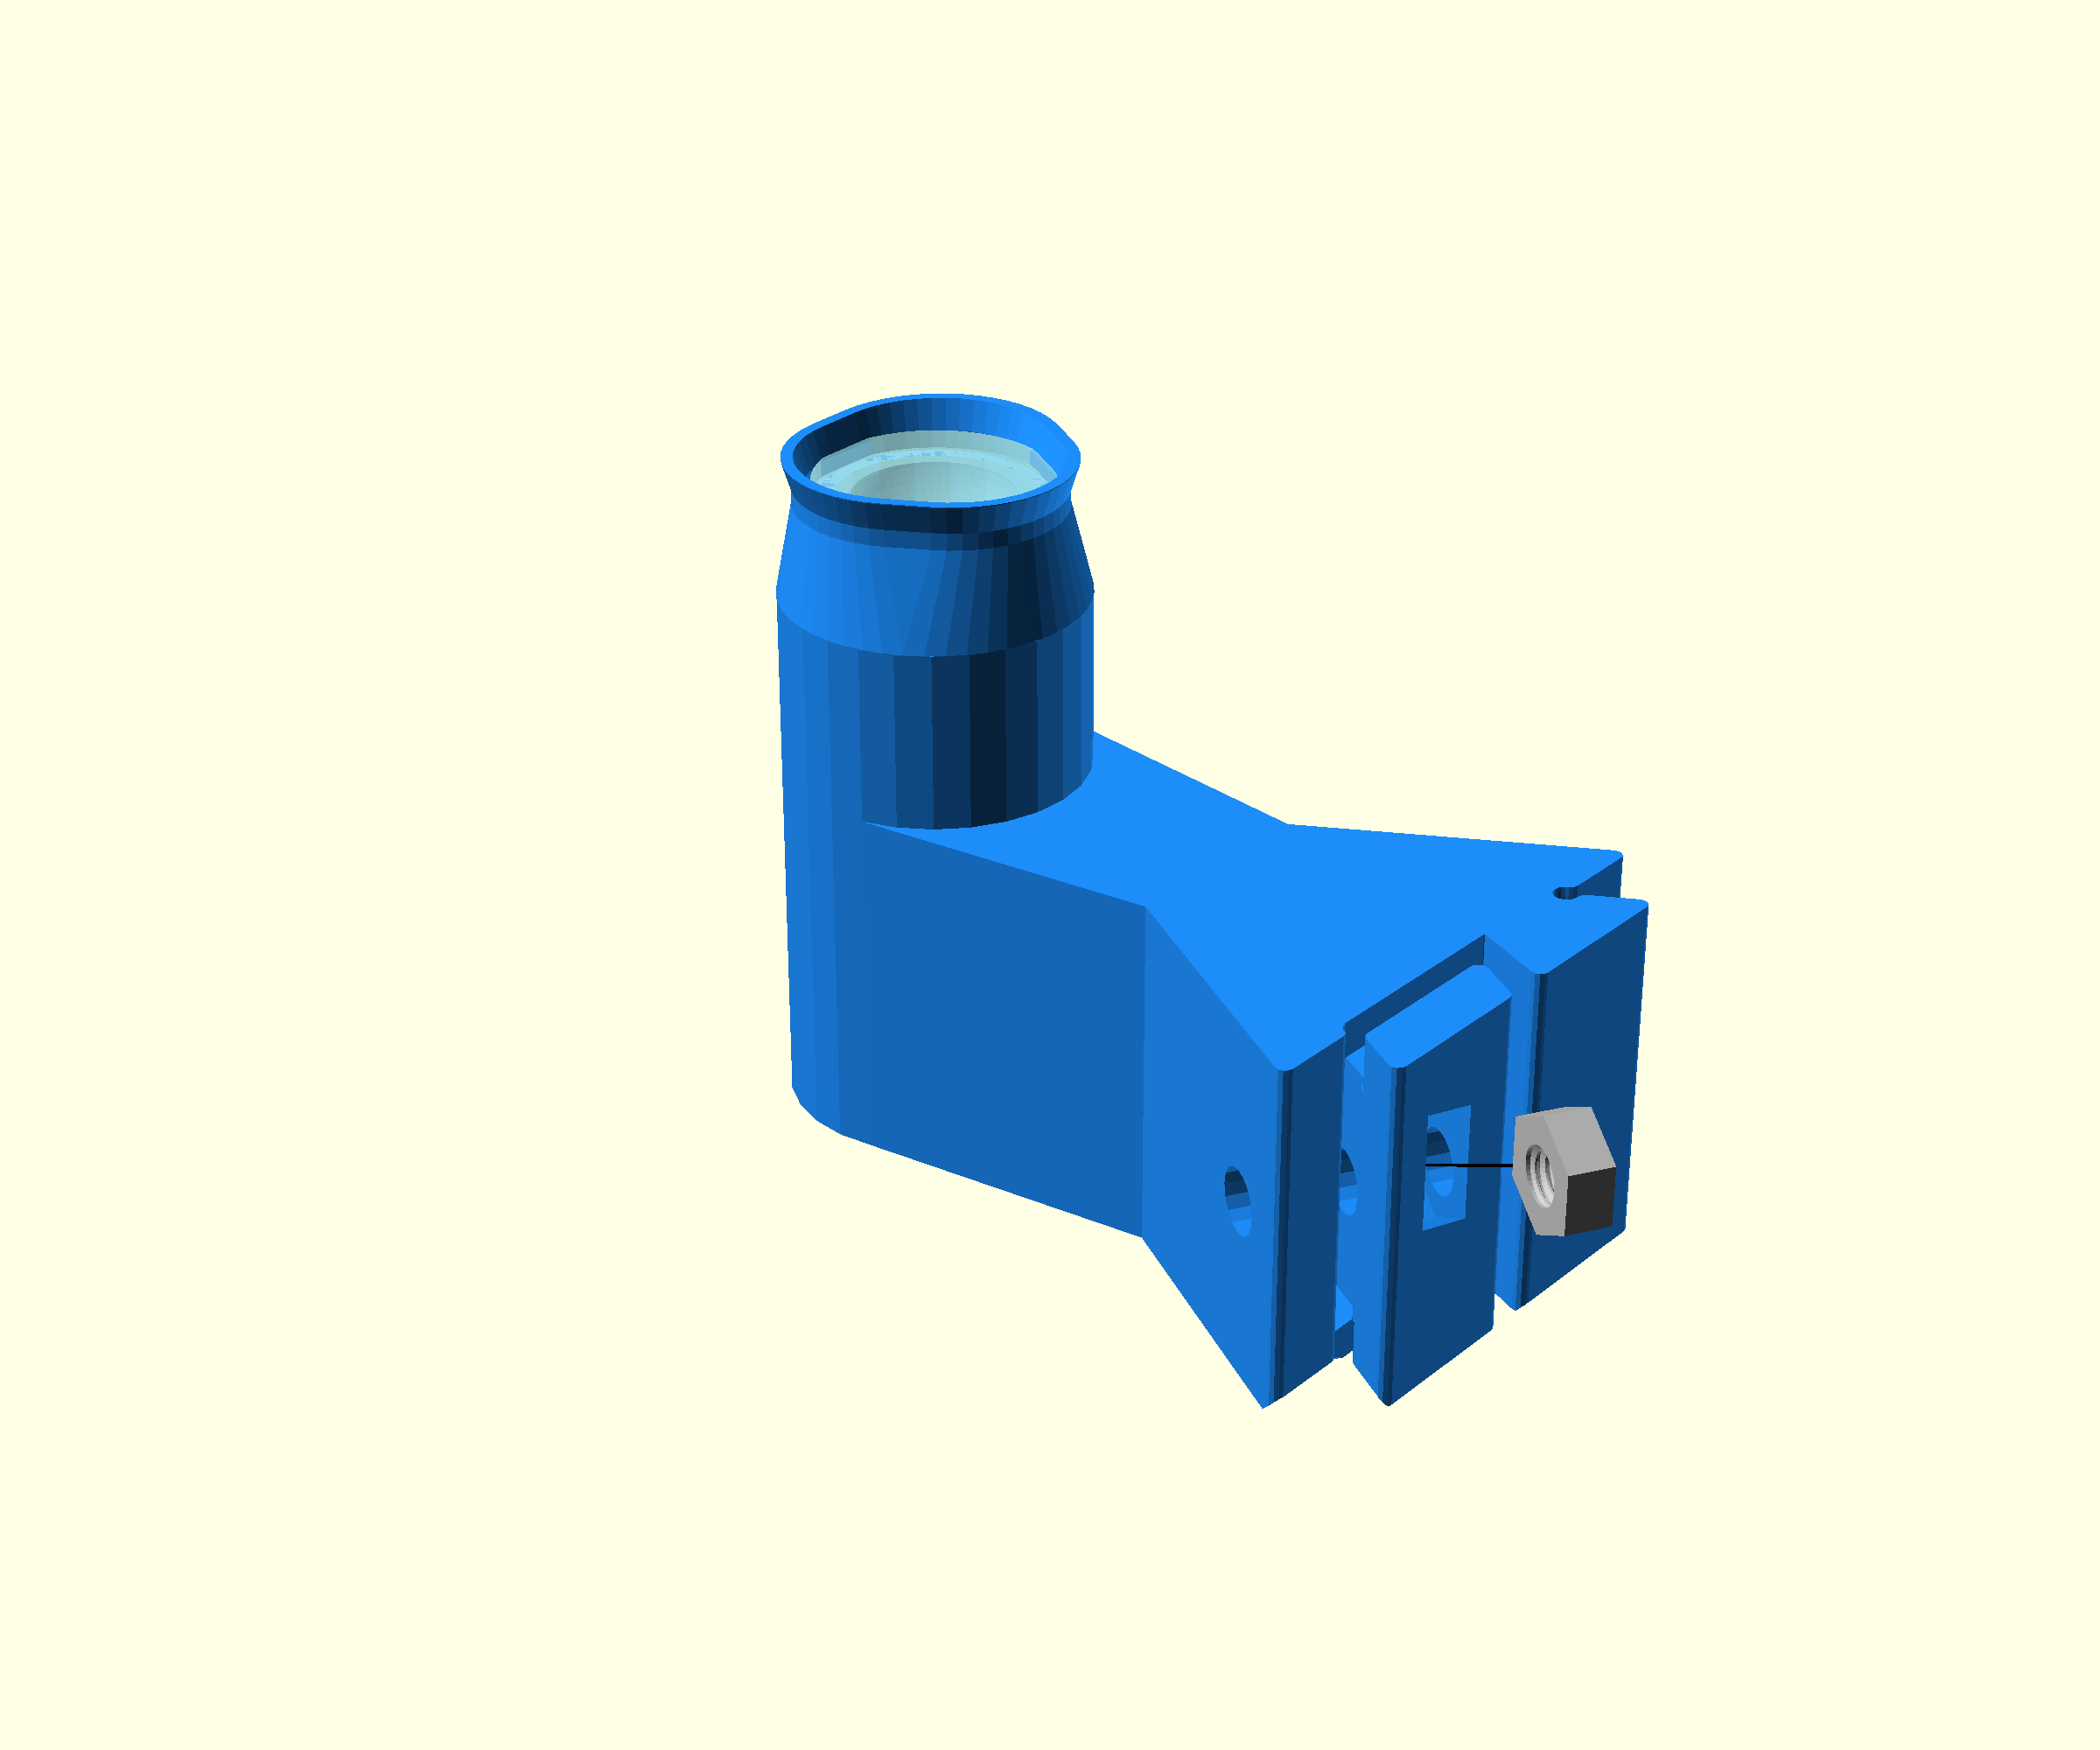
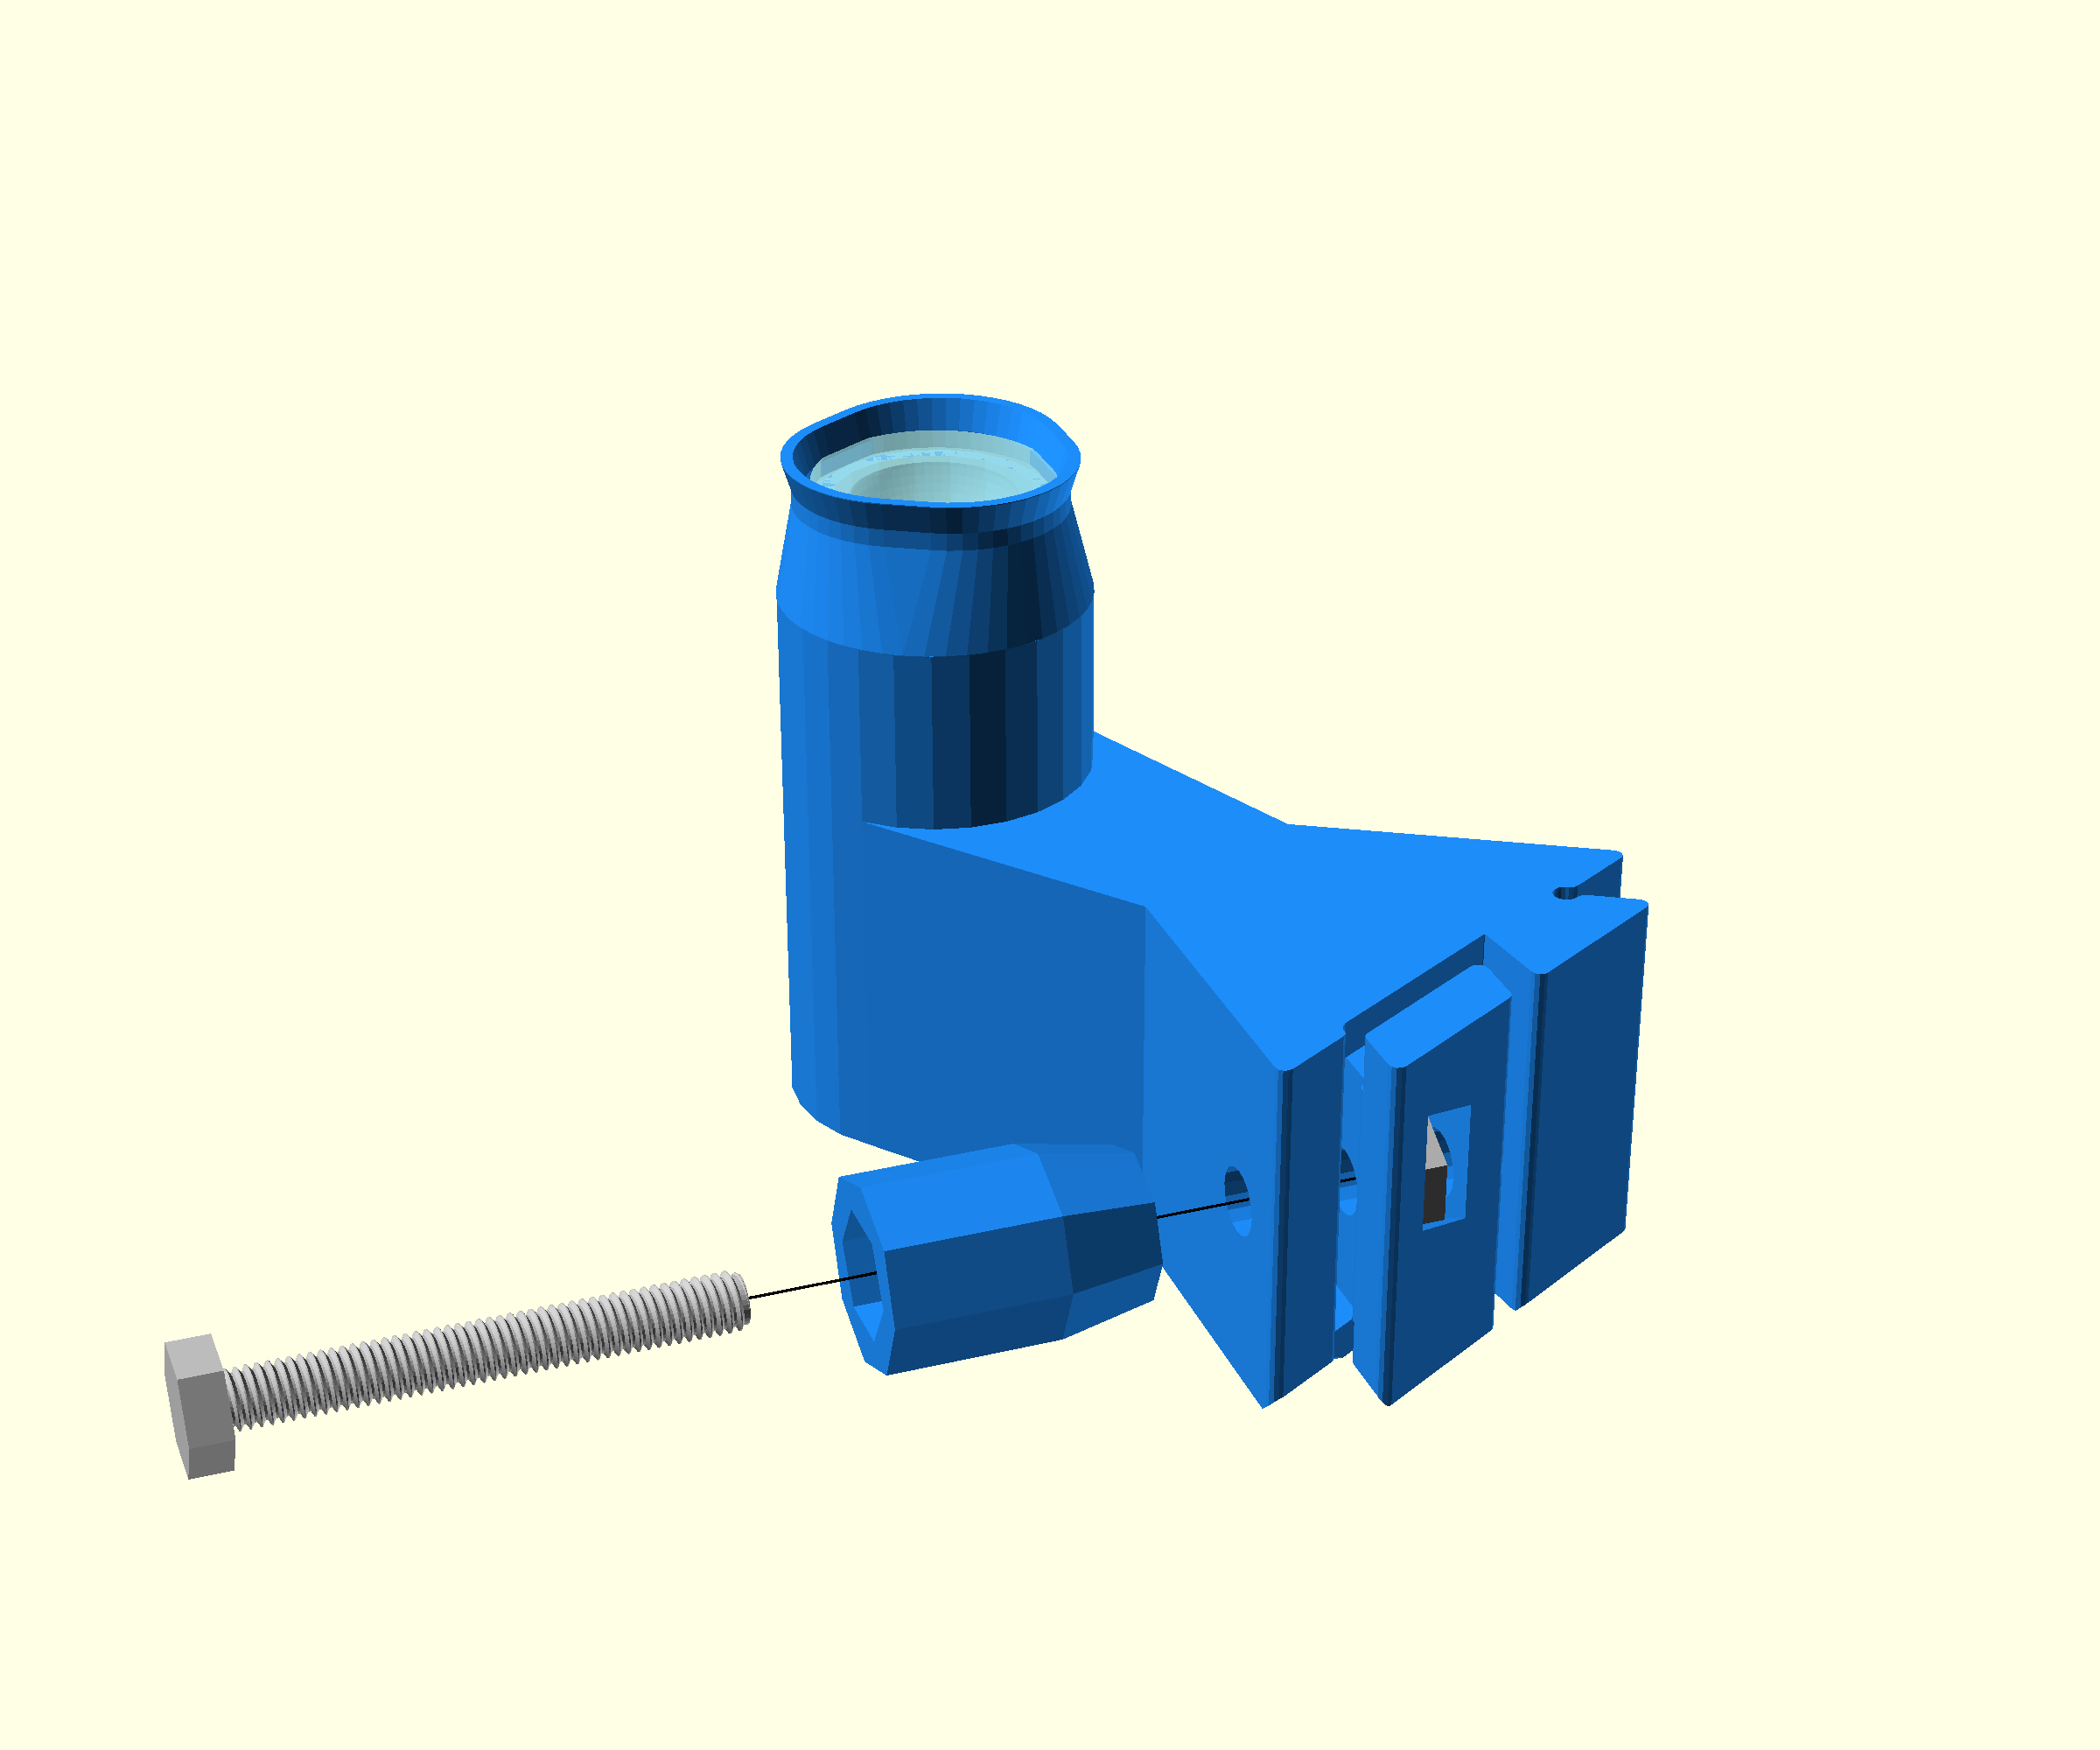
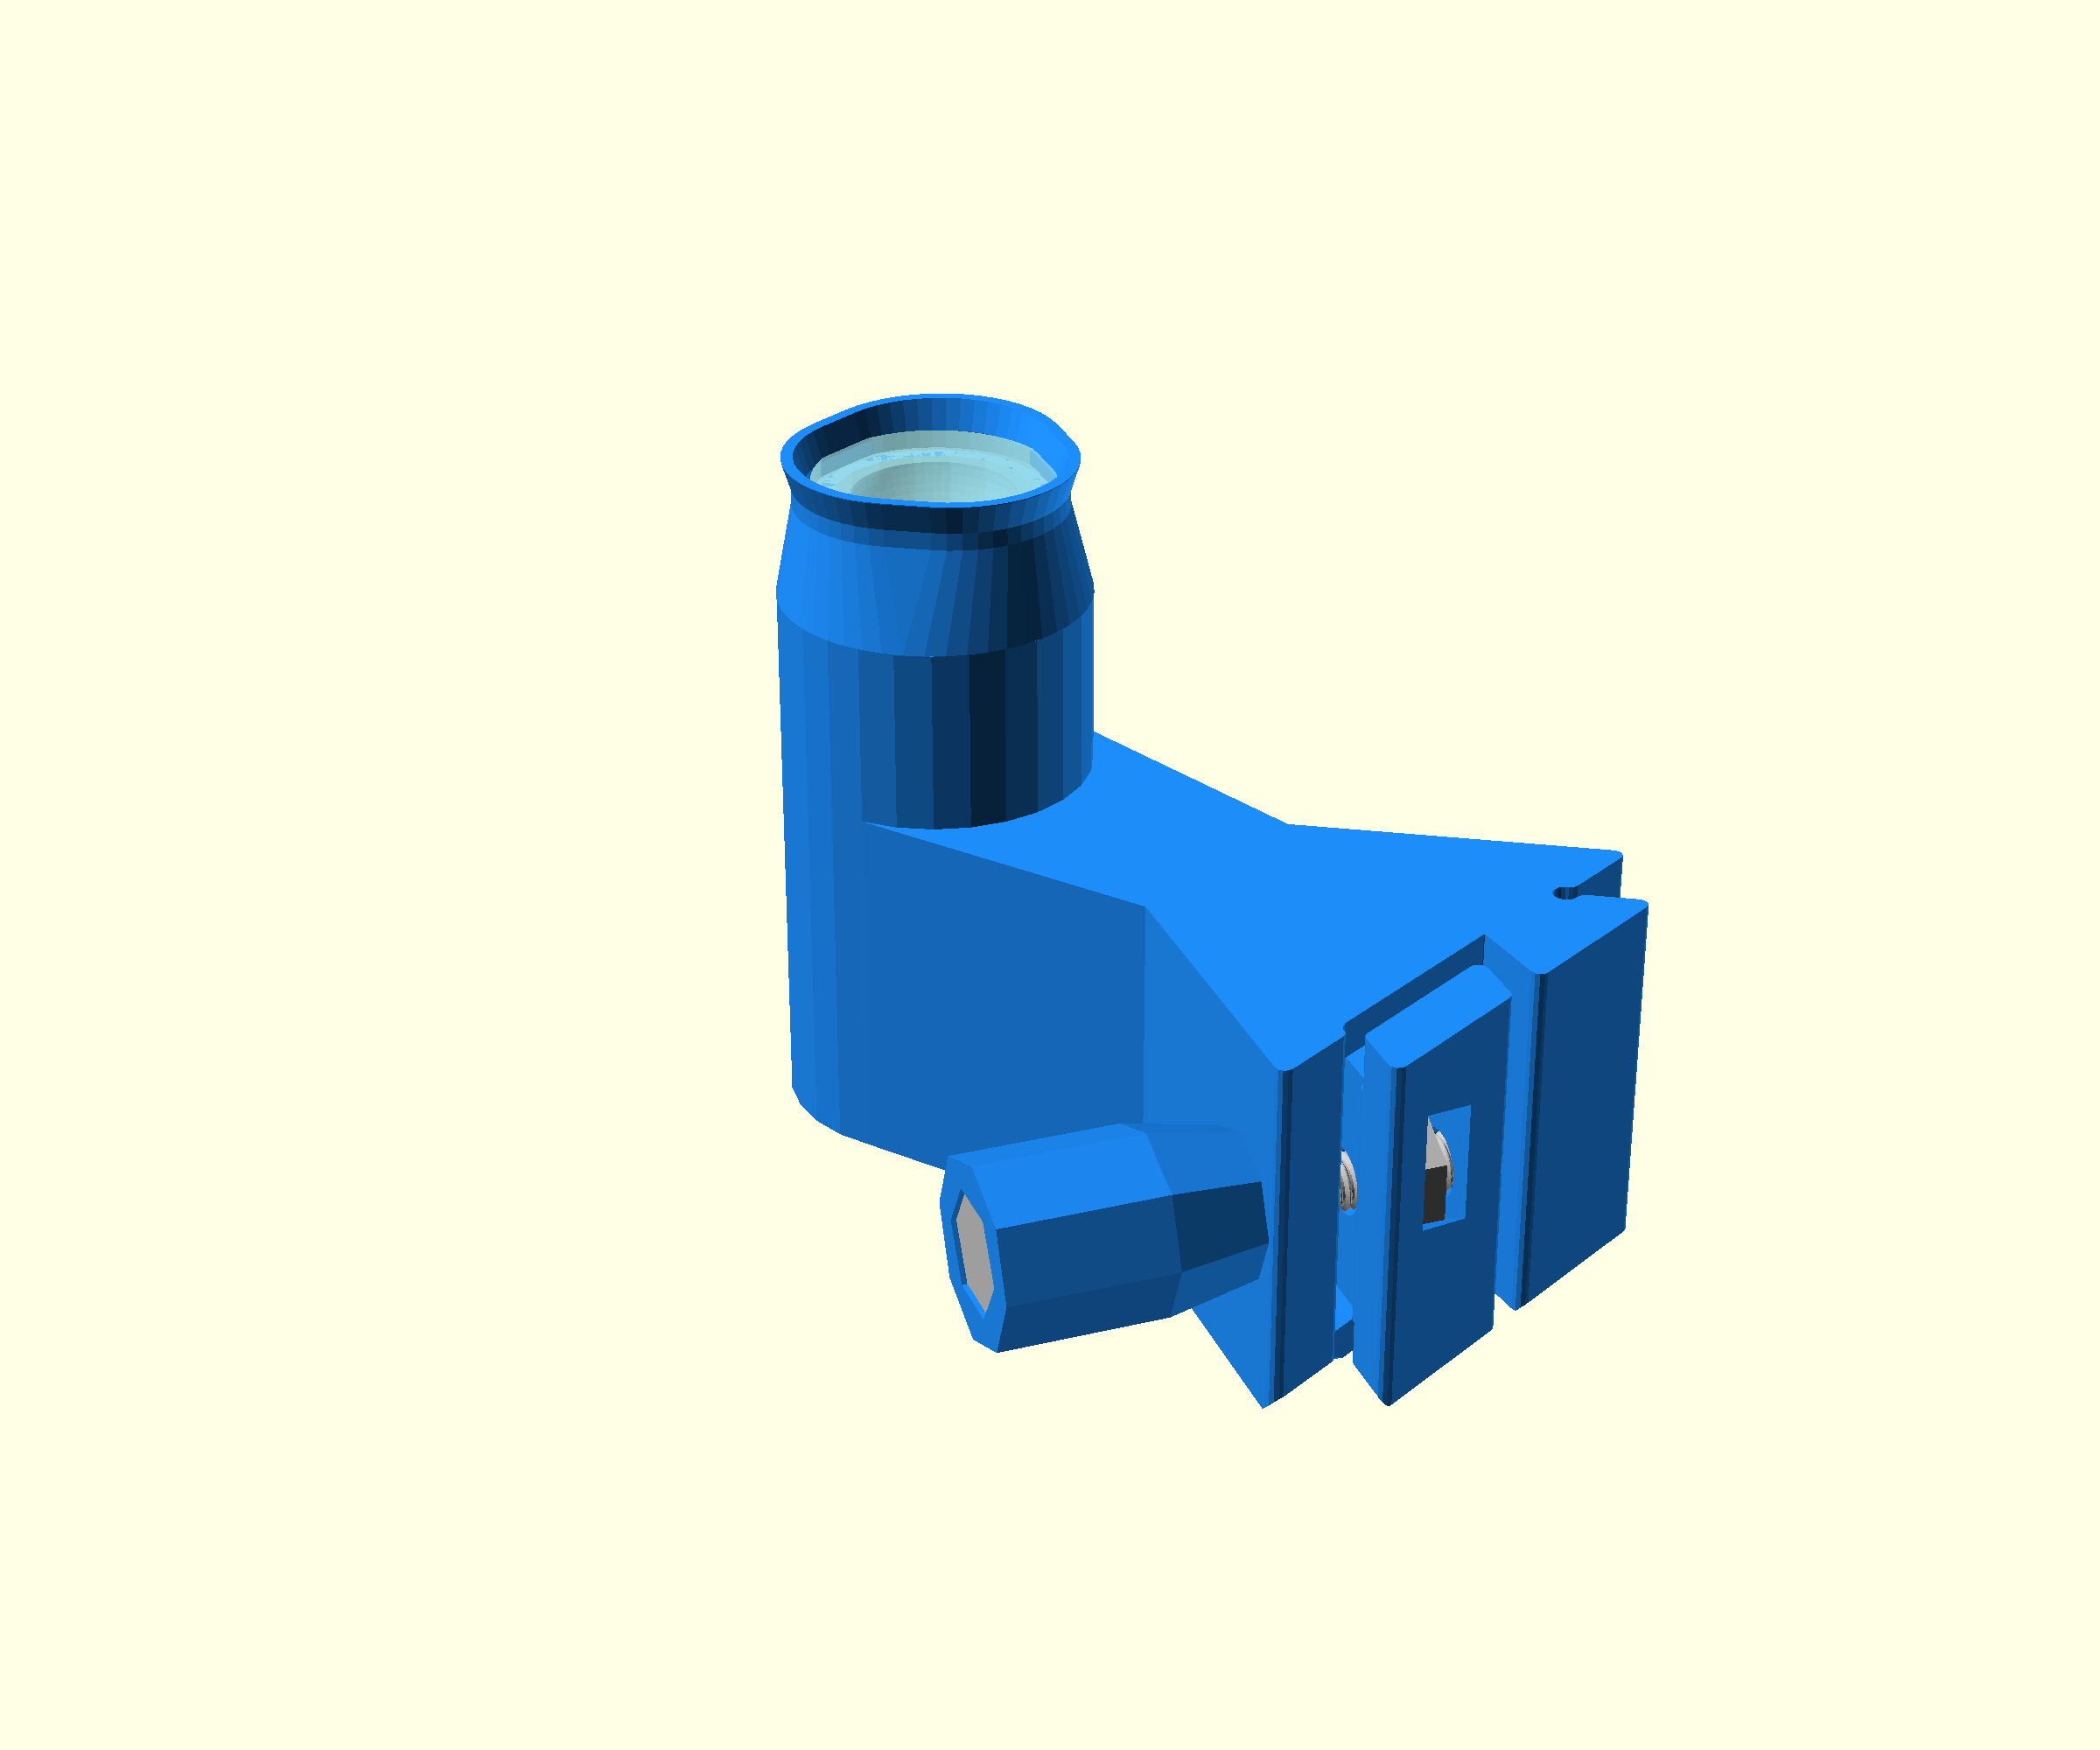
- Place an M3x25mm stainless steel hex bolt through the Illumination thumbscrew
- Drop an M3 nut into the nut slot on the condenser arm dovetail
- Start to screw the thumbscrew into the nut from the outside of the dovetail
- Screw the thumbscrew by hand until it almost touches the dovetail. Do not tighten further at this stage
Step 6: Mount the condenser arm
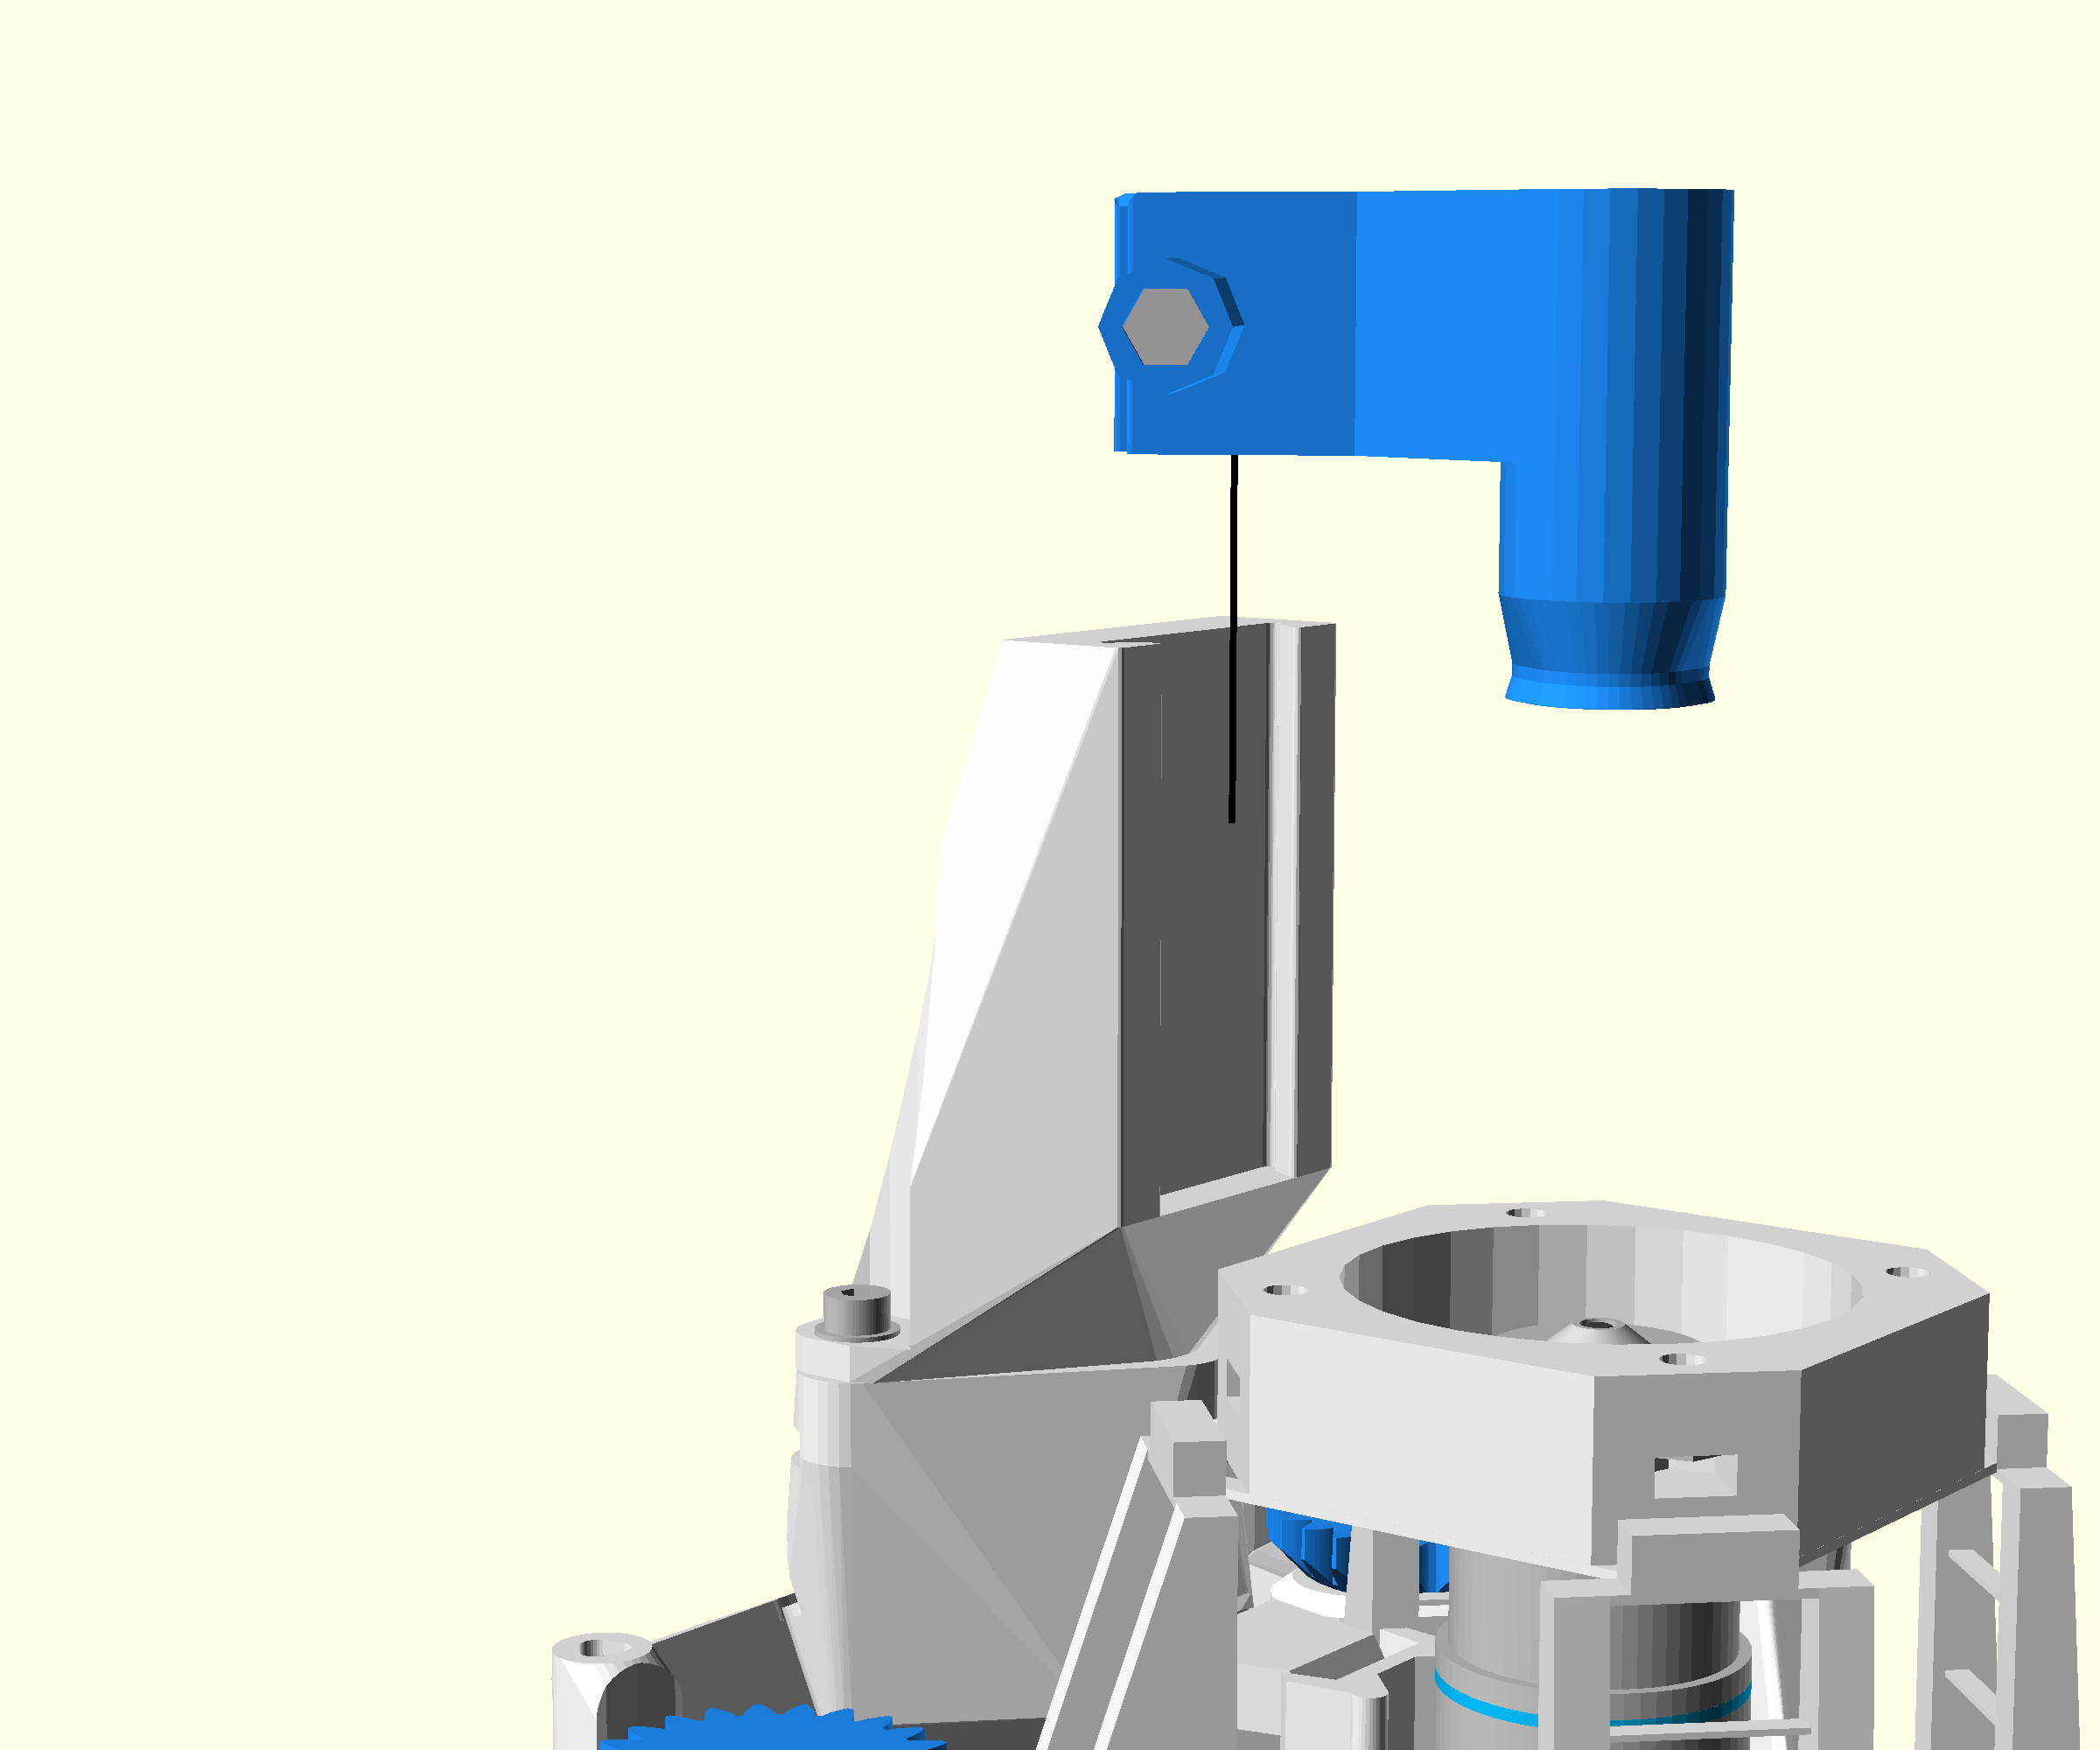

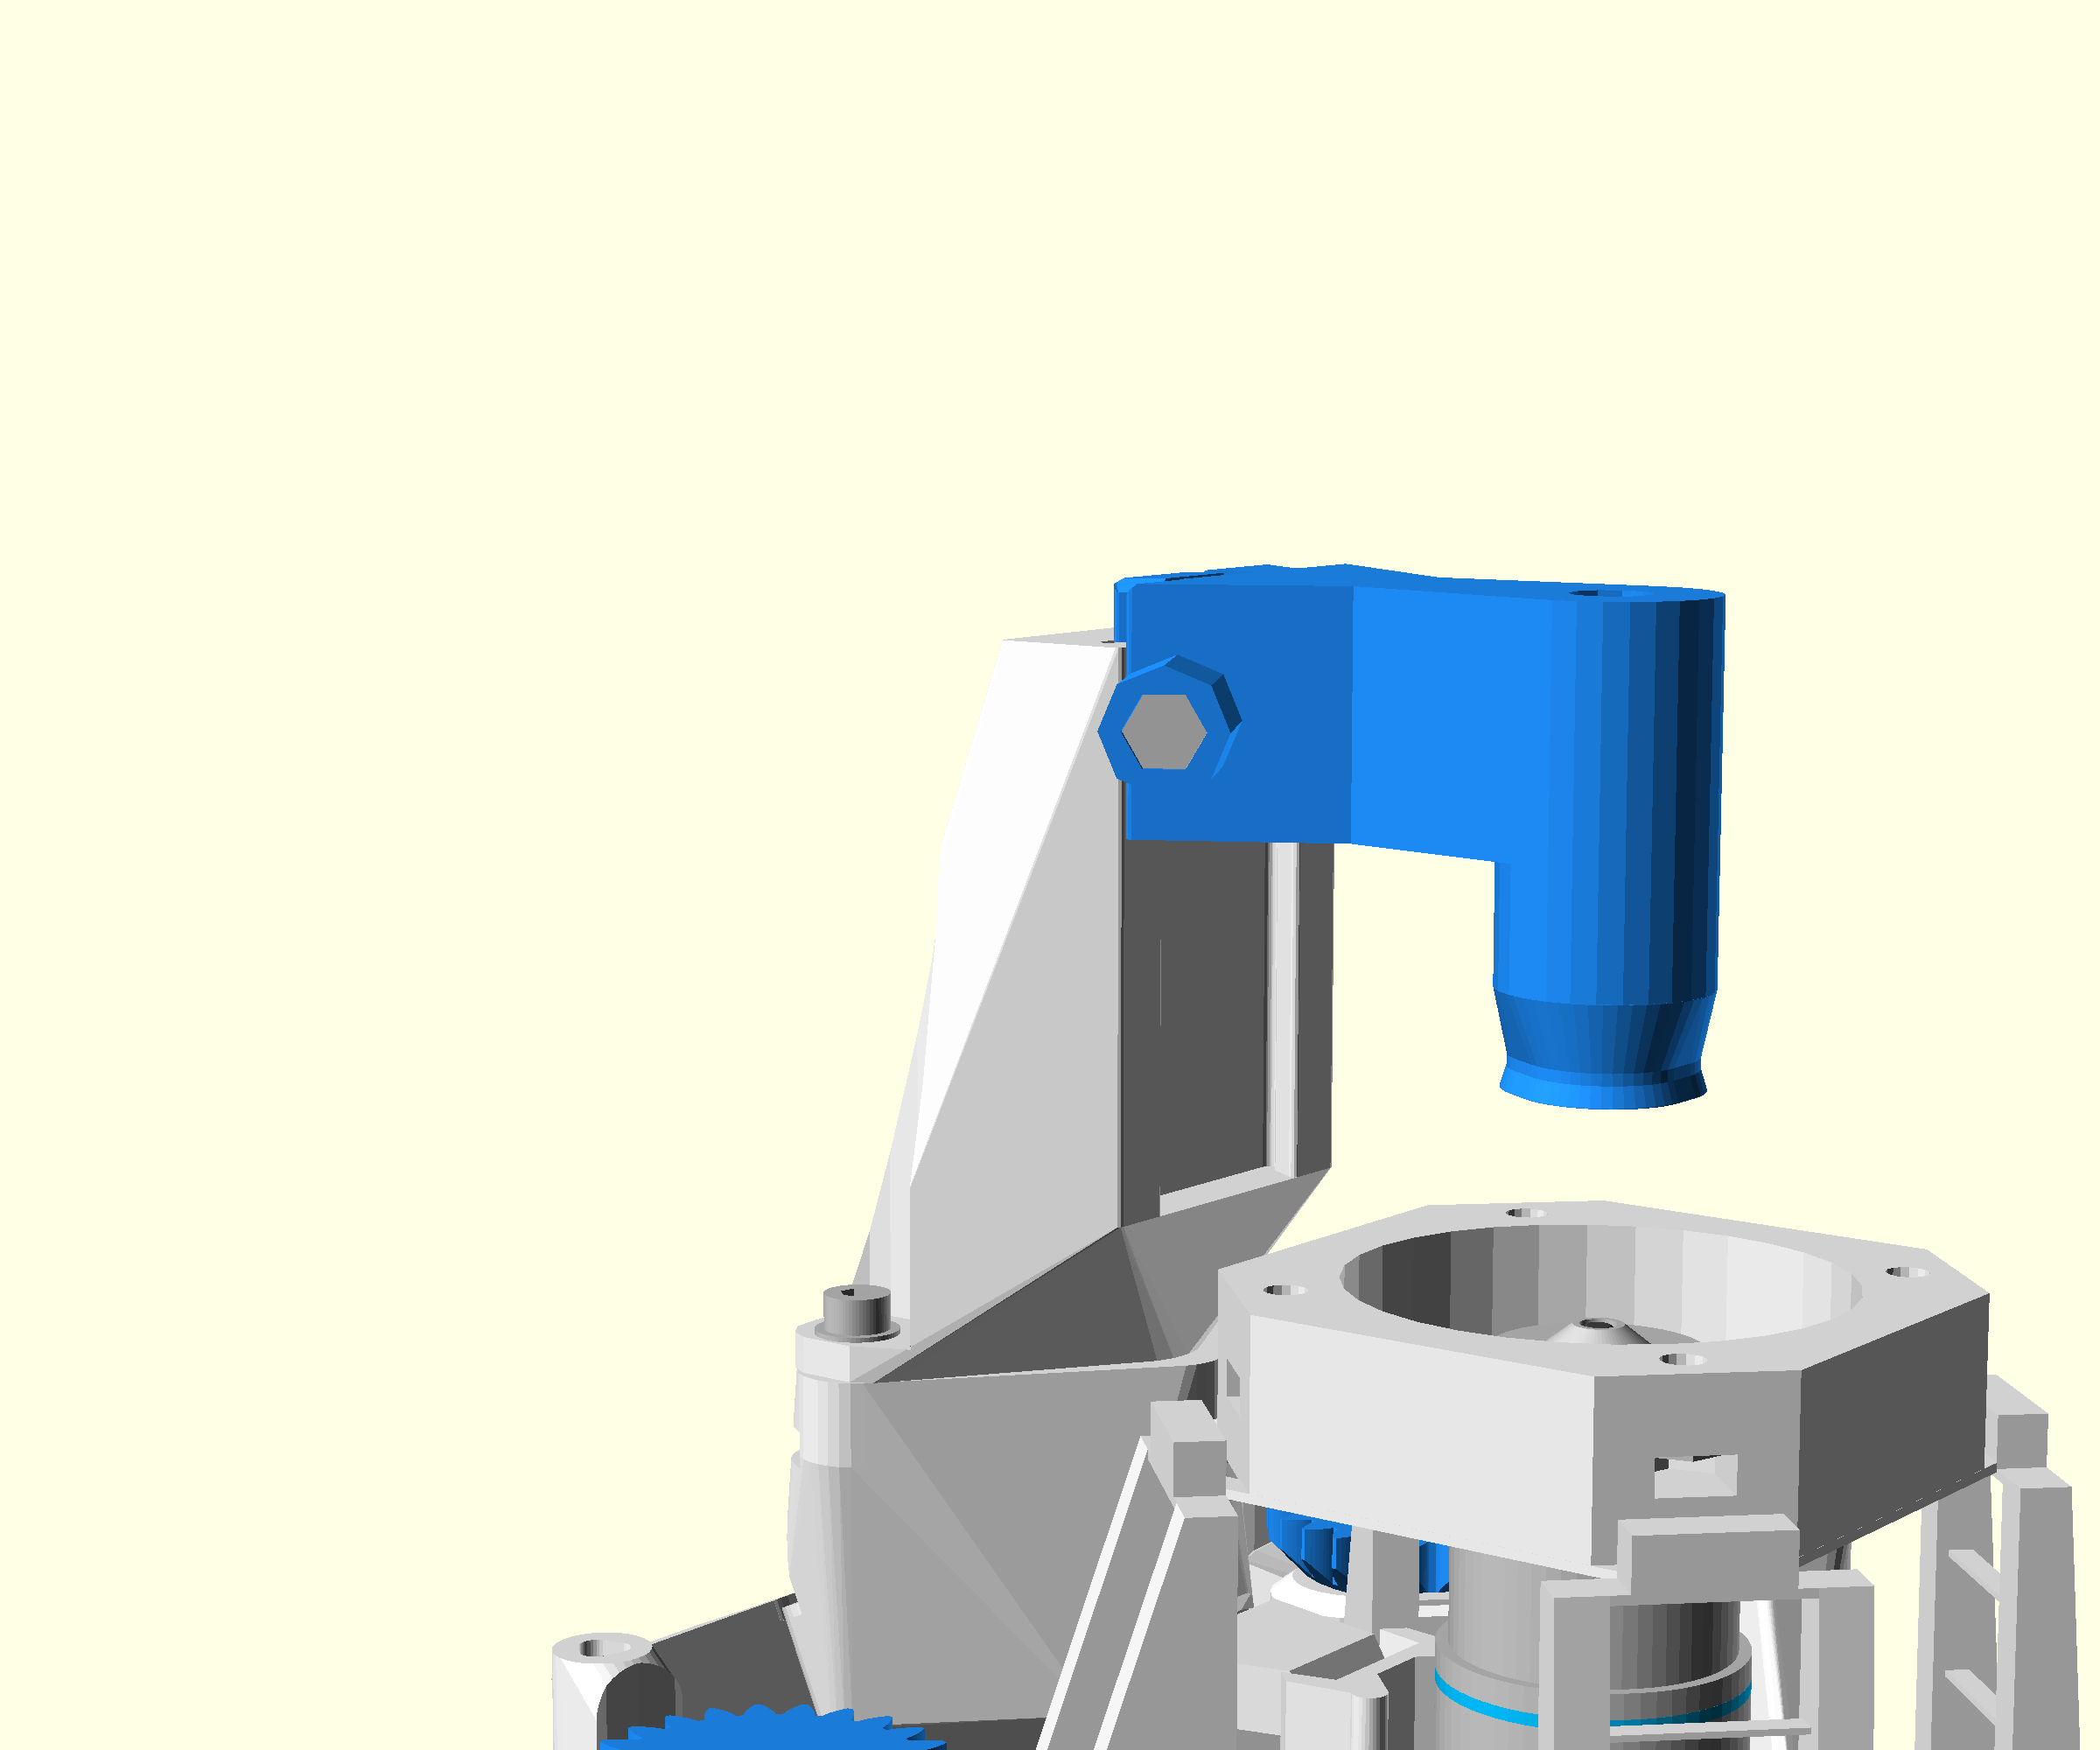
- Slide the condenser arm into the illumination dovetail until it is approximately flush with the top
- Tighten the thumbscrew by hand to lock the arm in place.
- Do not worry about the exact position, this will be adjusted on first use.
Step 7: Push-fit the LED
- Bend the LED cable to 90 degrees from the LED
- Push the LED into the top of the condenser