Complete the wiring
For this section you will need:
Printed Parts
- 1 Pi stand
Electronic Components
- 1 Raspberry Pi
- 1 Raspberry Pi Power Supply
- 1 Sangaboard - If you cannot get a Sangaboard try building compatible arduino nano circuit
Mechanical Components
Assembly video
Step 1: Connect the Raspberry Pi
- Take the Pi stand you printed earlier and push the Raspberry Pi into place so the connectors show through the holes.
- Secure the Raspberry Pi in place with two self tapping screws
- Insert the ribbon cable from the optics module into the camera port of the Rasberry Pi, ensuring the contacts are on the opposite side from the clasp.
Step 2: Connect the Sangaboard
- Mount the Sangaboard onto the Raspberry Pi GPIO pins, ensuring that the ribbon cable goes through the slot.
- Secure the Sangaboard in place with two self tapping screws
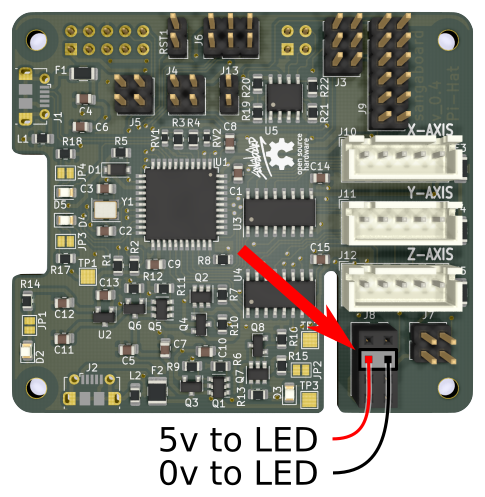
- Push the motor cables into their labelled connectors. Make sure the motor from the correct axis on the microscope goes to the correct port.
Step 3: Connect the LED to the Sangaboard
- Insert the 2-pin male connector into the 4x2 way female header on the Sangaboard.
- If you are not using a Sangaboard v4, you can also connect the LED to the Raspberry Pi

Step 4: Mount the electronics drawer
- Place an M3 nut into the slot just inside the hole in the front of the microscope base.
- Place another M3 nut into the slot above the Sangaboard power connector on the Pi stand.
- Slide the Pi stand into the microscope base making sure not to pinch any wires.
- Hold the Pi stand in place with two M3x10 cap head screws which should screw into the two nuts.
To power up your microscope you will need a power supply.