 Assembly Instructions
Prepare the separate z-actuator
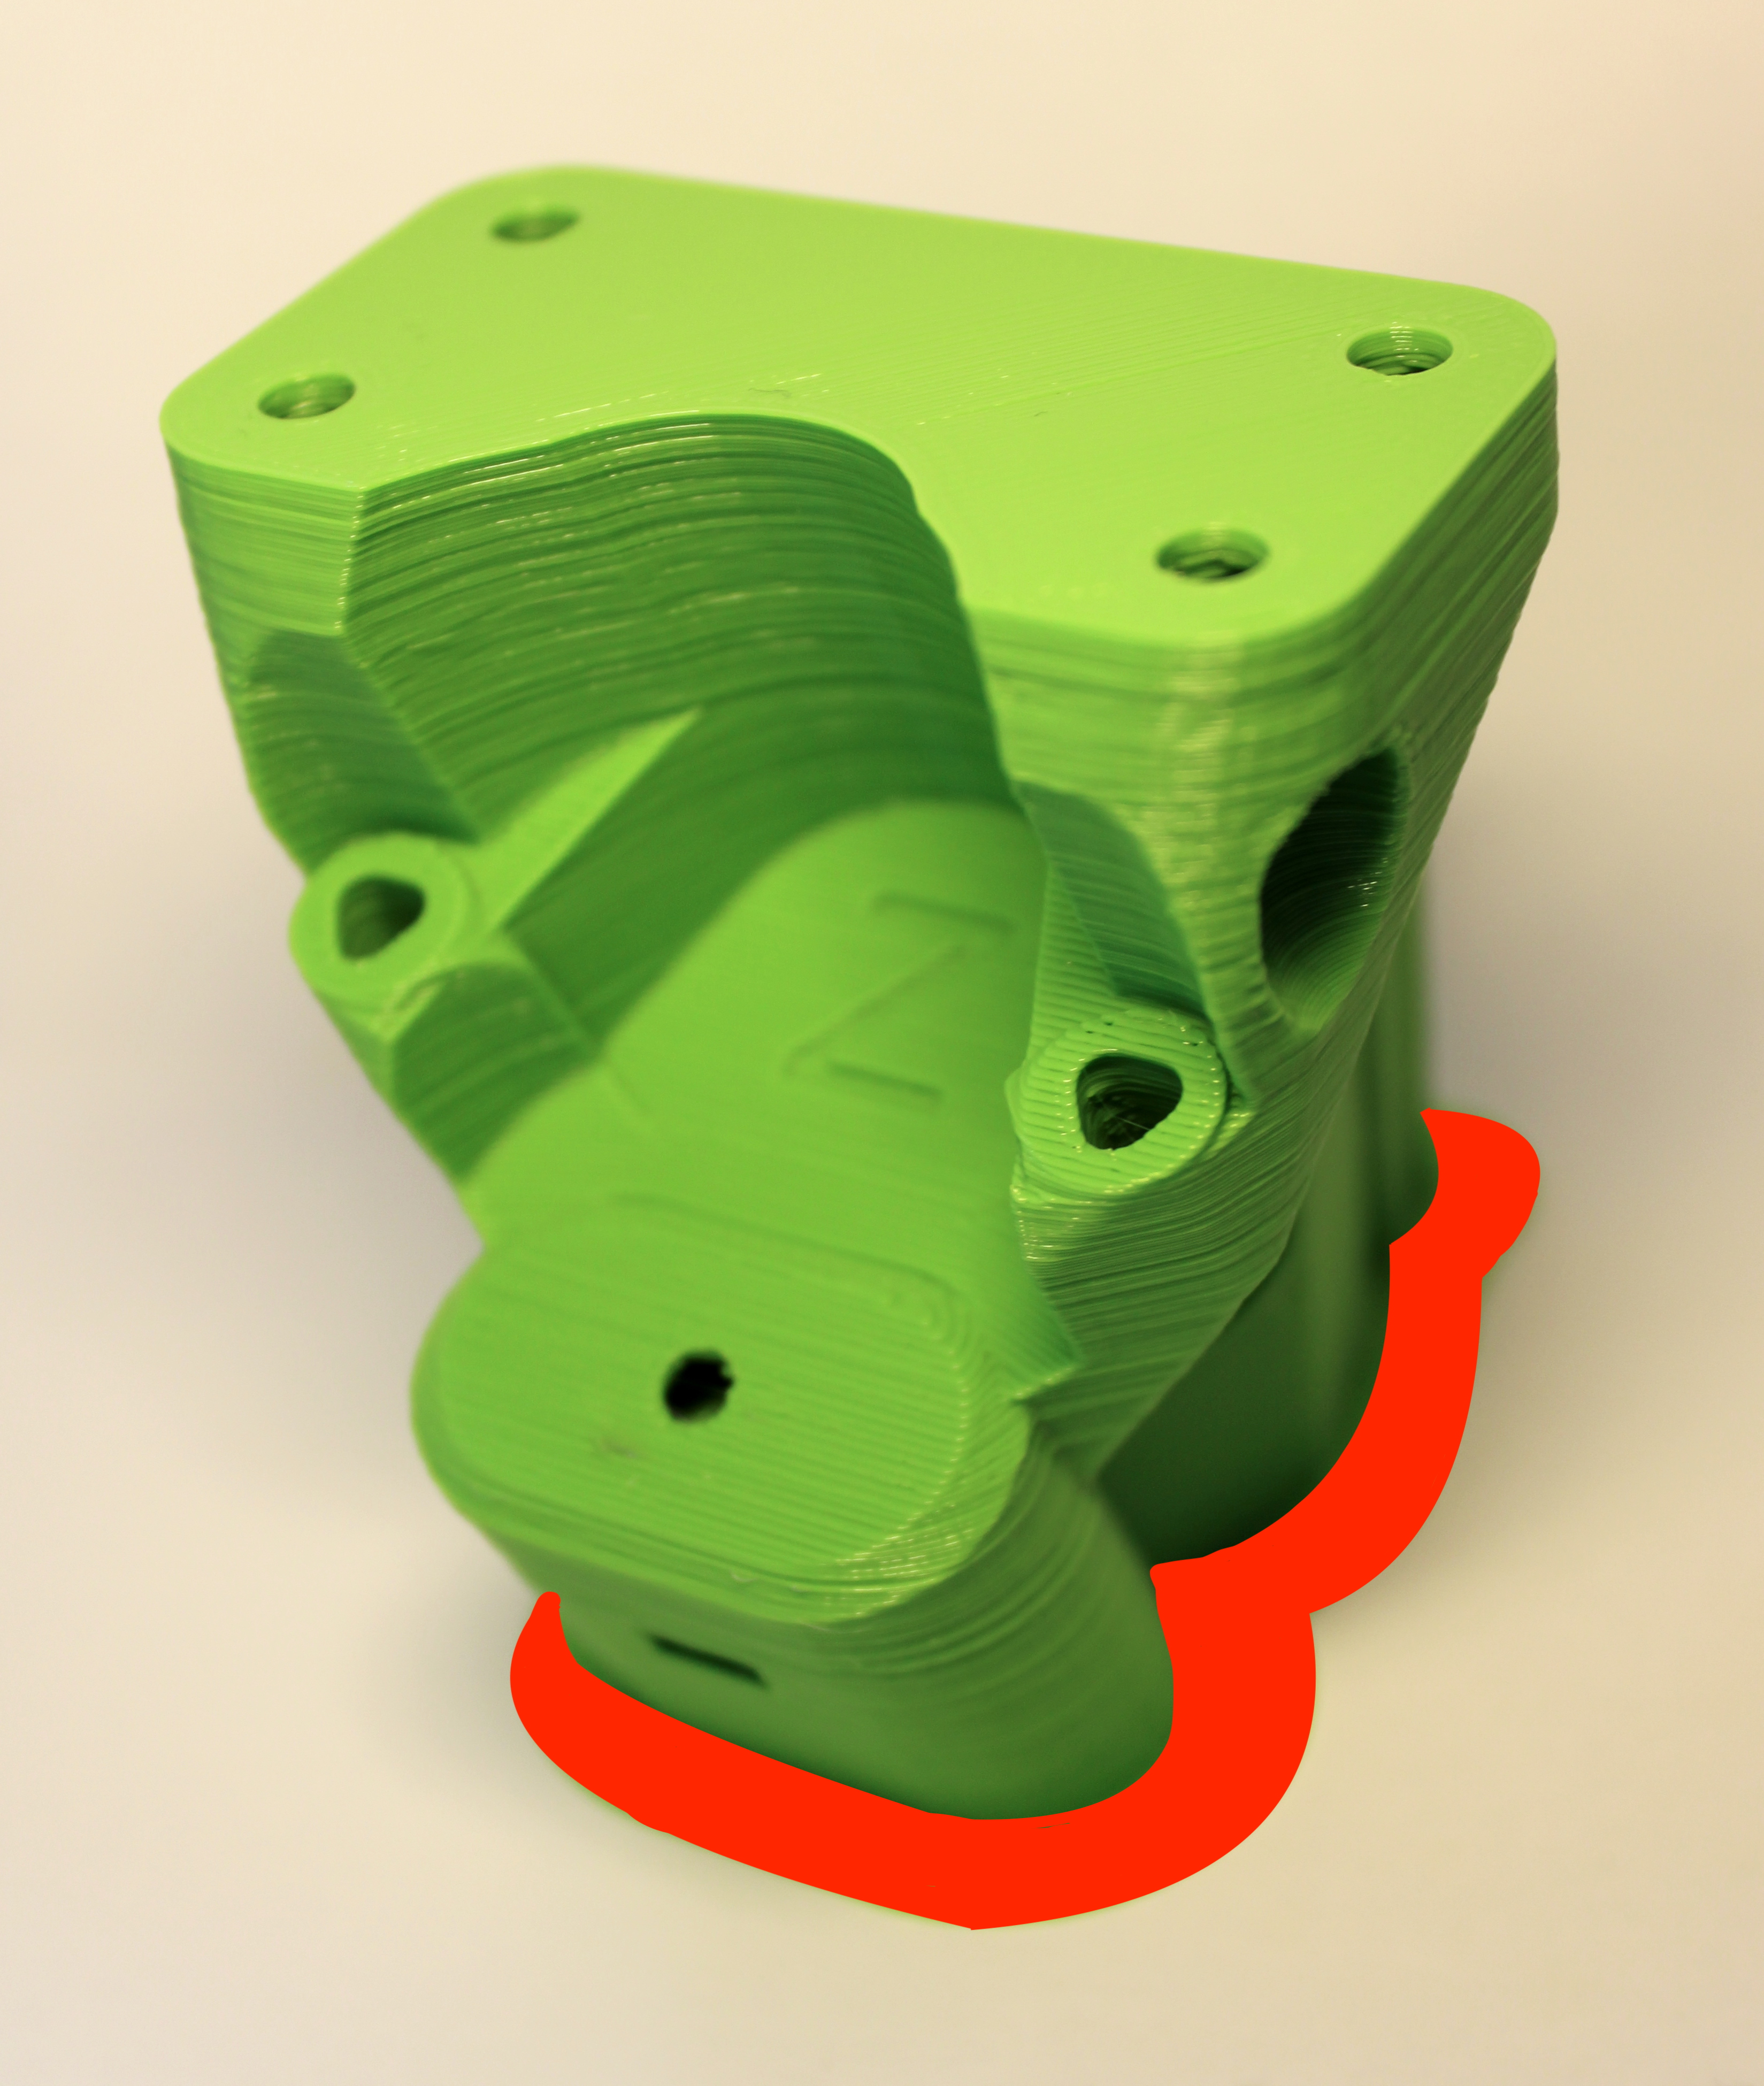
Step 1: Removing brim and supports
The separate z-actuator has some custom supports and a custom brim to remove. These are highlighted in red in the following images.
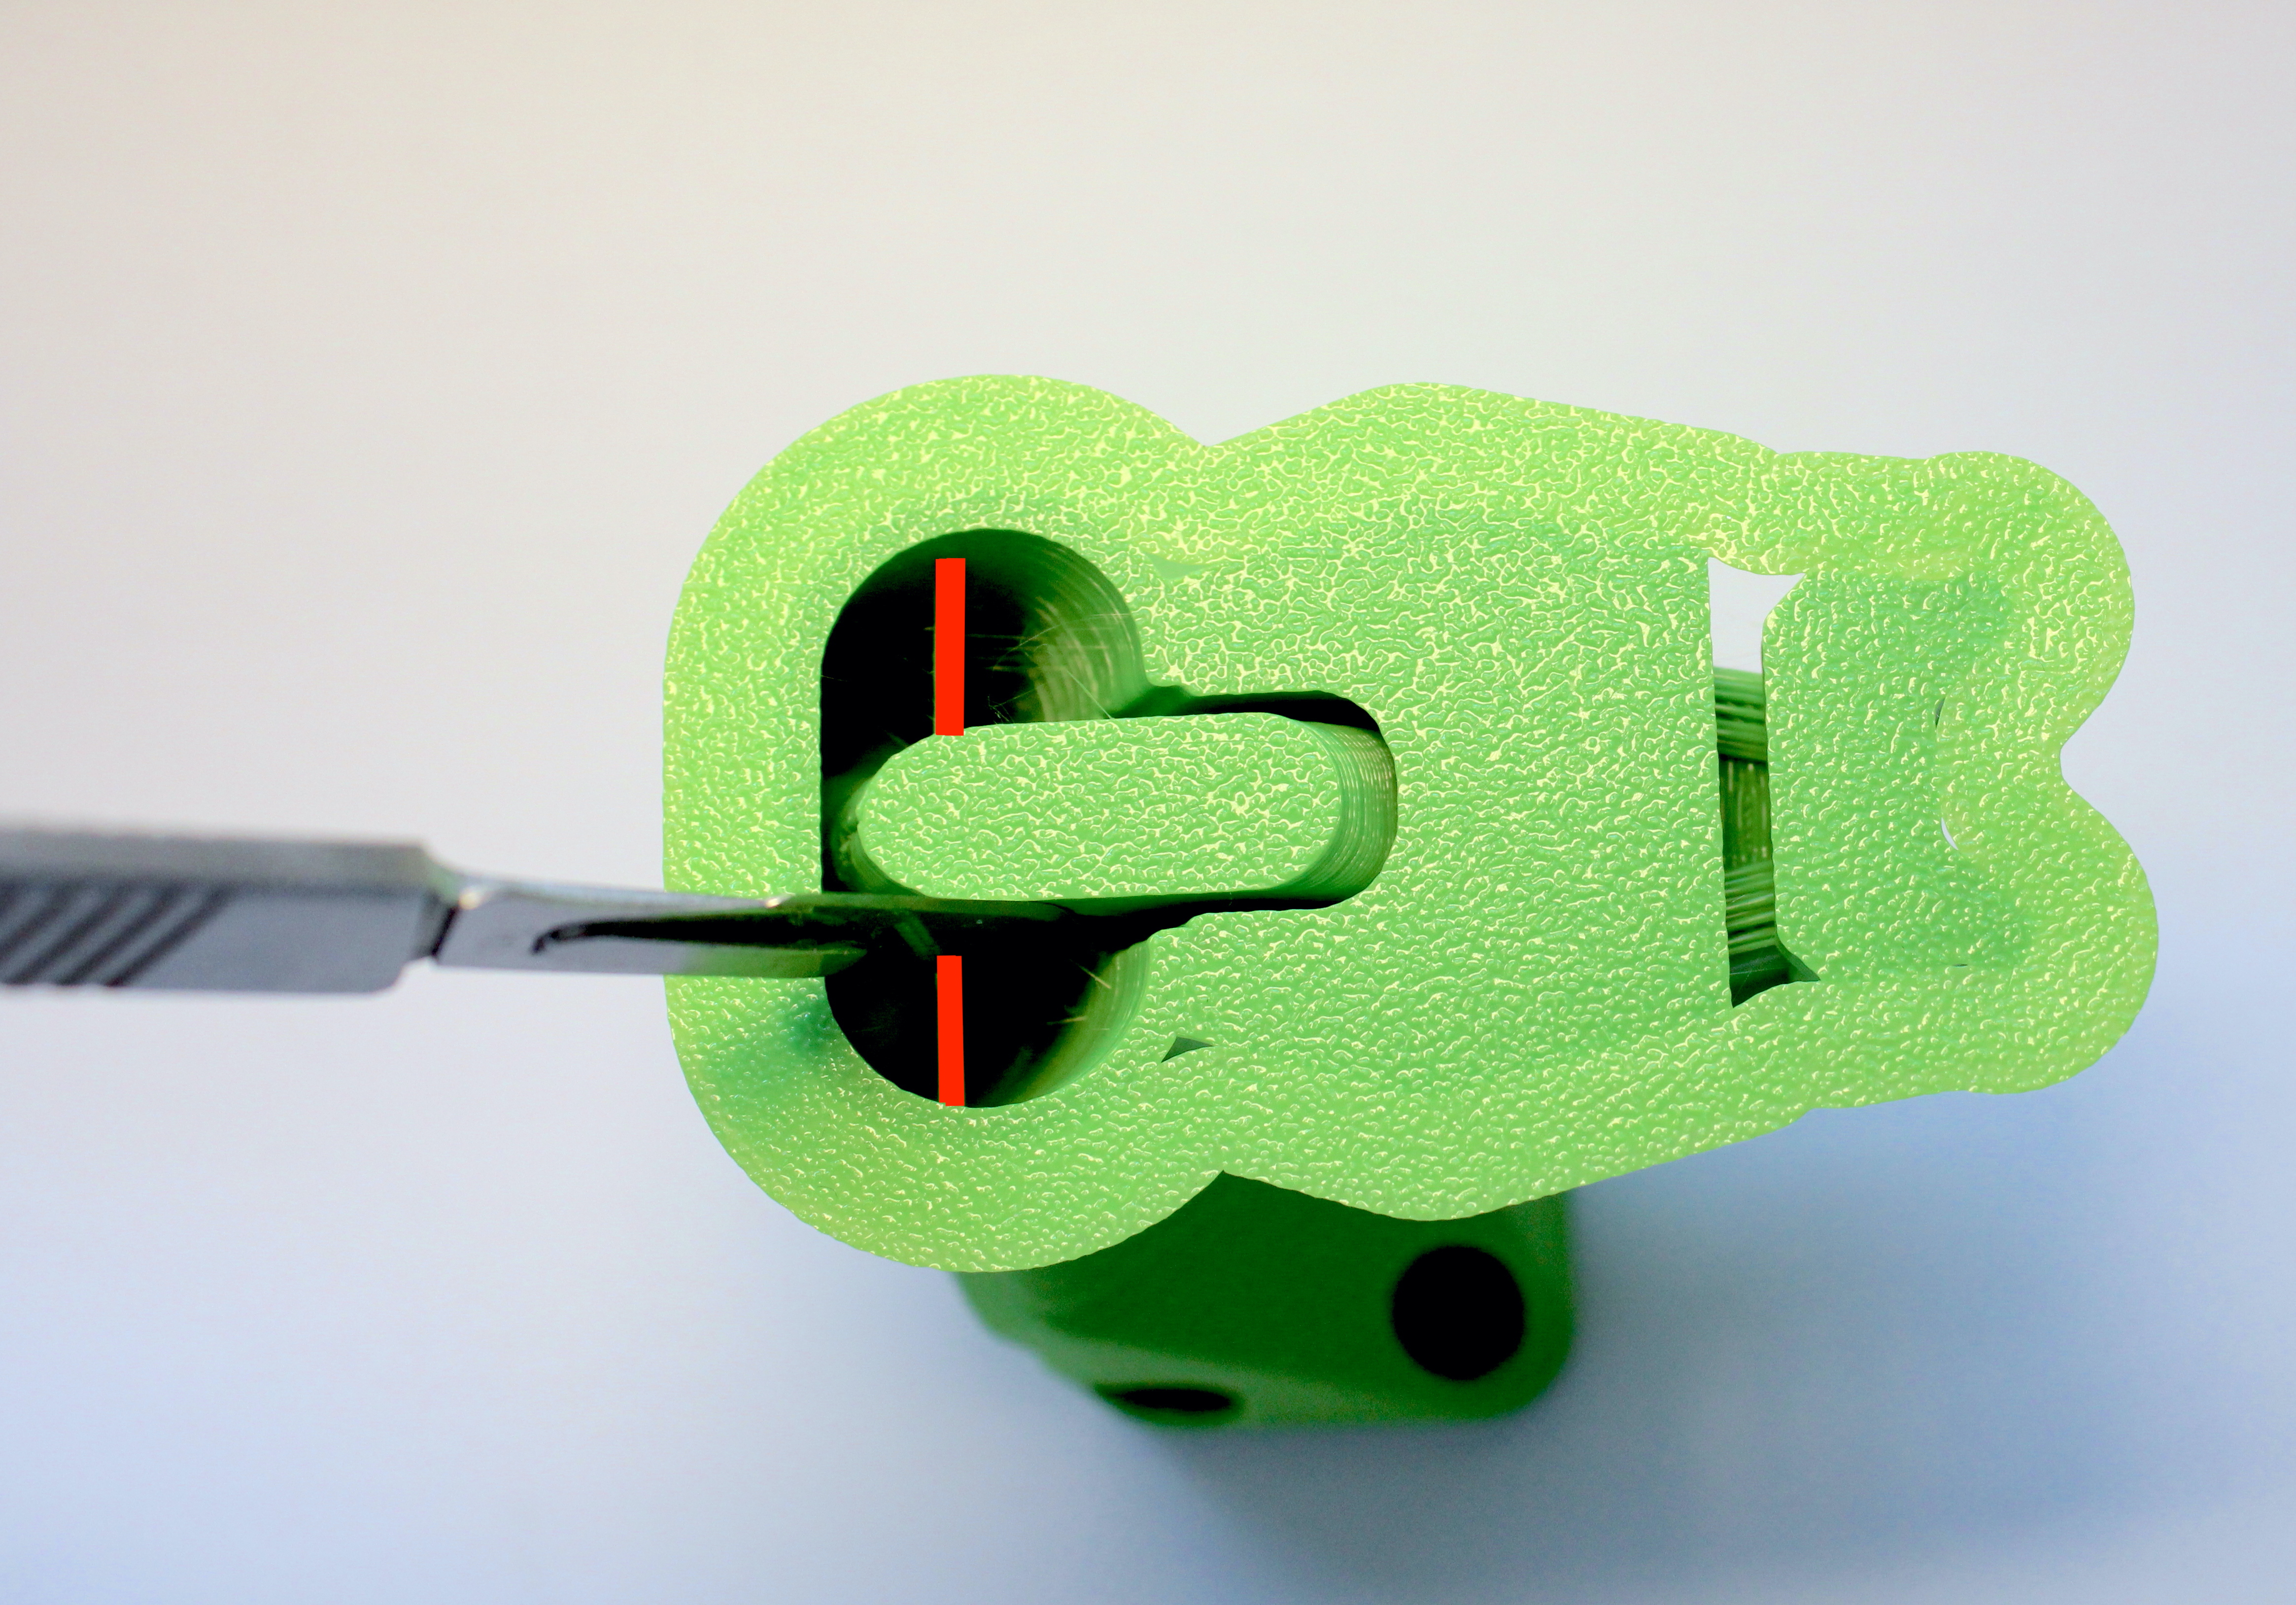
- Cut the ties inside actuator column (2 total) with the precision wire cutters