 Assembly Instructions
Assemble the motors
For this section you will need:
Tools
Printed Parts
- 3 cable tidy caps - - Each cap is a different shape
- 3 small gears
Electronic Components
Mechanical Components
Step 1: Attach the small gears
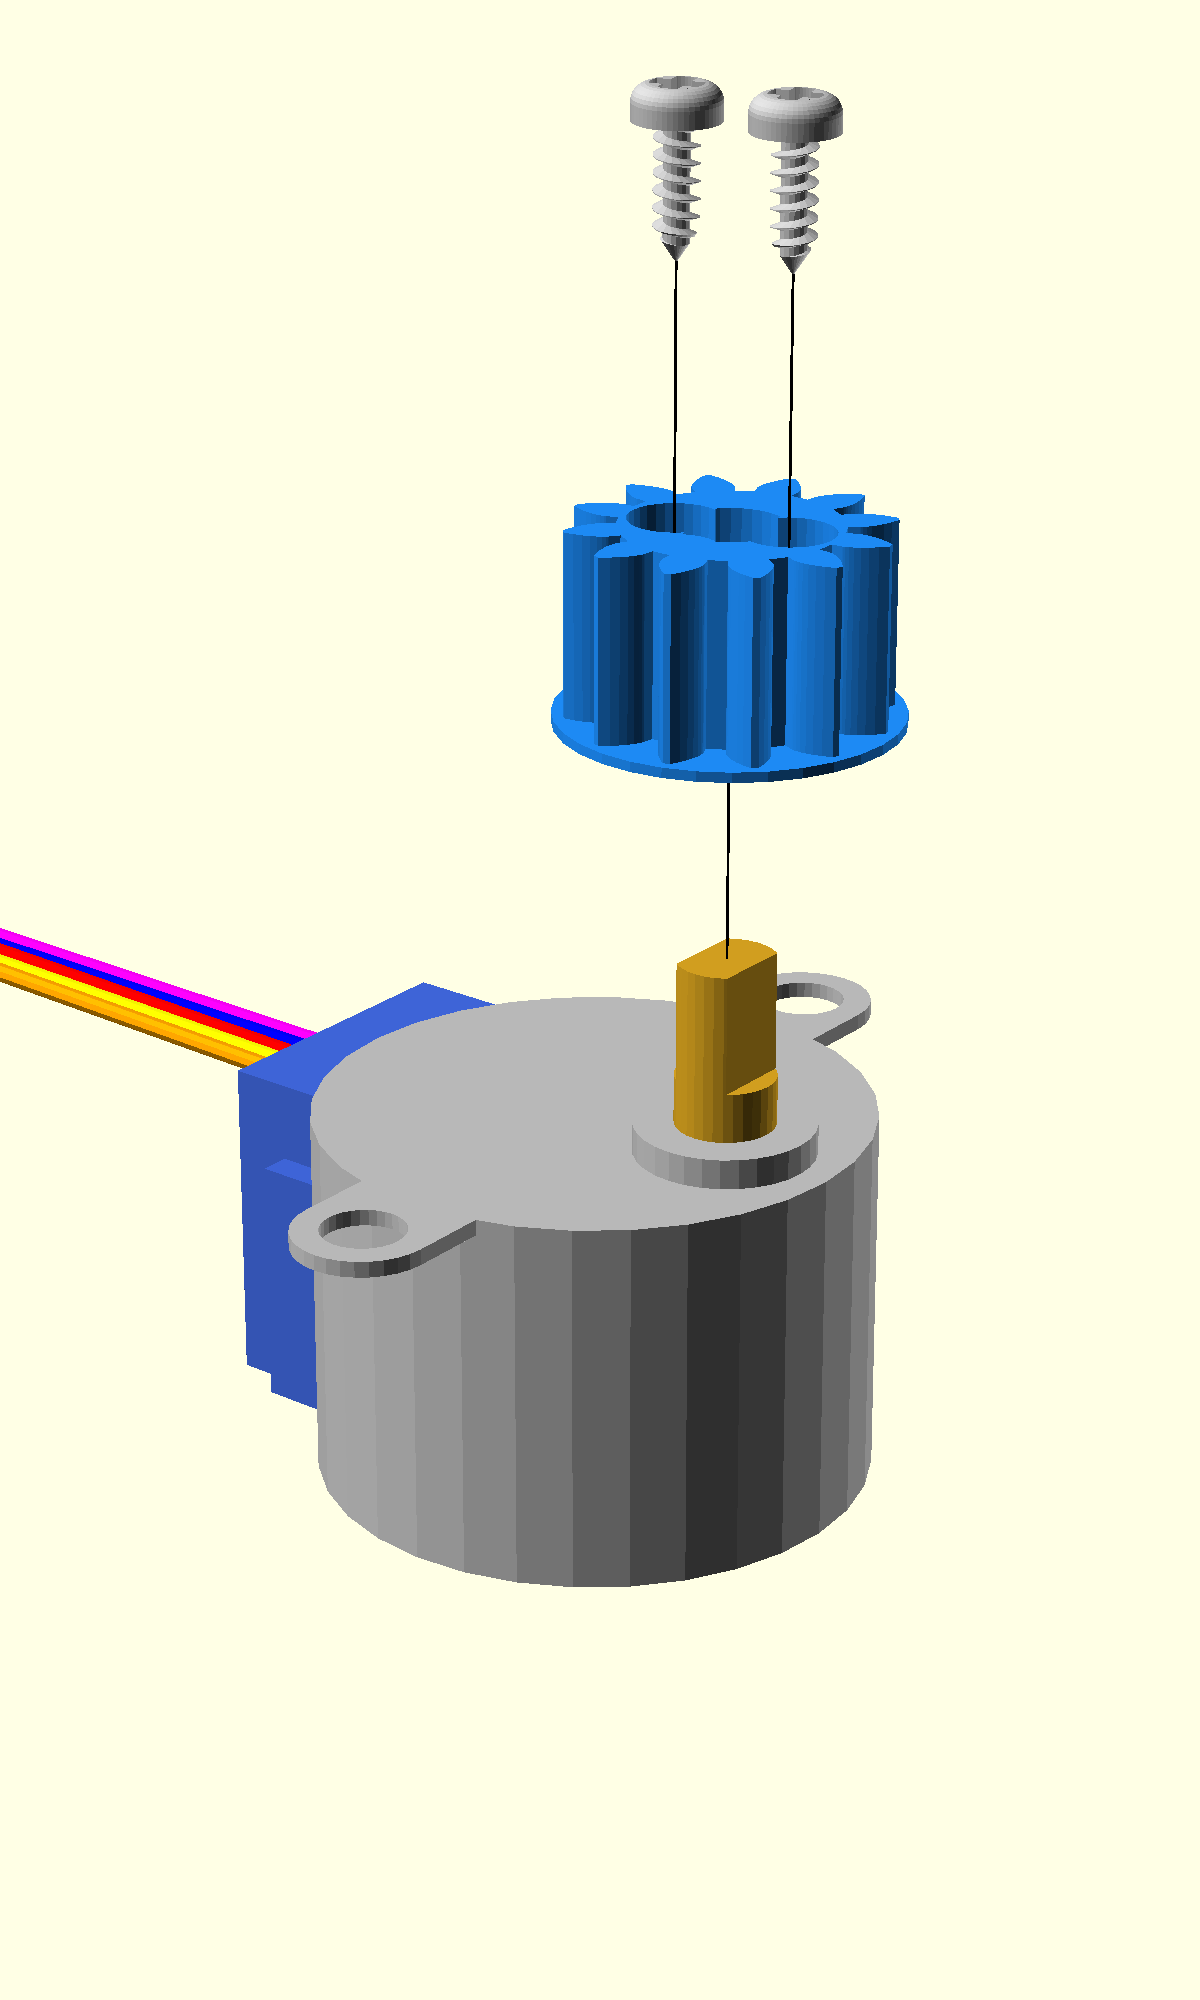
- Take a stepper motor and a small gear
- Place the motor on the work surface with the shaft pointing up
- Align the flat sides of the motor shaft with the flat sides of the hole in the gear.
- Push the gear onto the motor with the flanged side downwards (motor side).
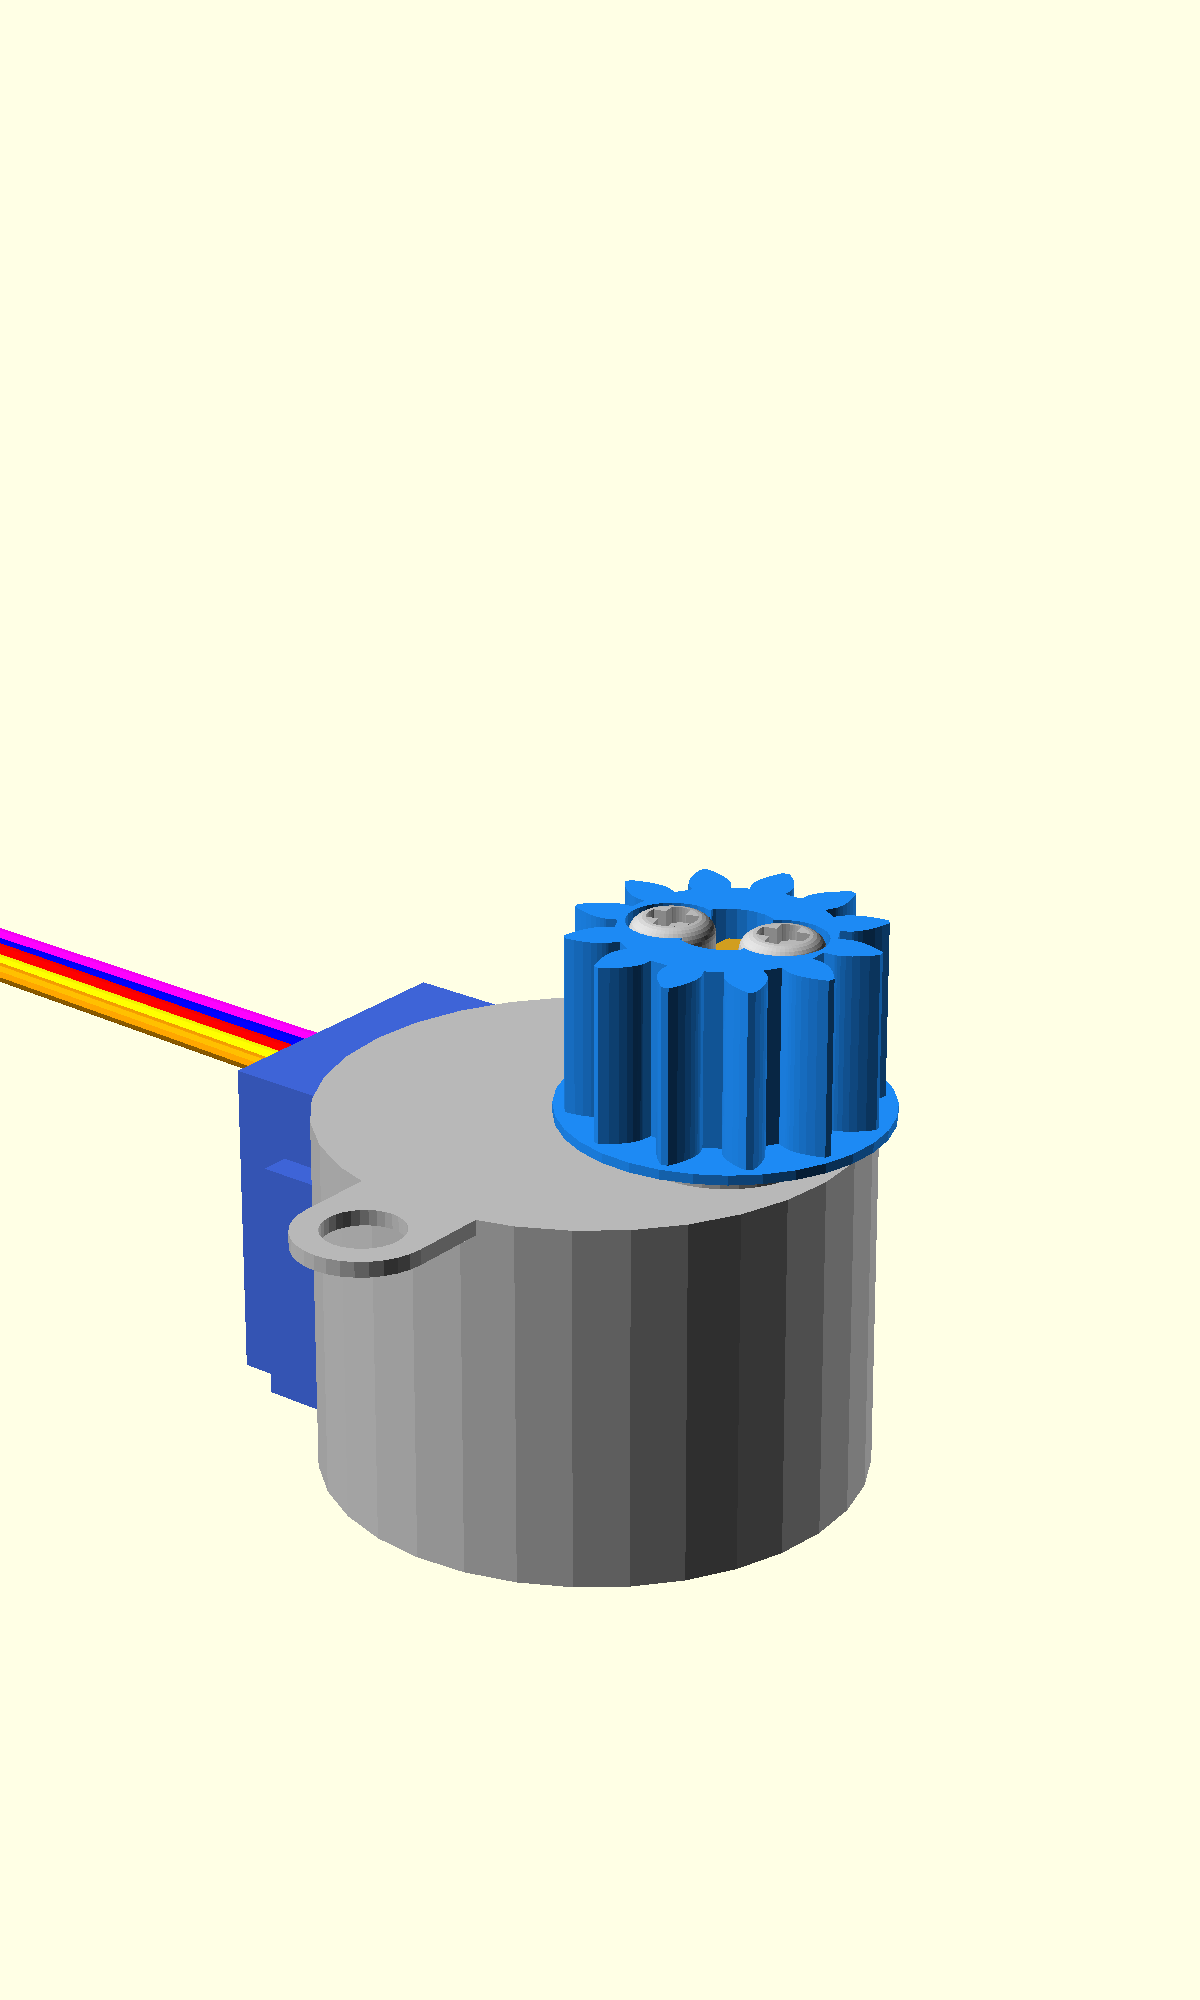
- Take two self tapping screws and drive them fully into the holes on either side of the shaft. #1 pozidrive screwdriver
- Repeat for the other two motors
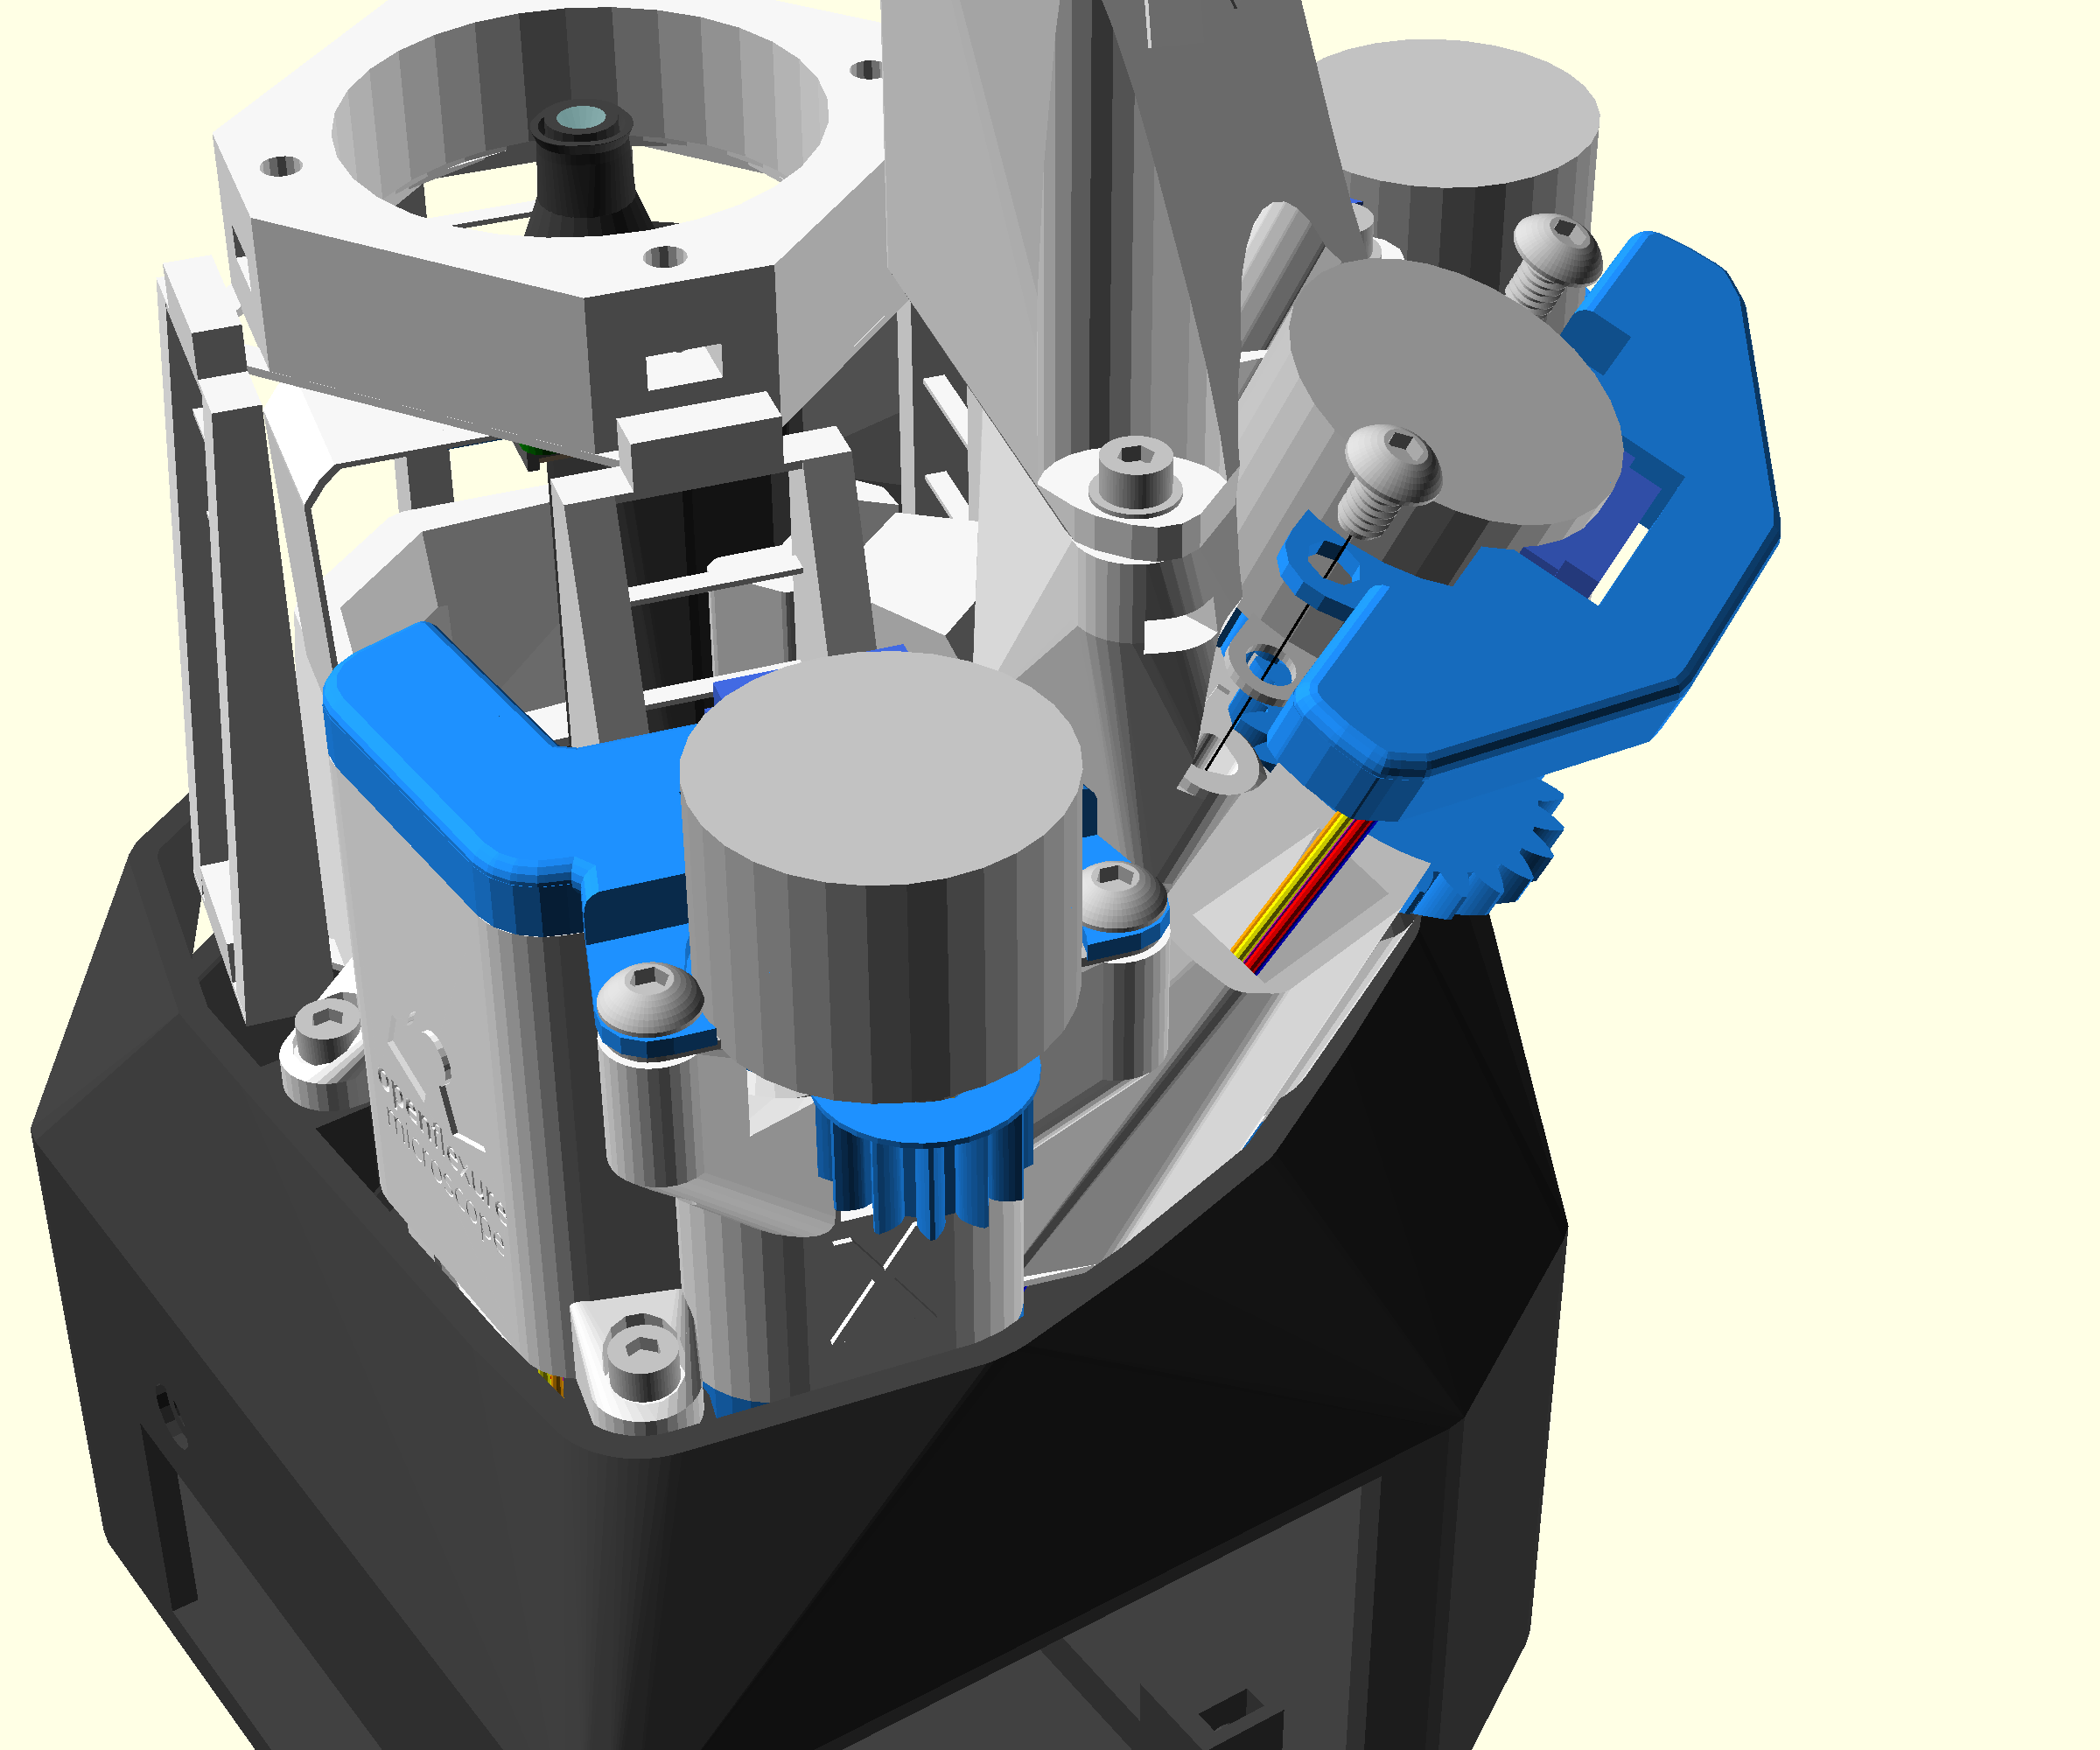
Step 2: Attach the x and y motors

Note that each motor has a cable tidy cap that is different. Which cap to use should be apparent from the shape.
- Get a 2.5mm Ball-end Allen key ready
- Feed the cable from the motor through the rectangular wall in the outer wall by the x-actuator.
- Place the motor on the motor lugs with the small gear towards the outside of the microscope
- Check that the small gear and the large gear are meshed correctly
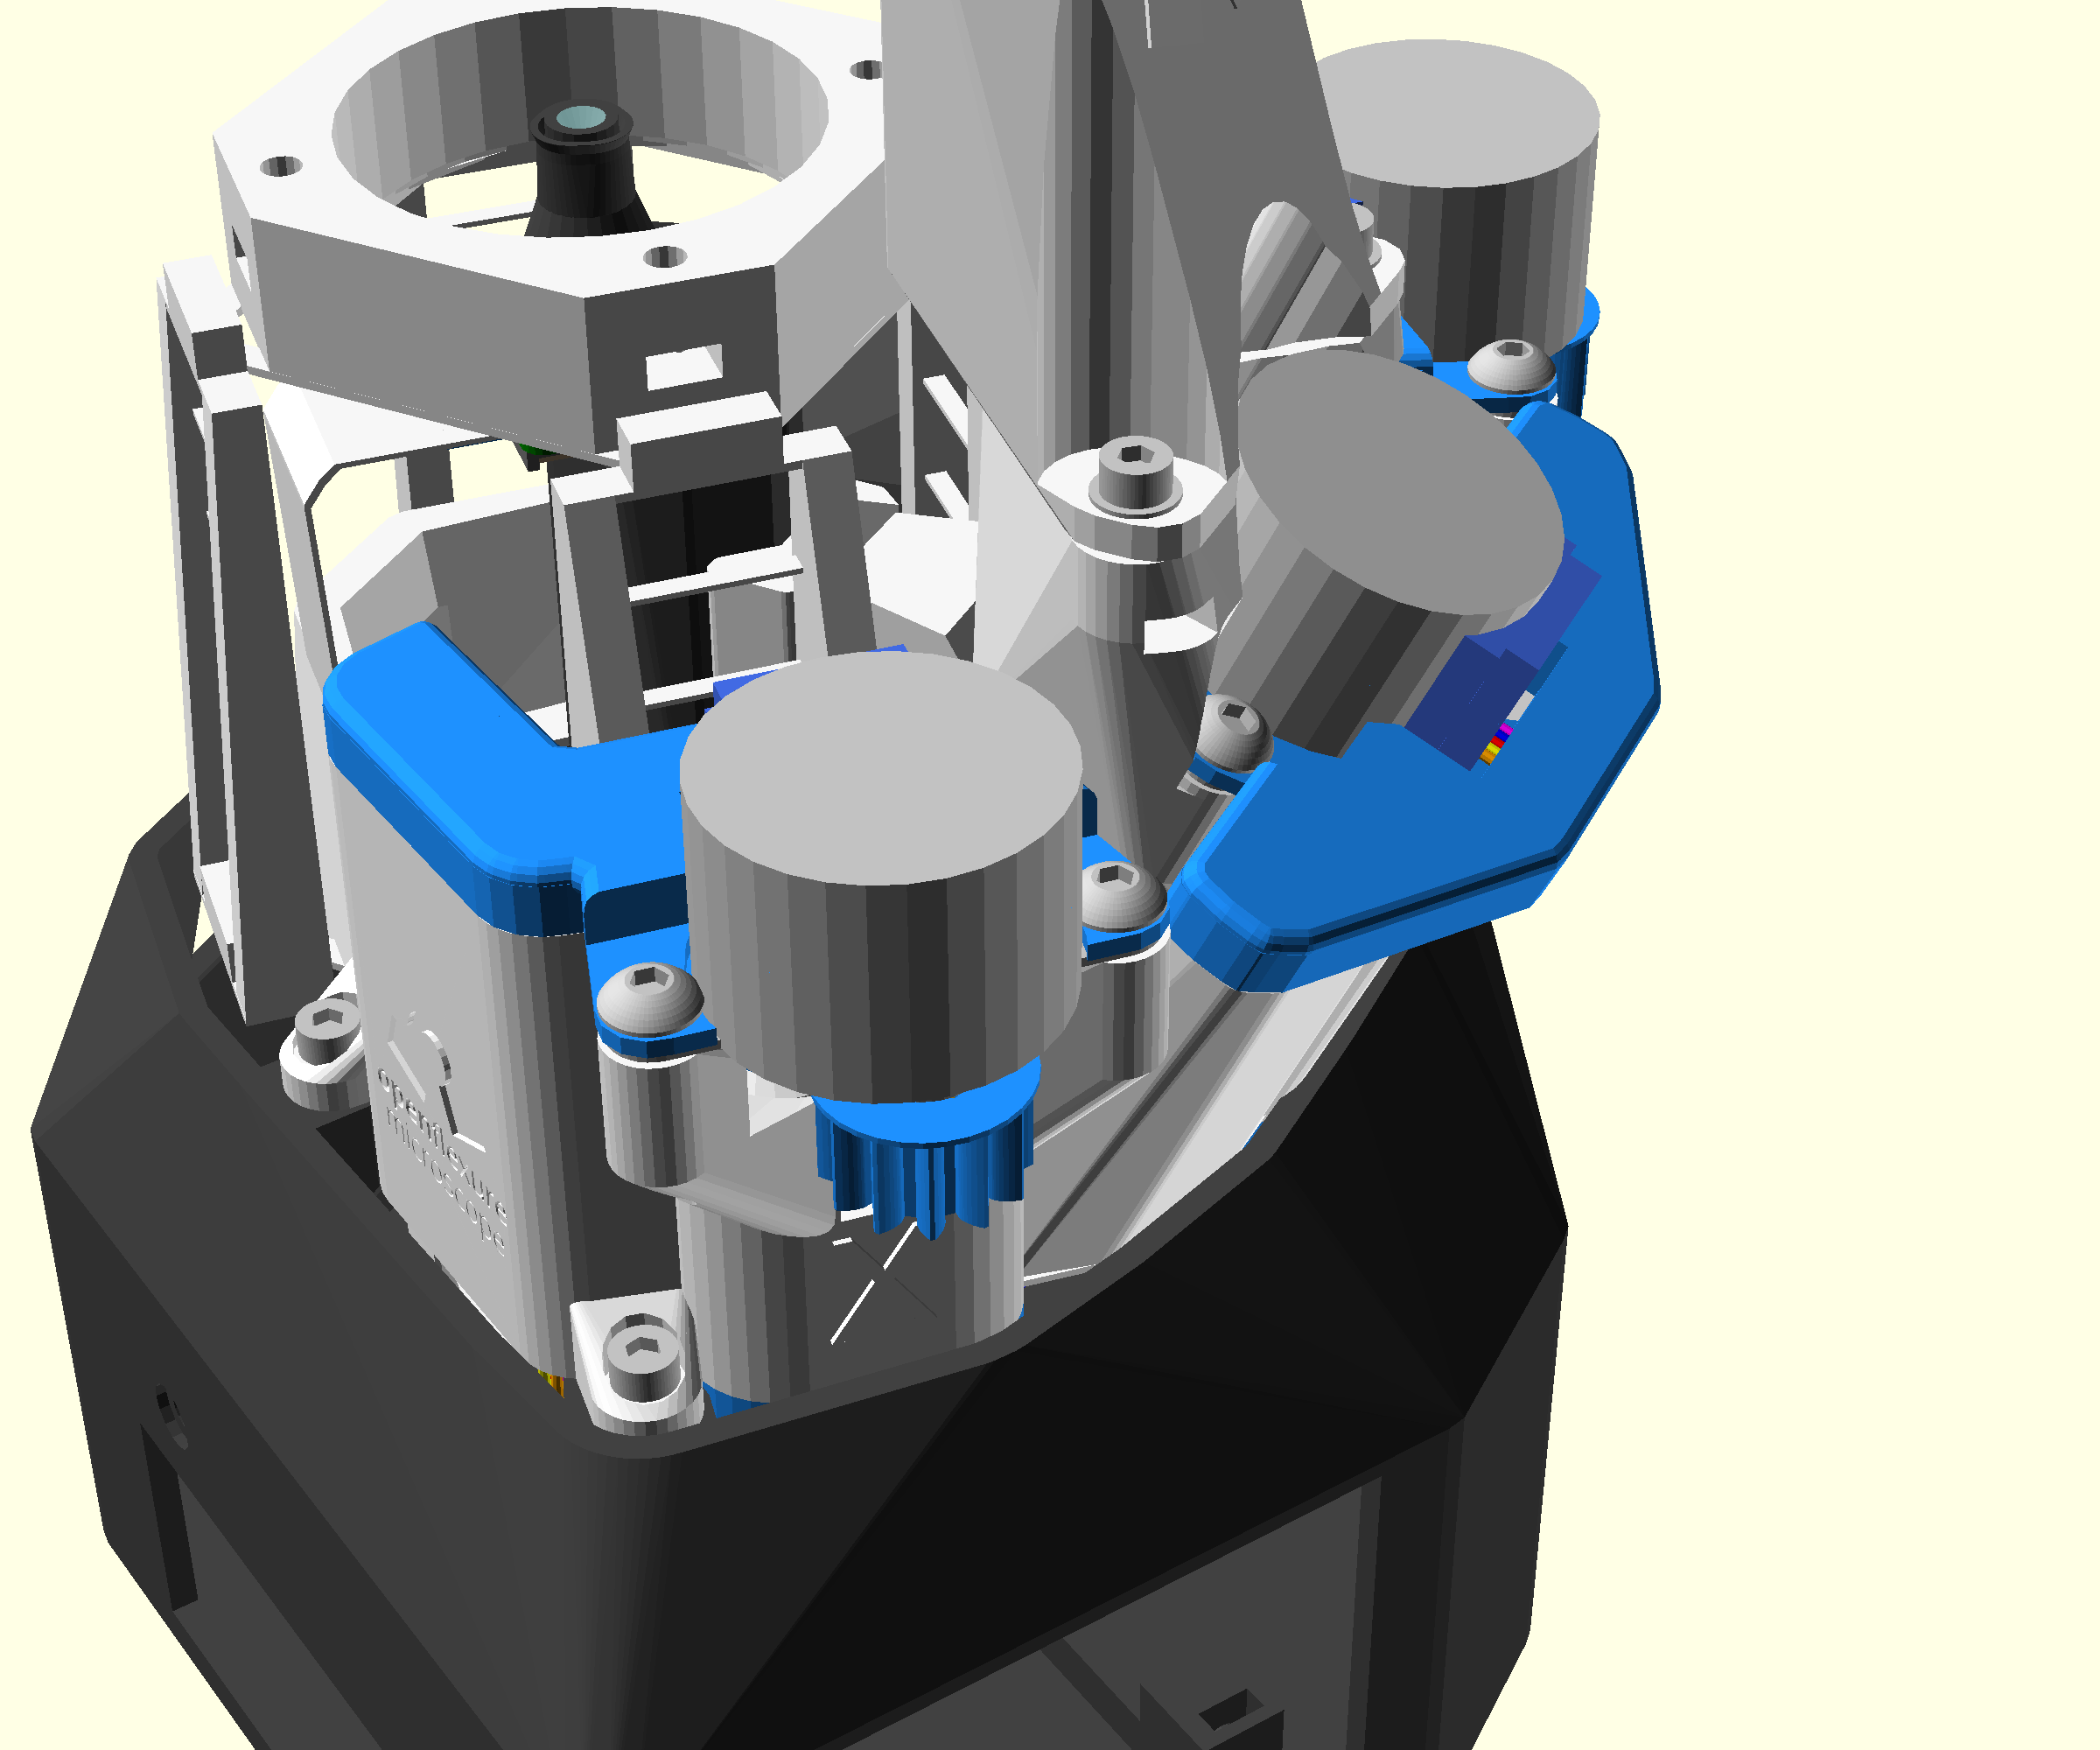
- Take the x cable tidy cap and place it over the motor
- Check that the motor cable is running through the cable tidy rather than pinched underneath.
- Fasten the motor and cable tidy caps to the motor lugs with two M4x6mm button head screws
- Repeat for y-actuator
Step 3: Attach the z motor
- Attach the motor to the z-actuator in the same way as they x and y actuators
- Feed the motor cable down the rectangular slot to the left of the actuator.