Assemble the actuators
There is one "actuator column" for each of the three axes of the OpenFlexure Microscope stage. These allow you to move the sample in X and Y, or focus the microscope by moving in Z.
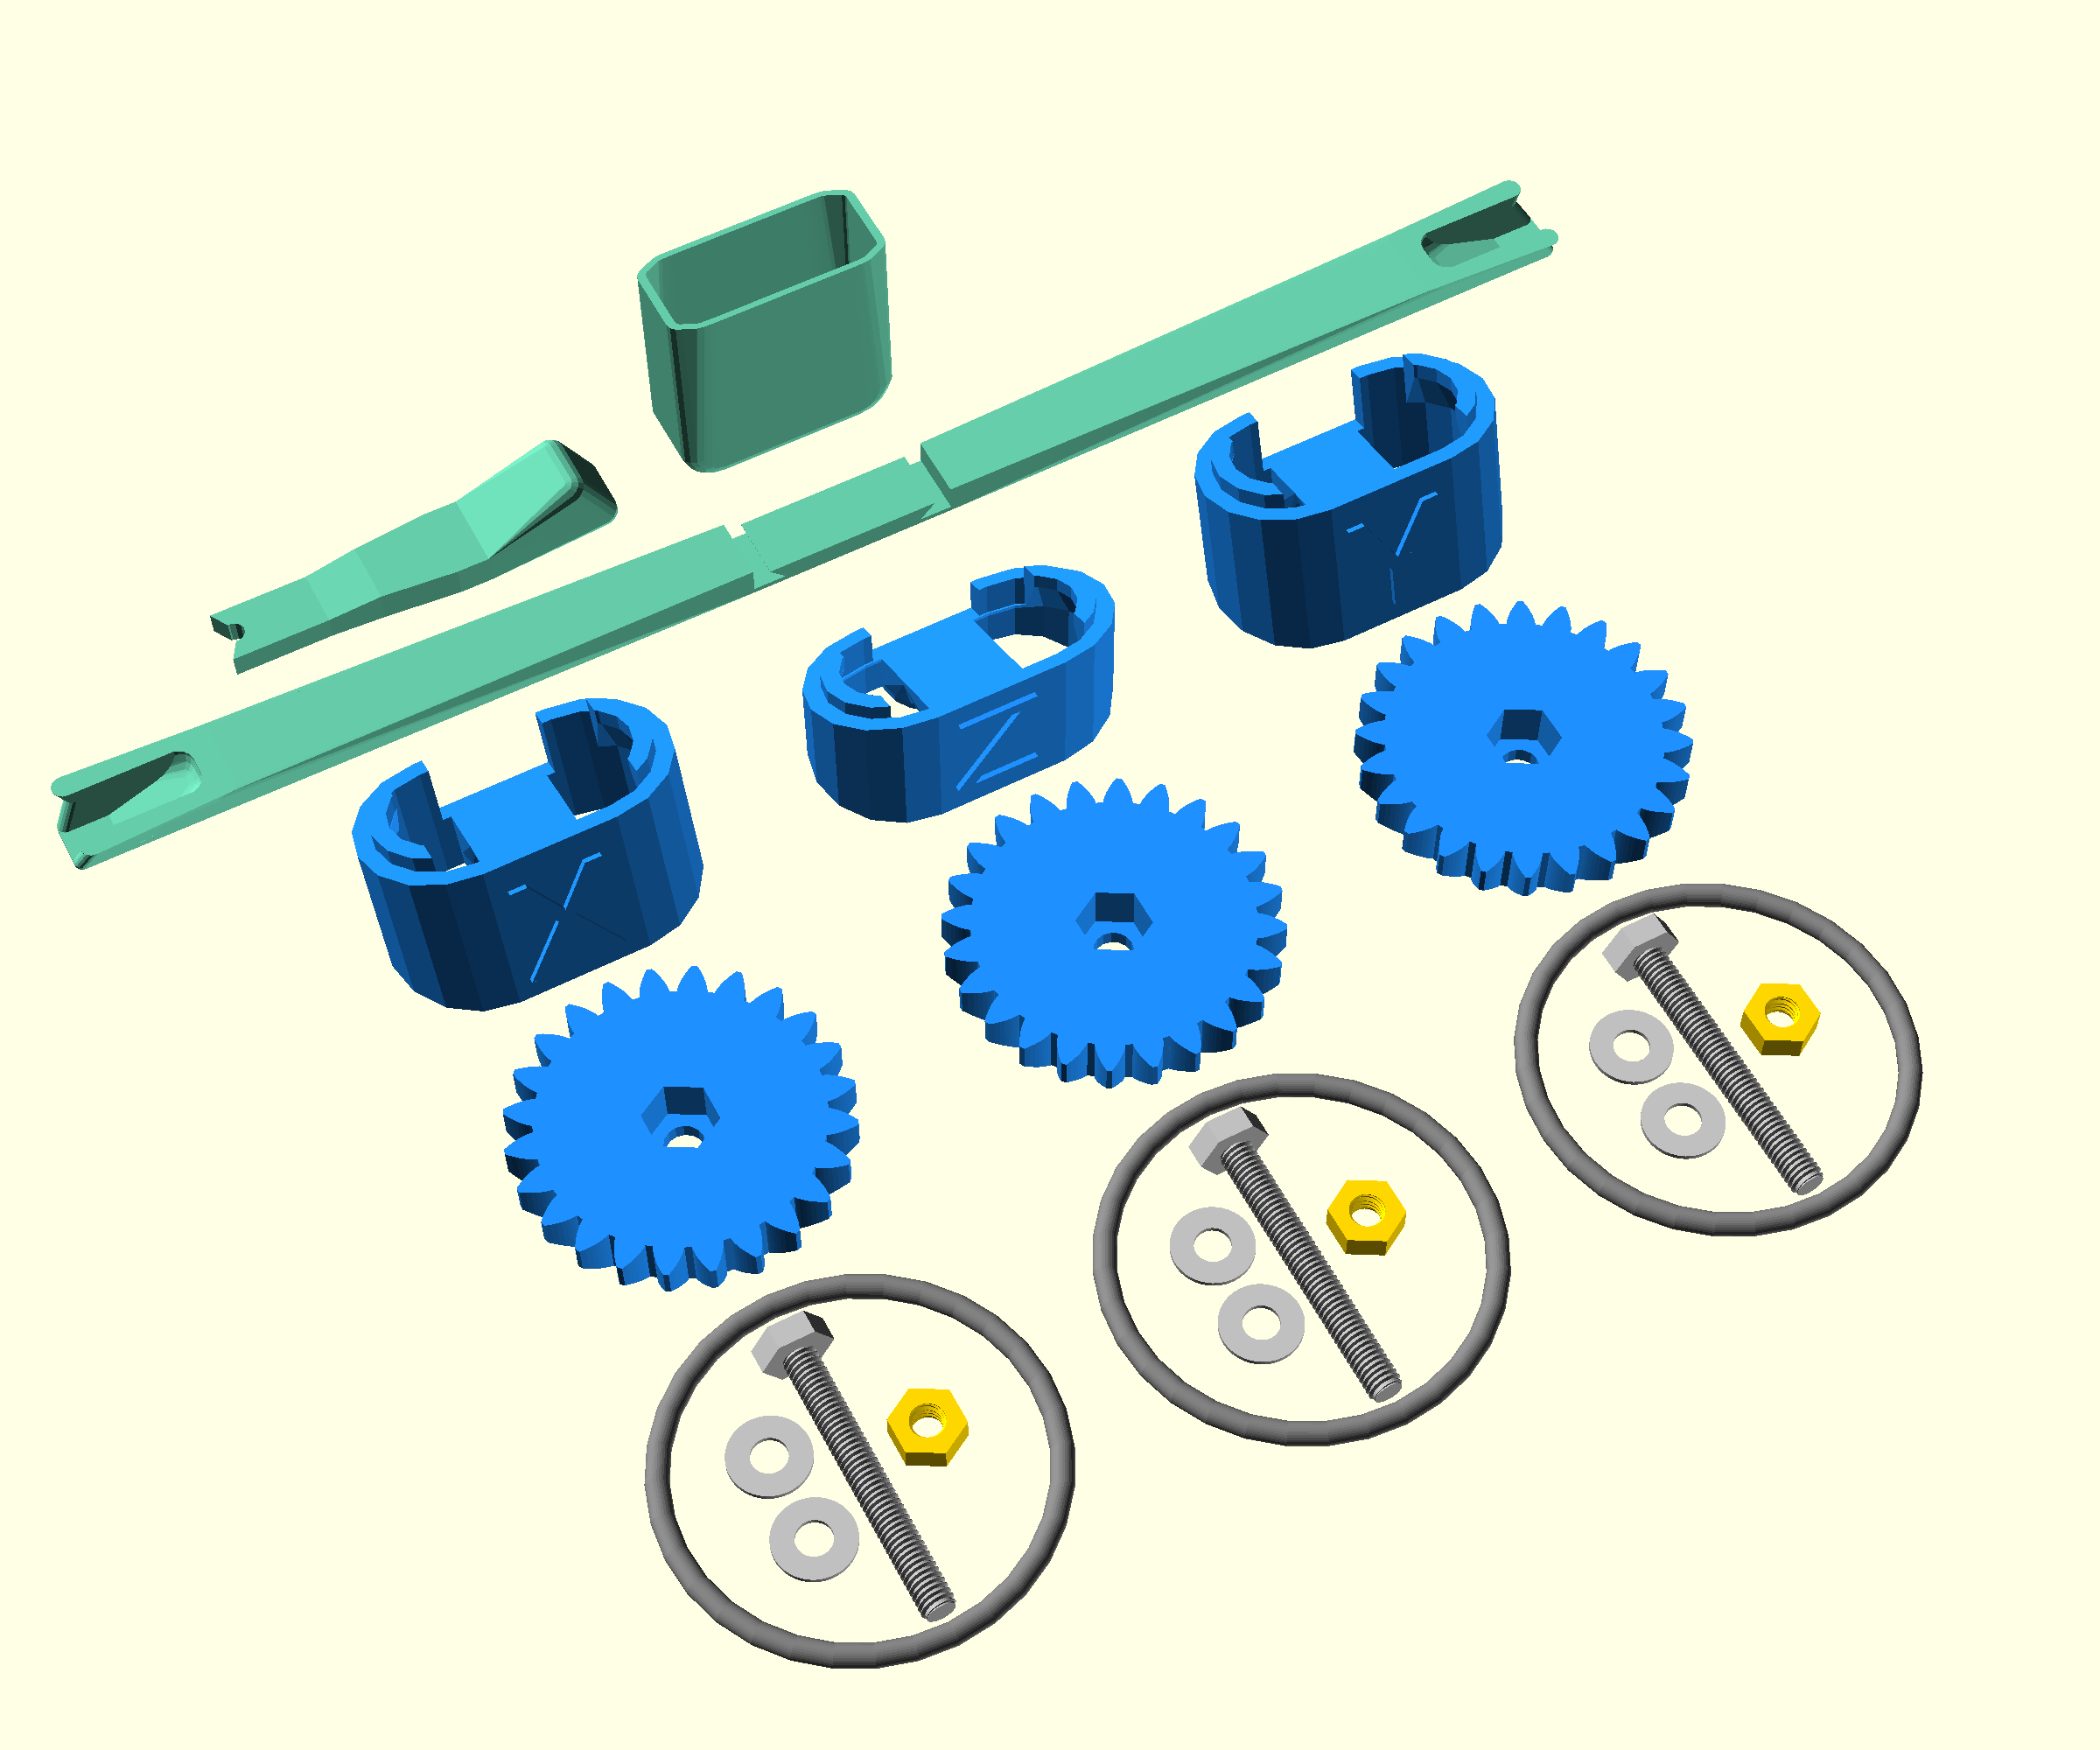
For this section you will need:
Printed Parts
- 3 feet - - Each actuator has its own labelled foot.
- 3 large gears
Printed Tools
- 1 band tool
- 1 band tool cover
- 1 nut tool
Sub-Assemblies
Consumables
- 3 drops of light oil - - Don't skip this or you will damage the screws
Mechancial Components
- 3 M3 brass nut
- 6 M3 stainless steel washers
- 3 M3x25mm stainless steel hex bolt
- 3 Viton O-ring (30mmx2mm) - - "Viton band"
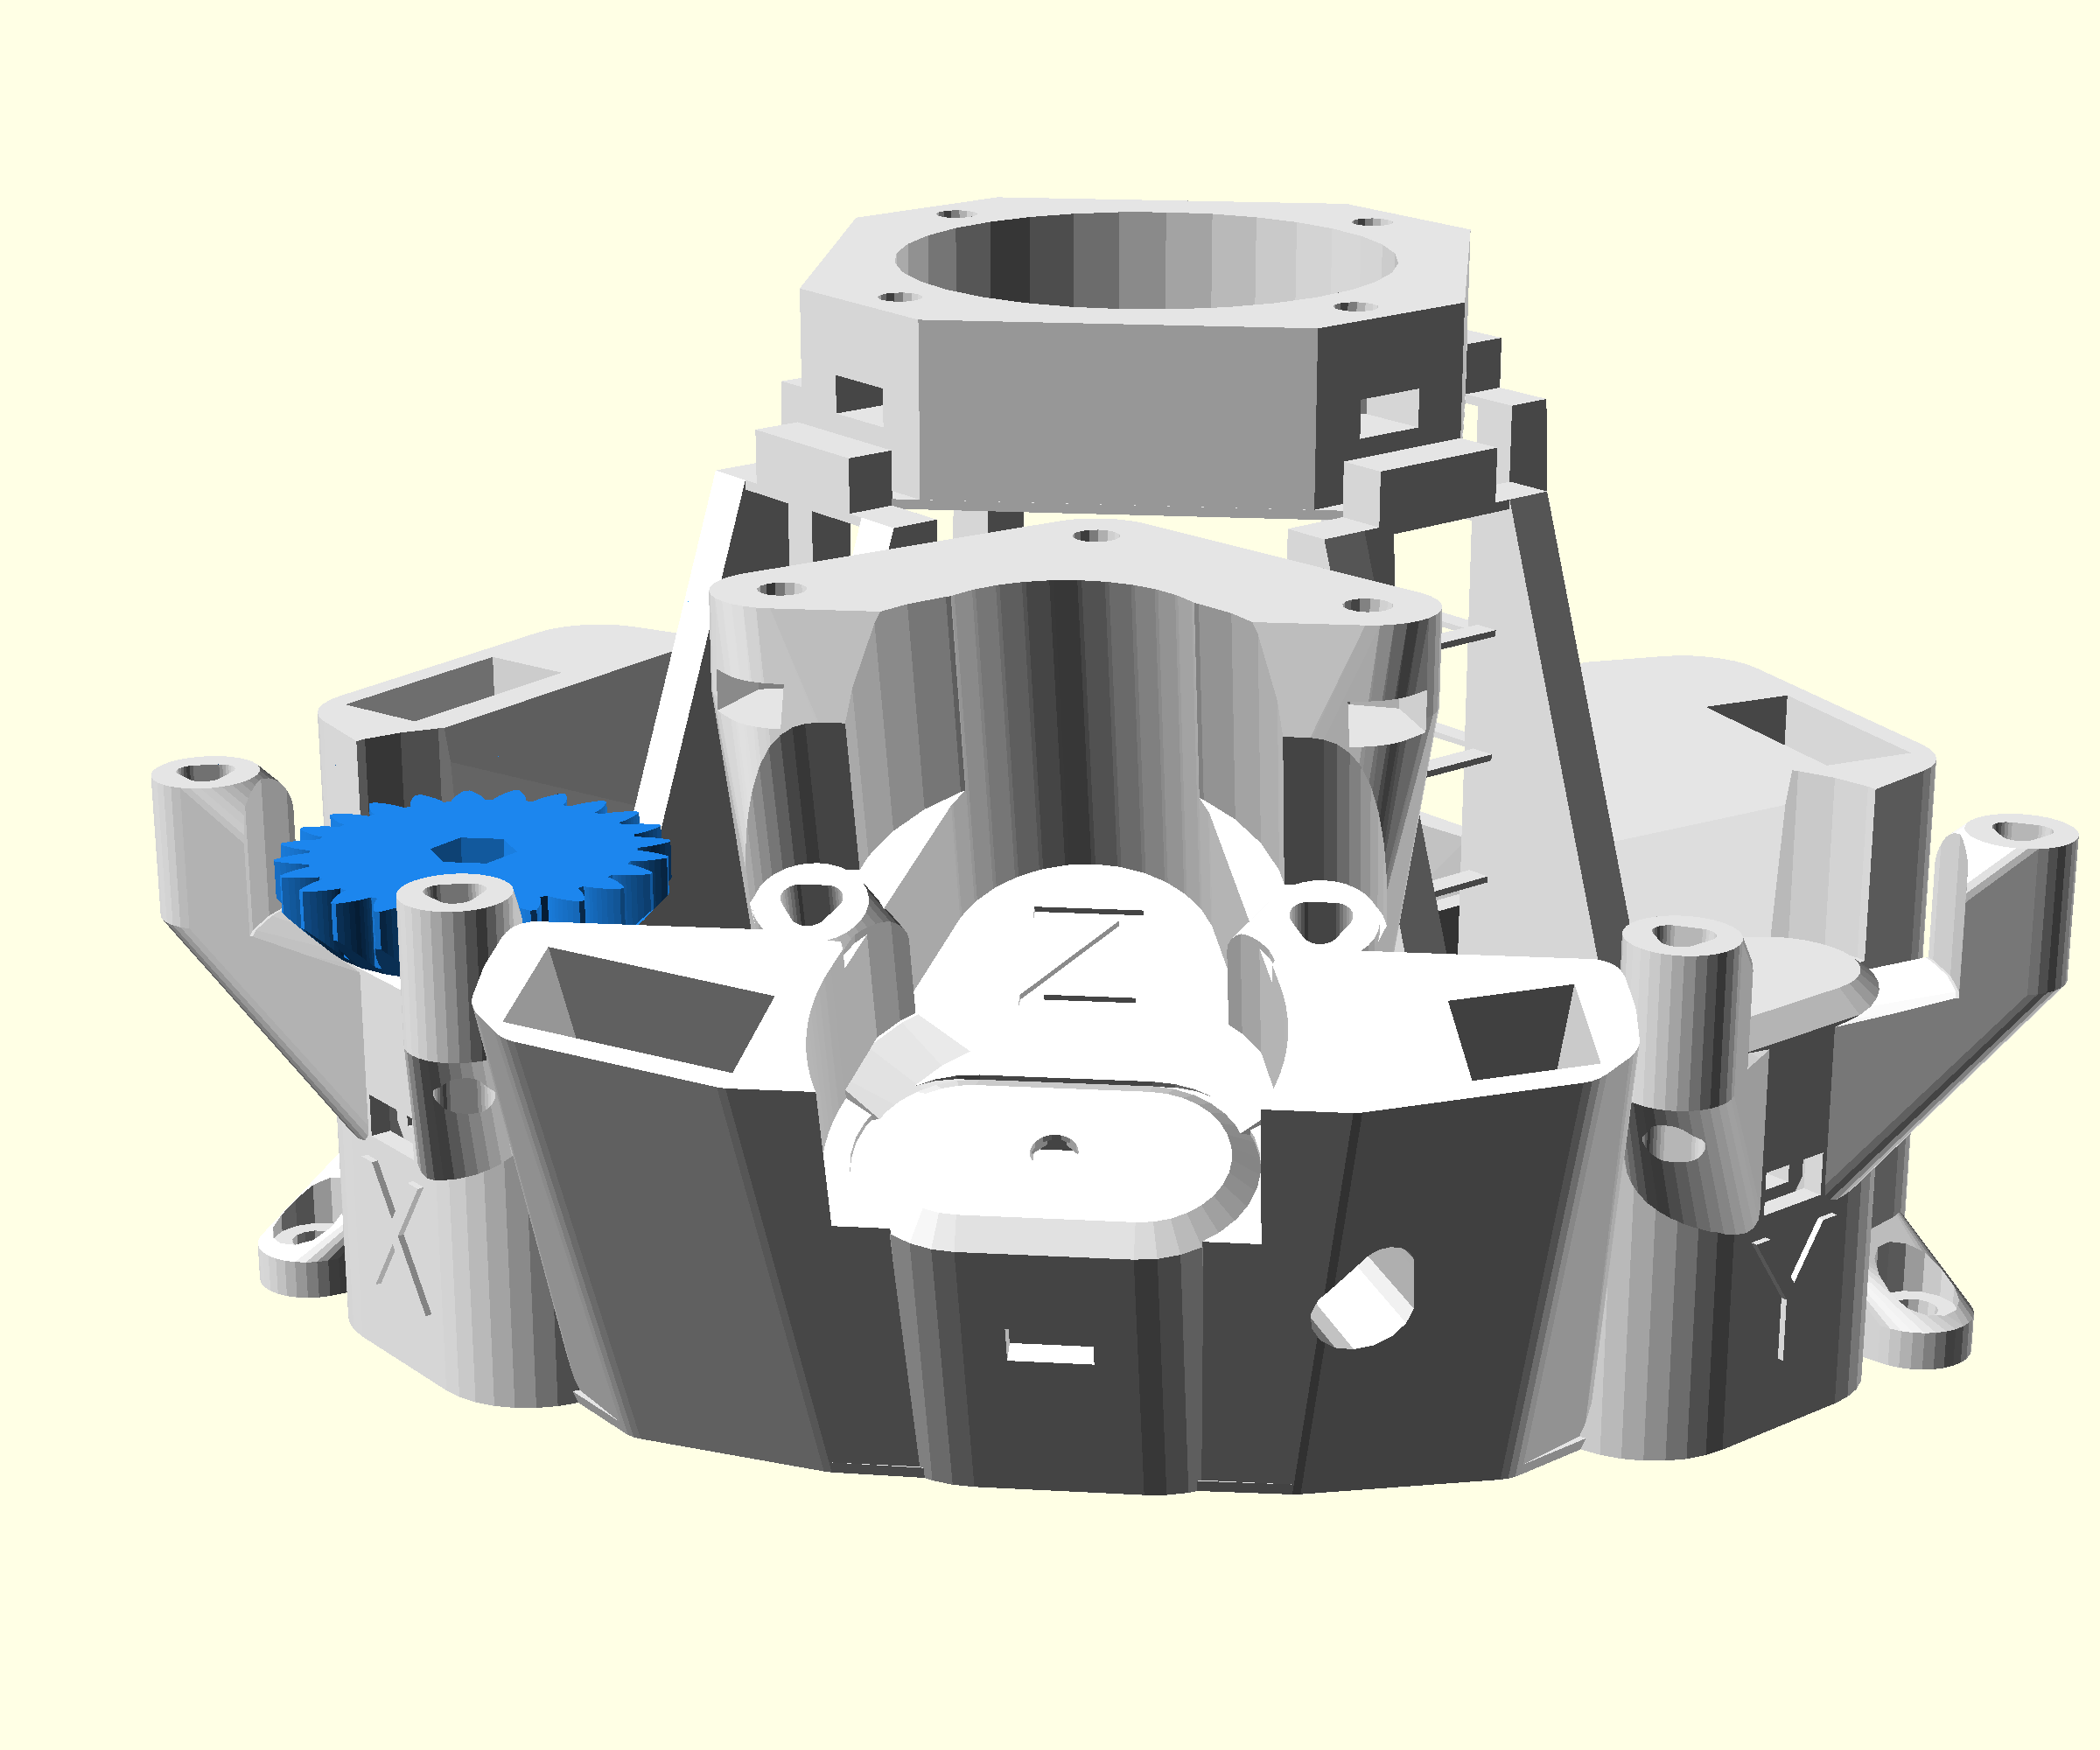
Step 1: Insert the nut
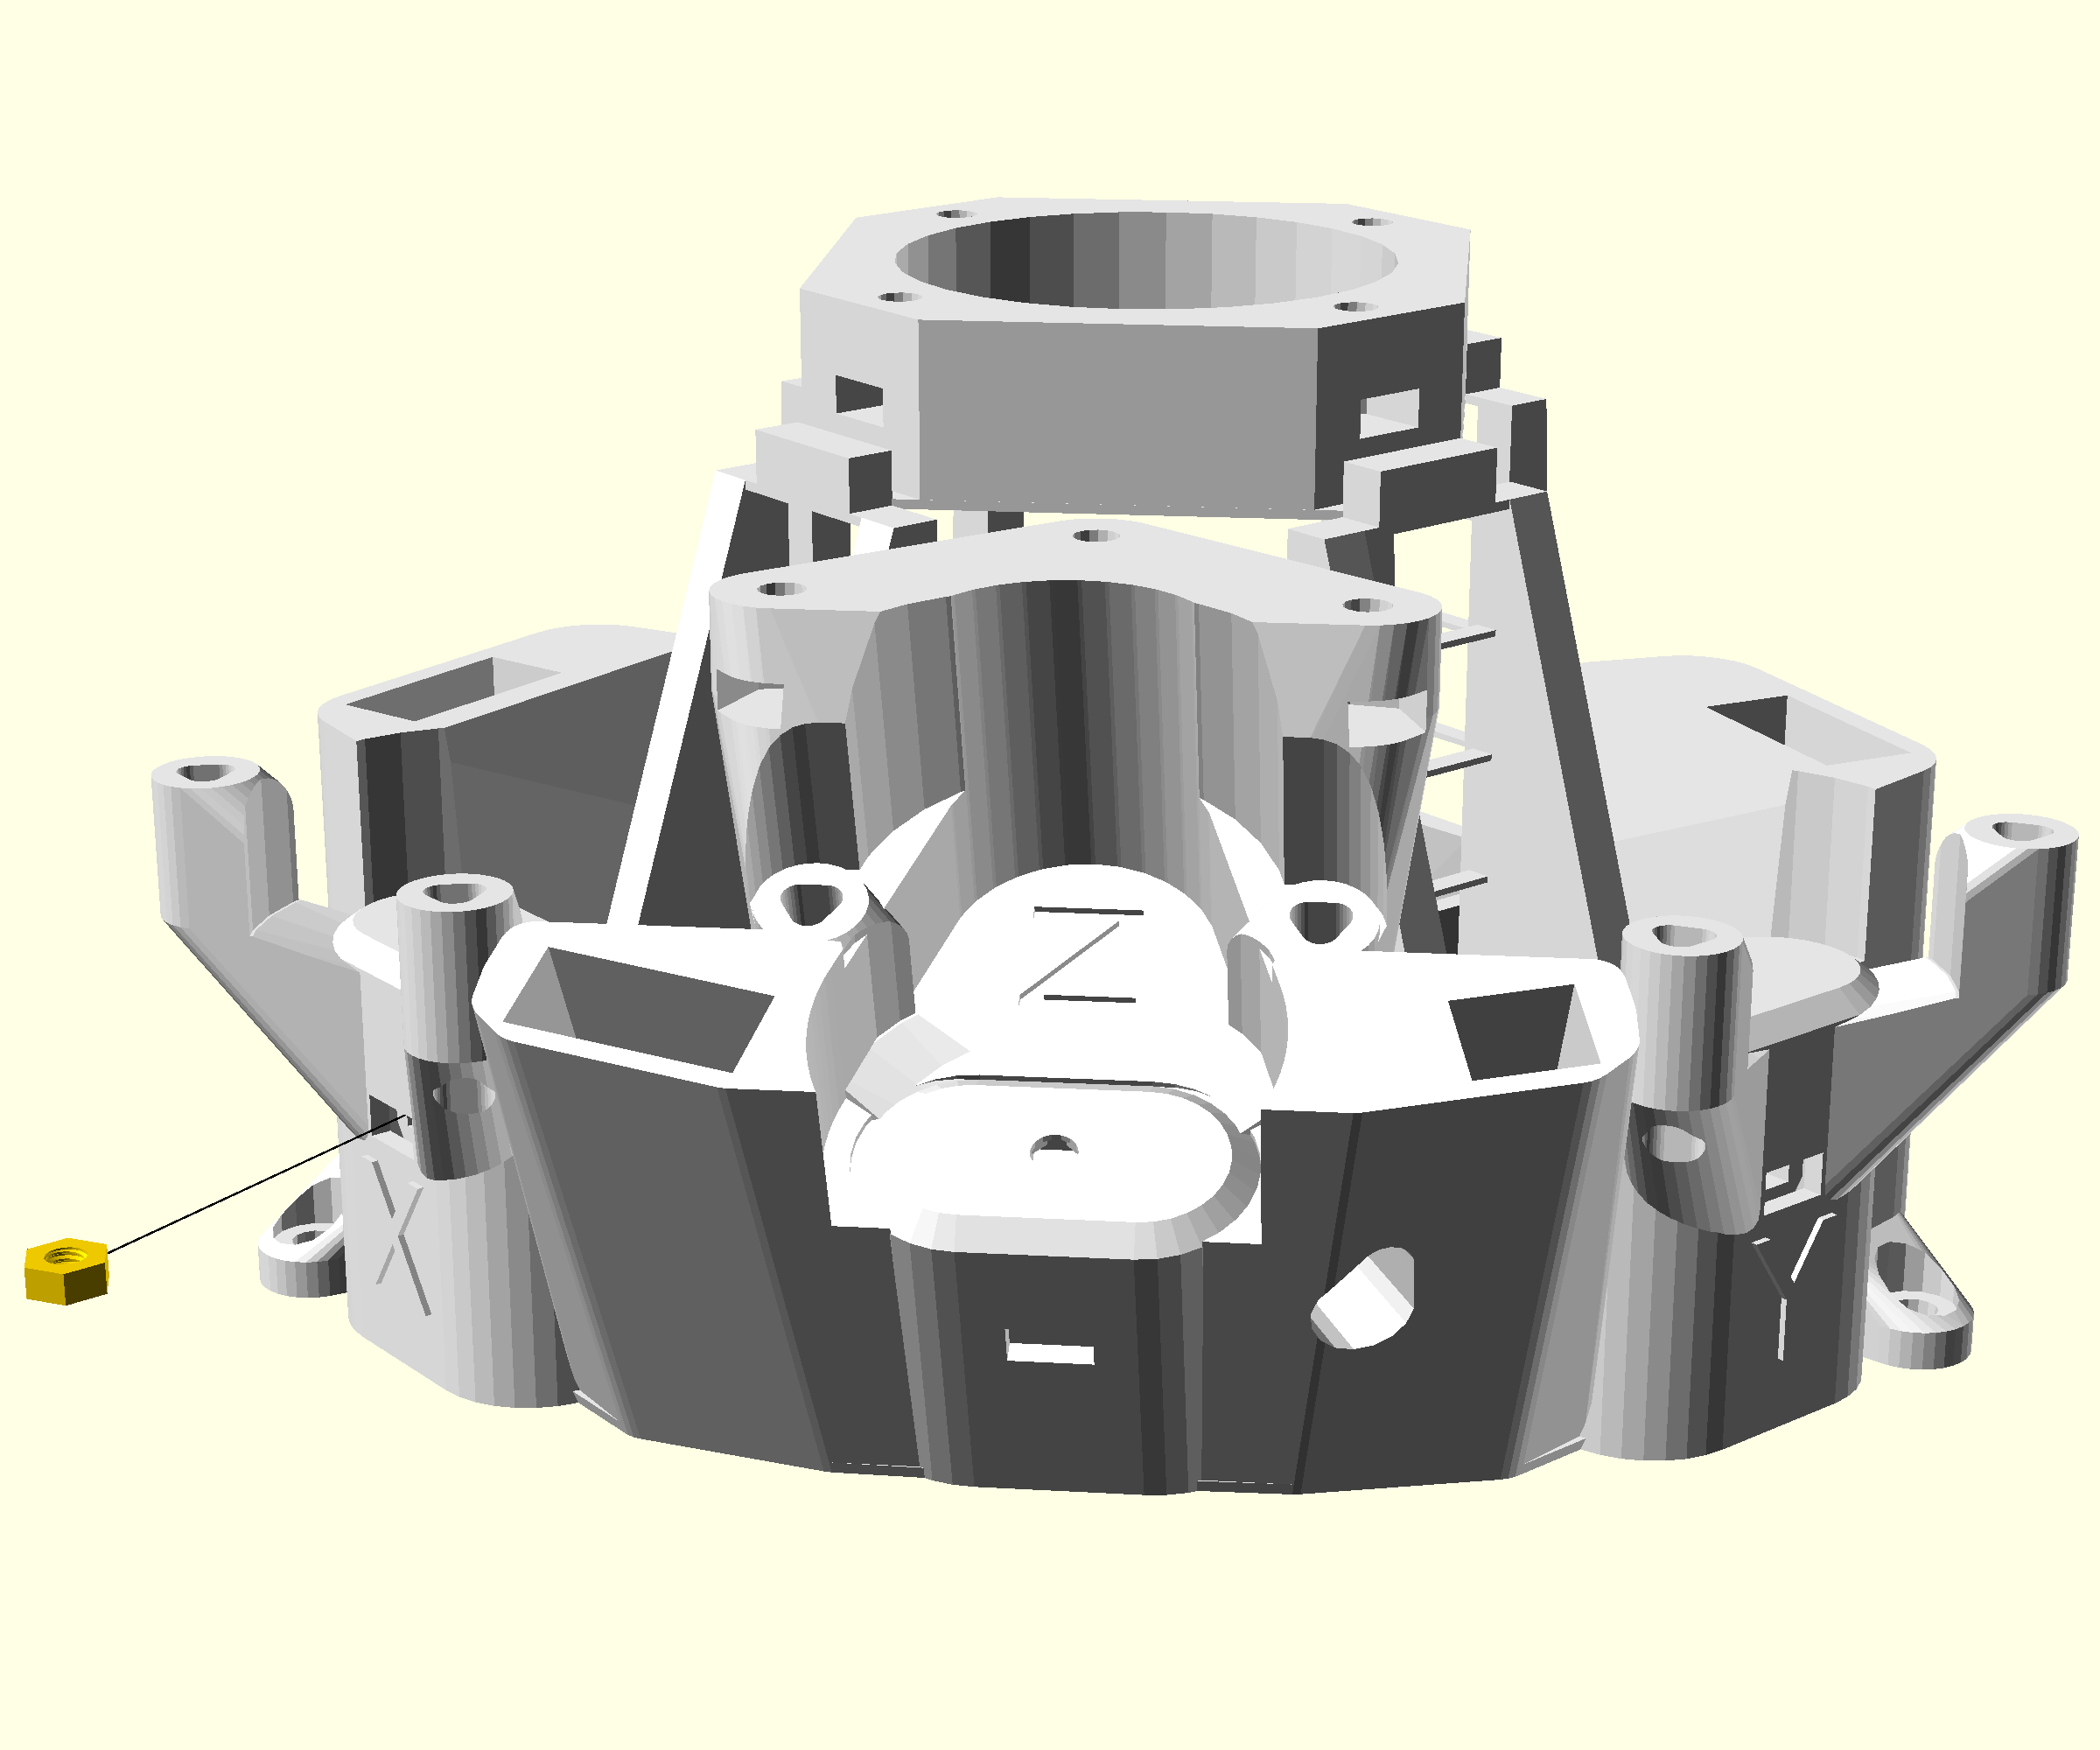
- Insert a brass nut into the x actuator through the hole in the front of the main body.
- Look through the hole you should see the side of the nut. If it is tilted you can tap the microscope until it sits flat.
Step 2: Attach the gear
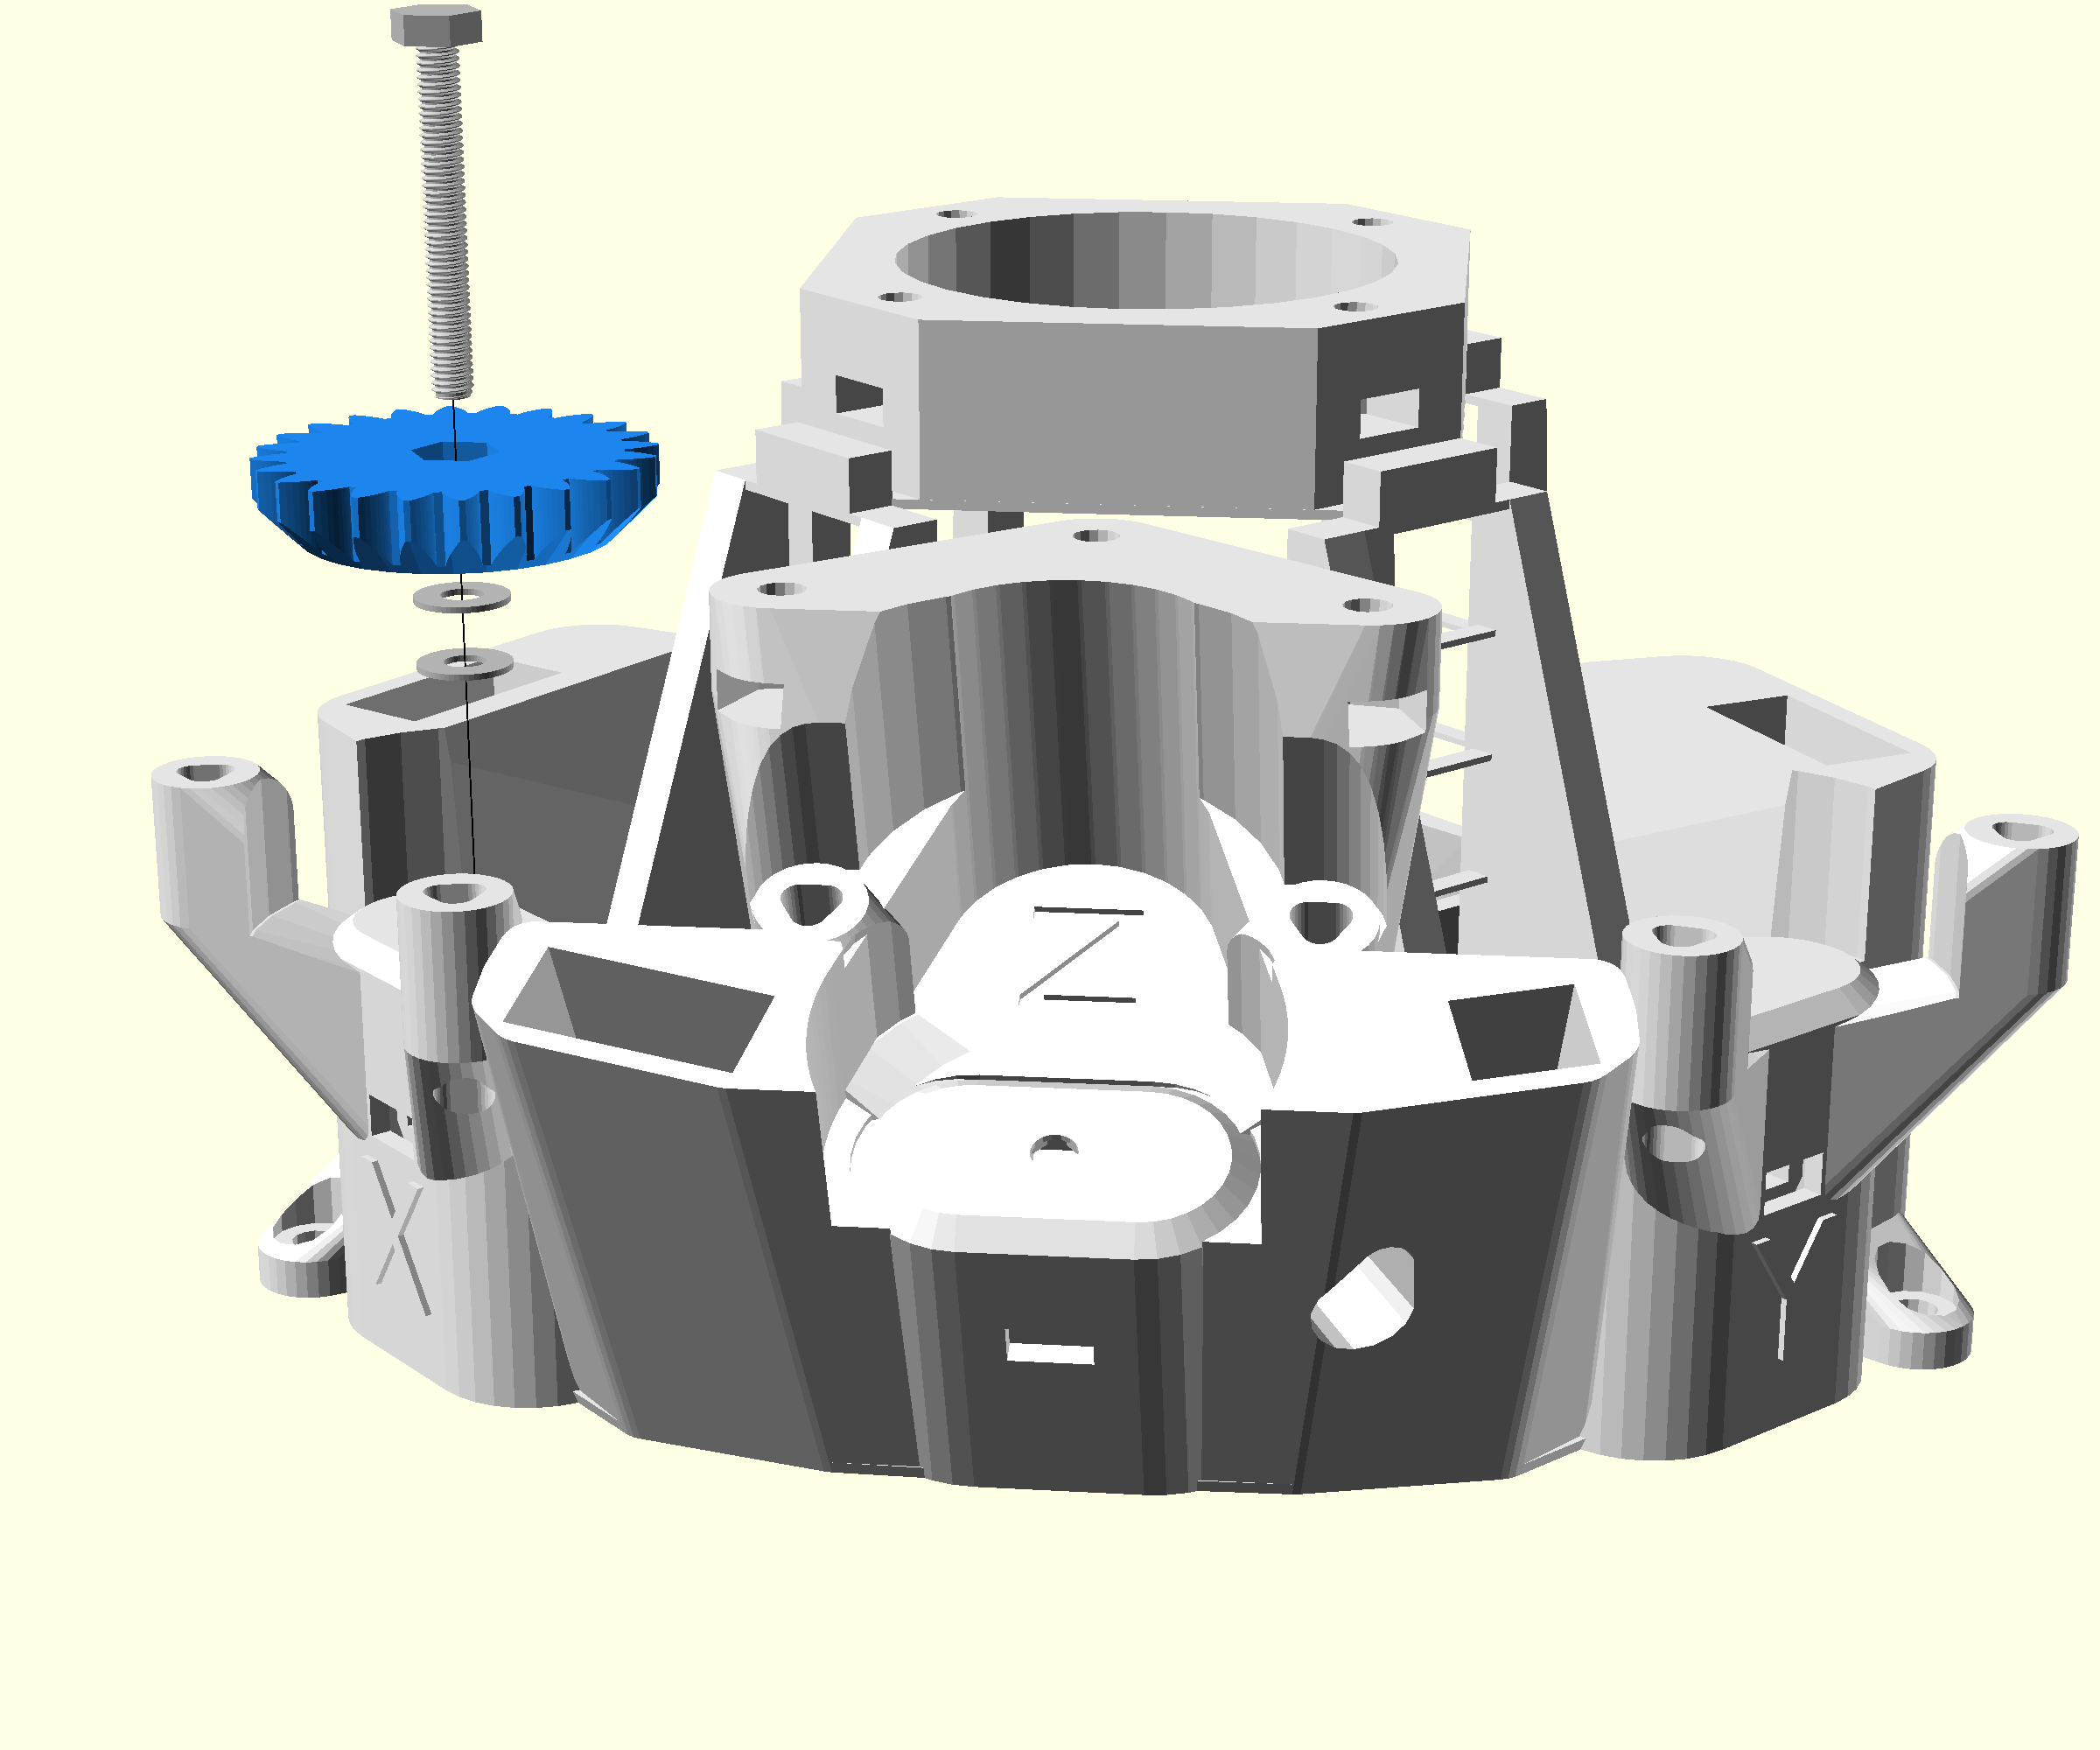
- Take one of the hex bolts
- Push it through one of the large gears and two washers
- Push the screw through the hole at the top of the x actuator until it reaches the nut
- Screw the bolt into the nut (If the nut turns hold it in place with the nut tool)
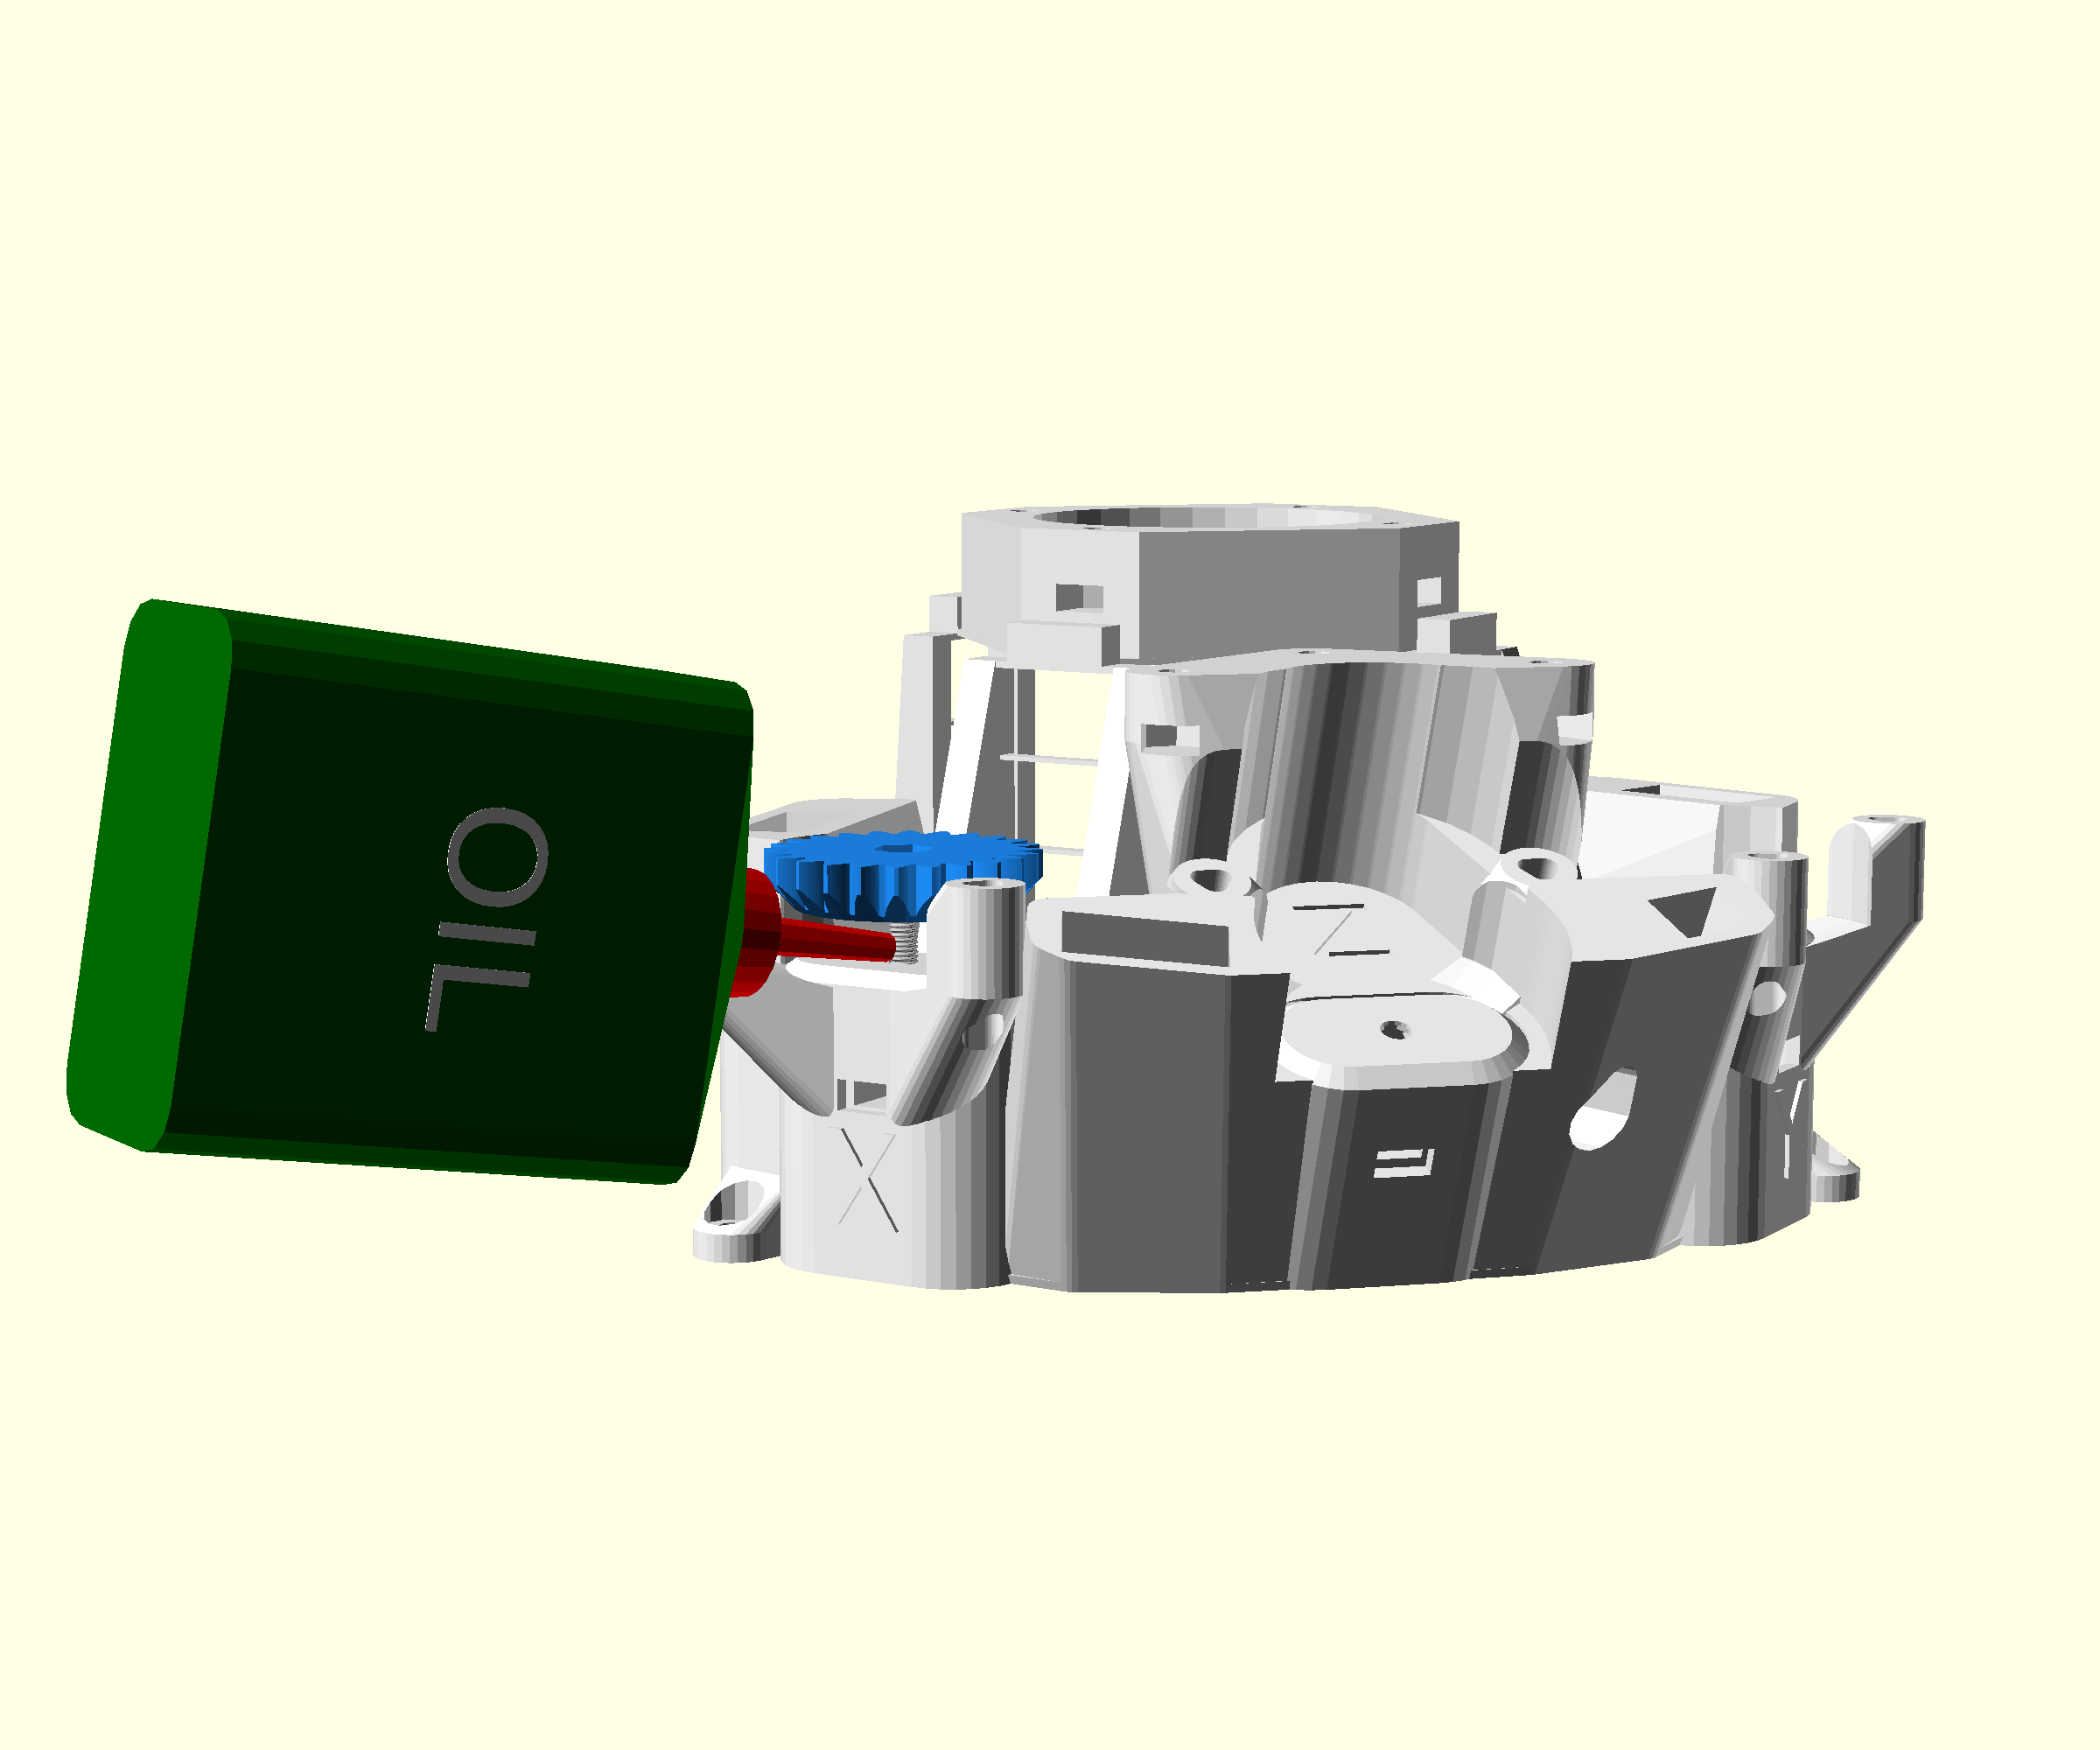
Step 3: Oil the lead screw
- Lift the gear so you can see about 5mm of screw thread underneath
- Add one drop of light oil onto the screw thread
Step 4: Prepare the actuator
- Look through the hole you inserted the nut
- You should be able to see the screw thread of the hex bolt
- Rotate the gear until the screw is clearly visible through the hole
- Push the nut tool into the hole so the internal part cannot move
Step 5: Attaching the viton bands and foot
This is the trickiest part of the microscope build. In this step we will clip bands onto hooks inside each actuator.
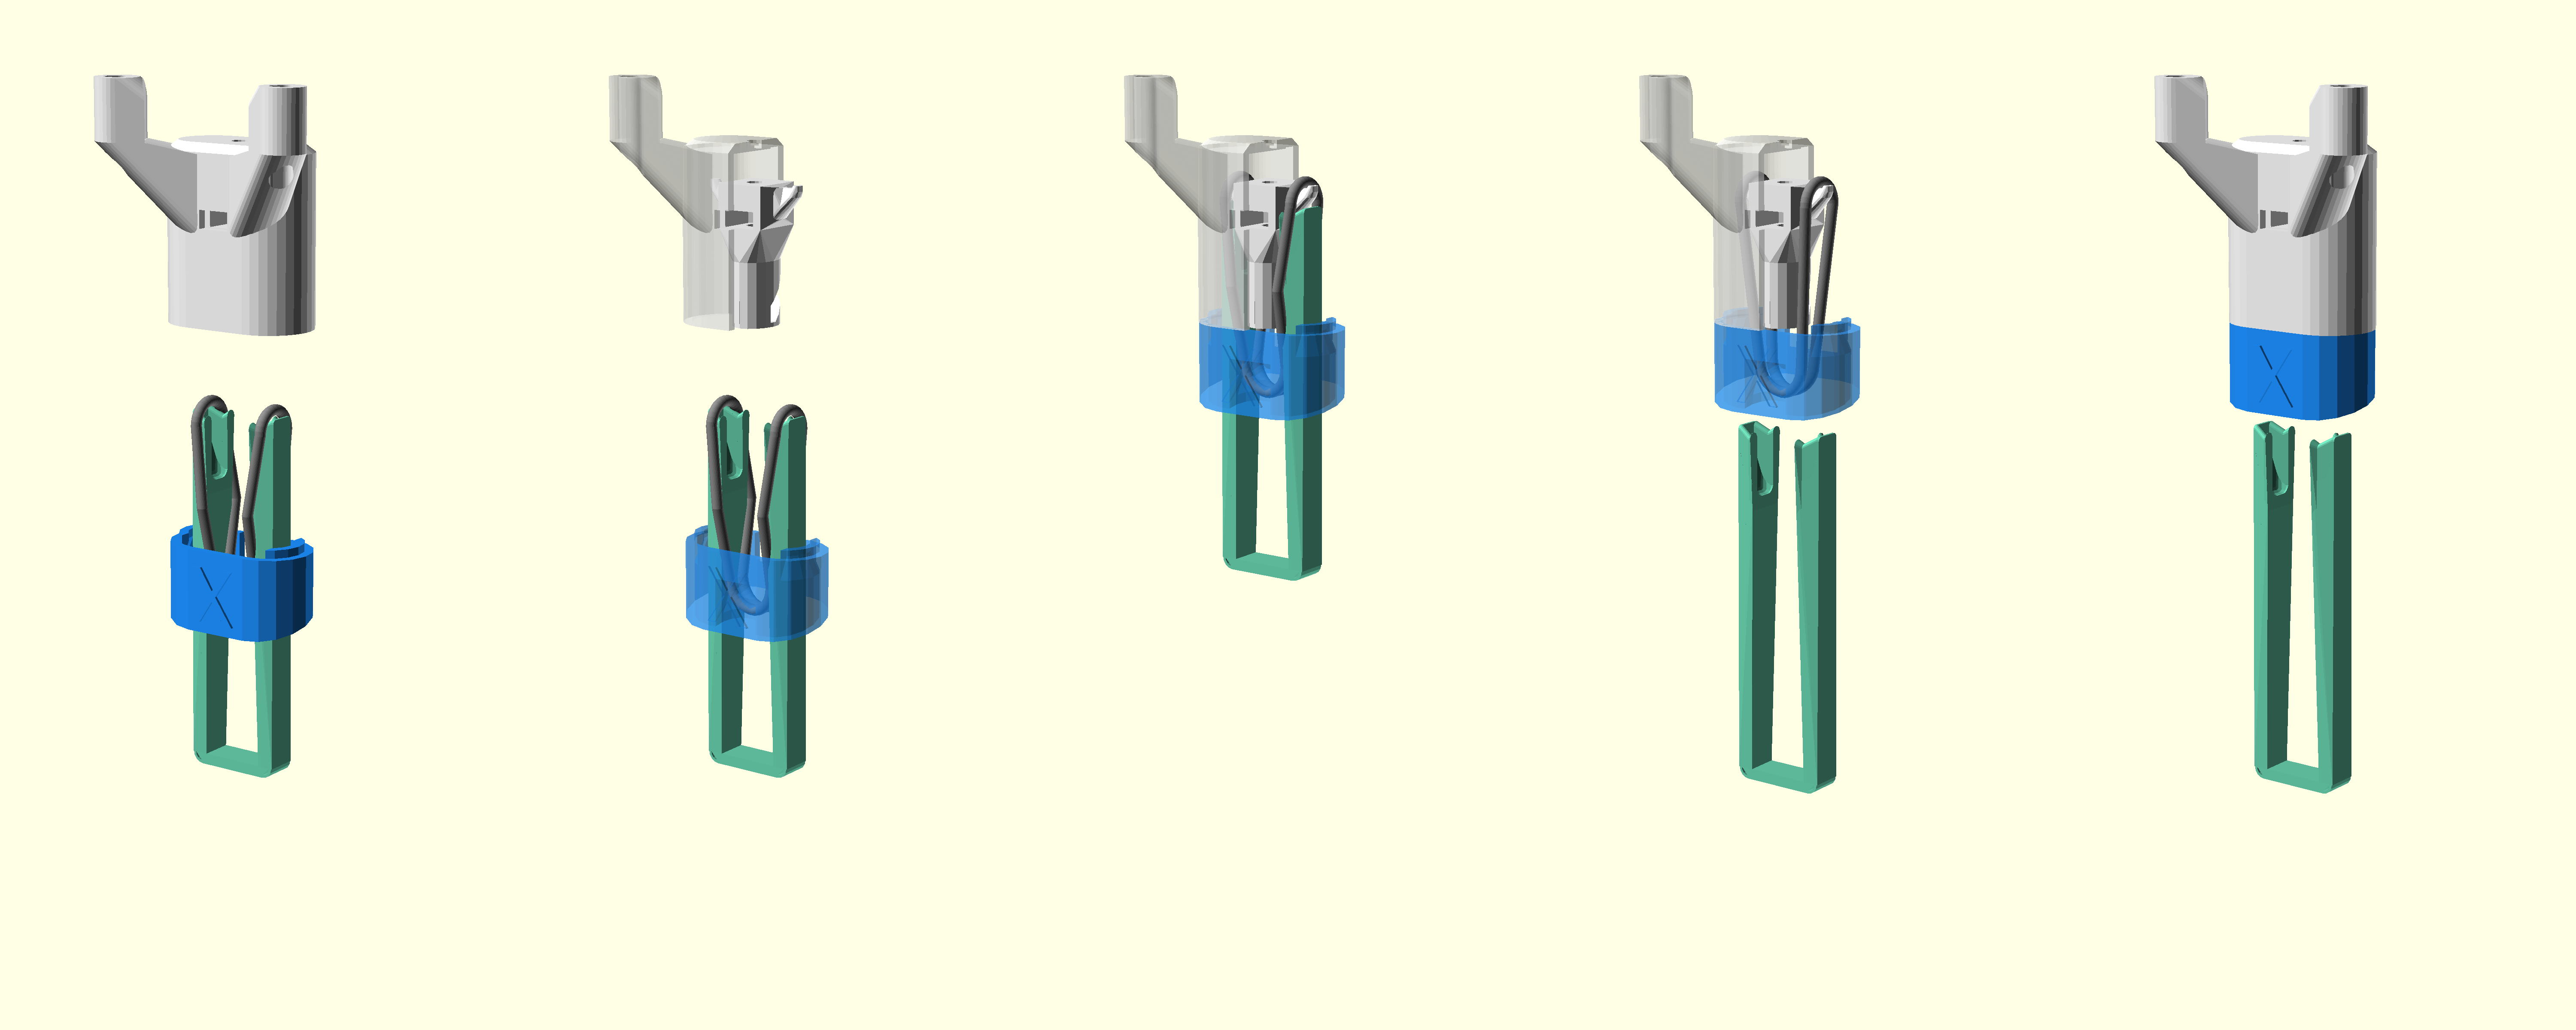
- Take the foot for the x actuator
- Loop a viton band through the foot
- Push the band tool through the foot hook the band onto the tool on each side.
- Push the band tool cover onto the bottom of the band tool
- Align the foot under the microscope so that the letter faces outwards
- Check that the nut tool is still blocking the actuator column.
- Push the band tool into the microscope until it clicks
- Remove the band tool.
If you had problems with this step see [troubleshooting actuator assembly].
Step 6: Seat the foot
- If the foot did not click into place during actuator assembly align it and push it into place
- The foot should sit flush with the base of the microscope
- The front of the foot should align with the front of the actuator
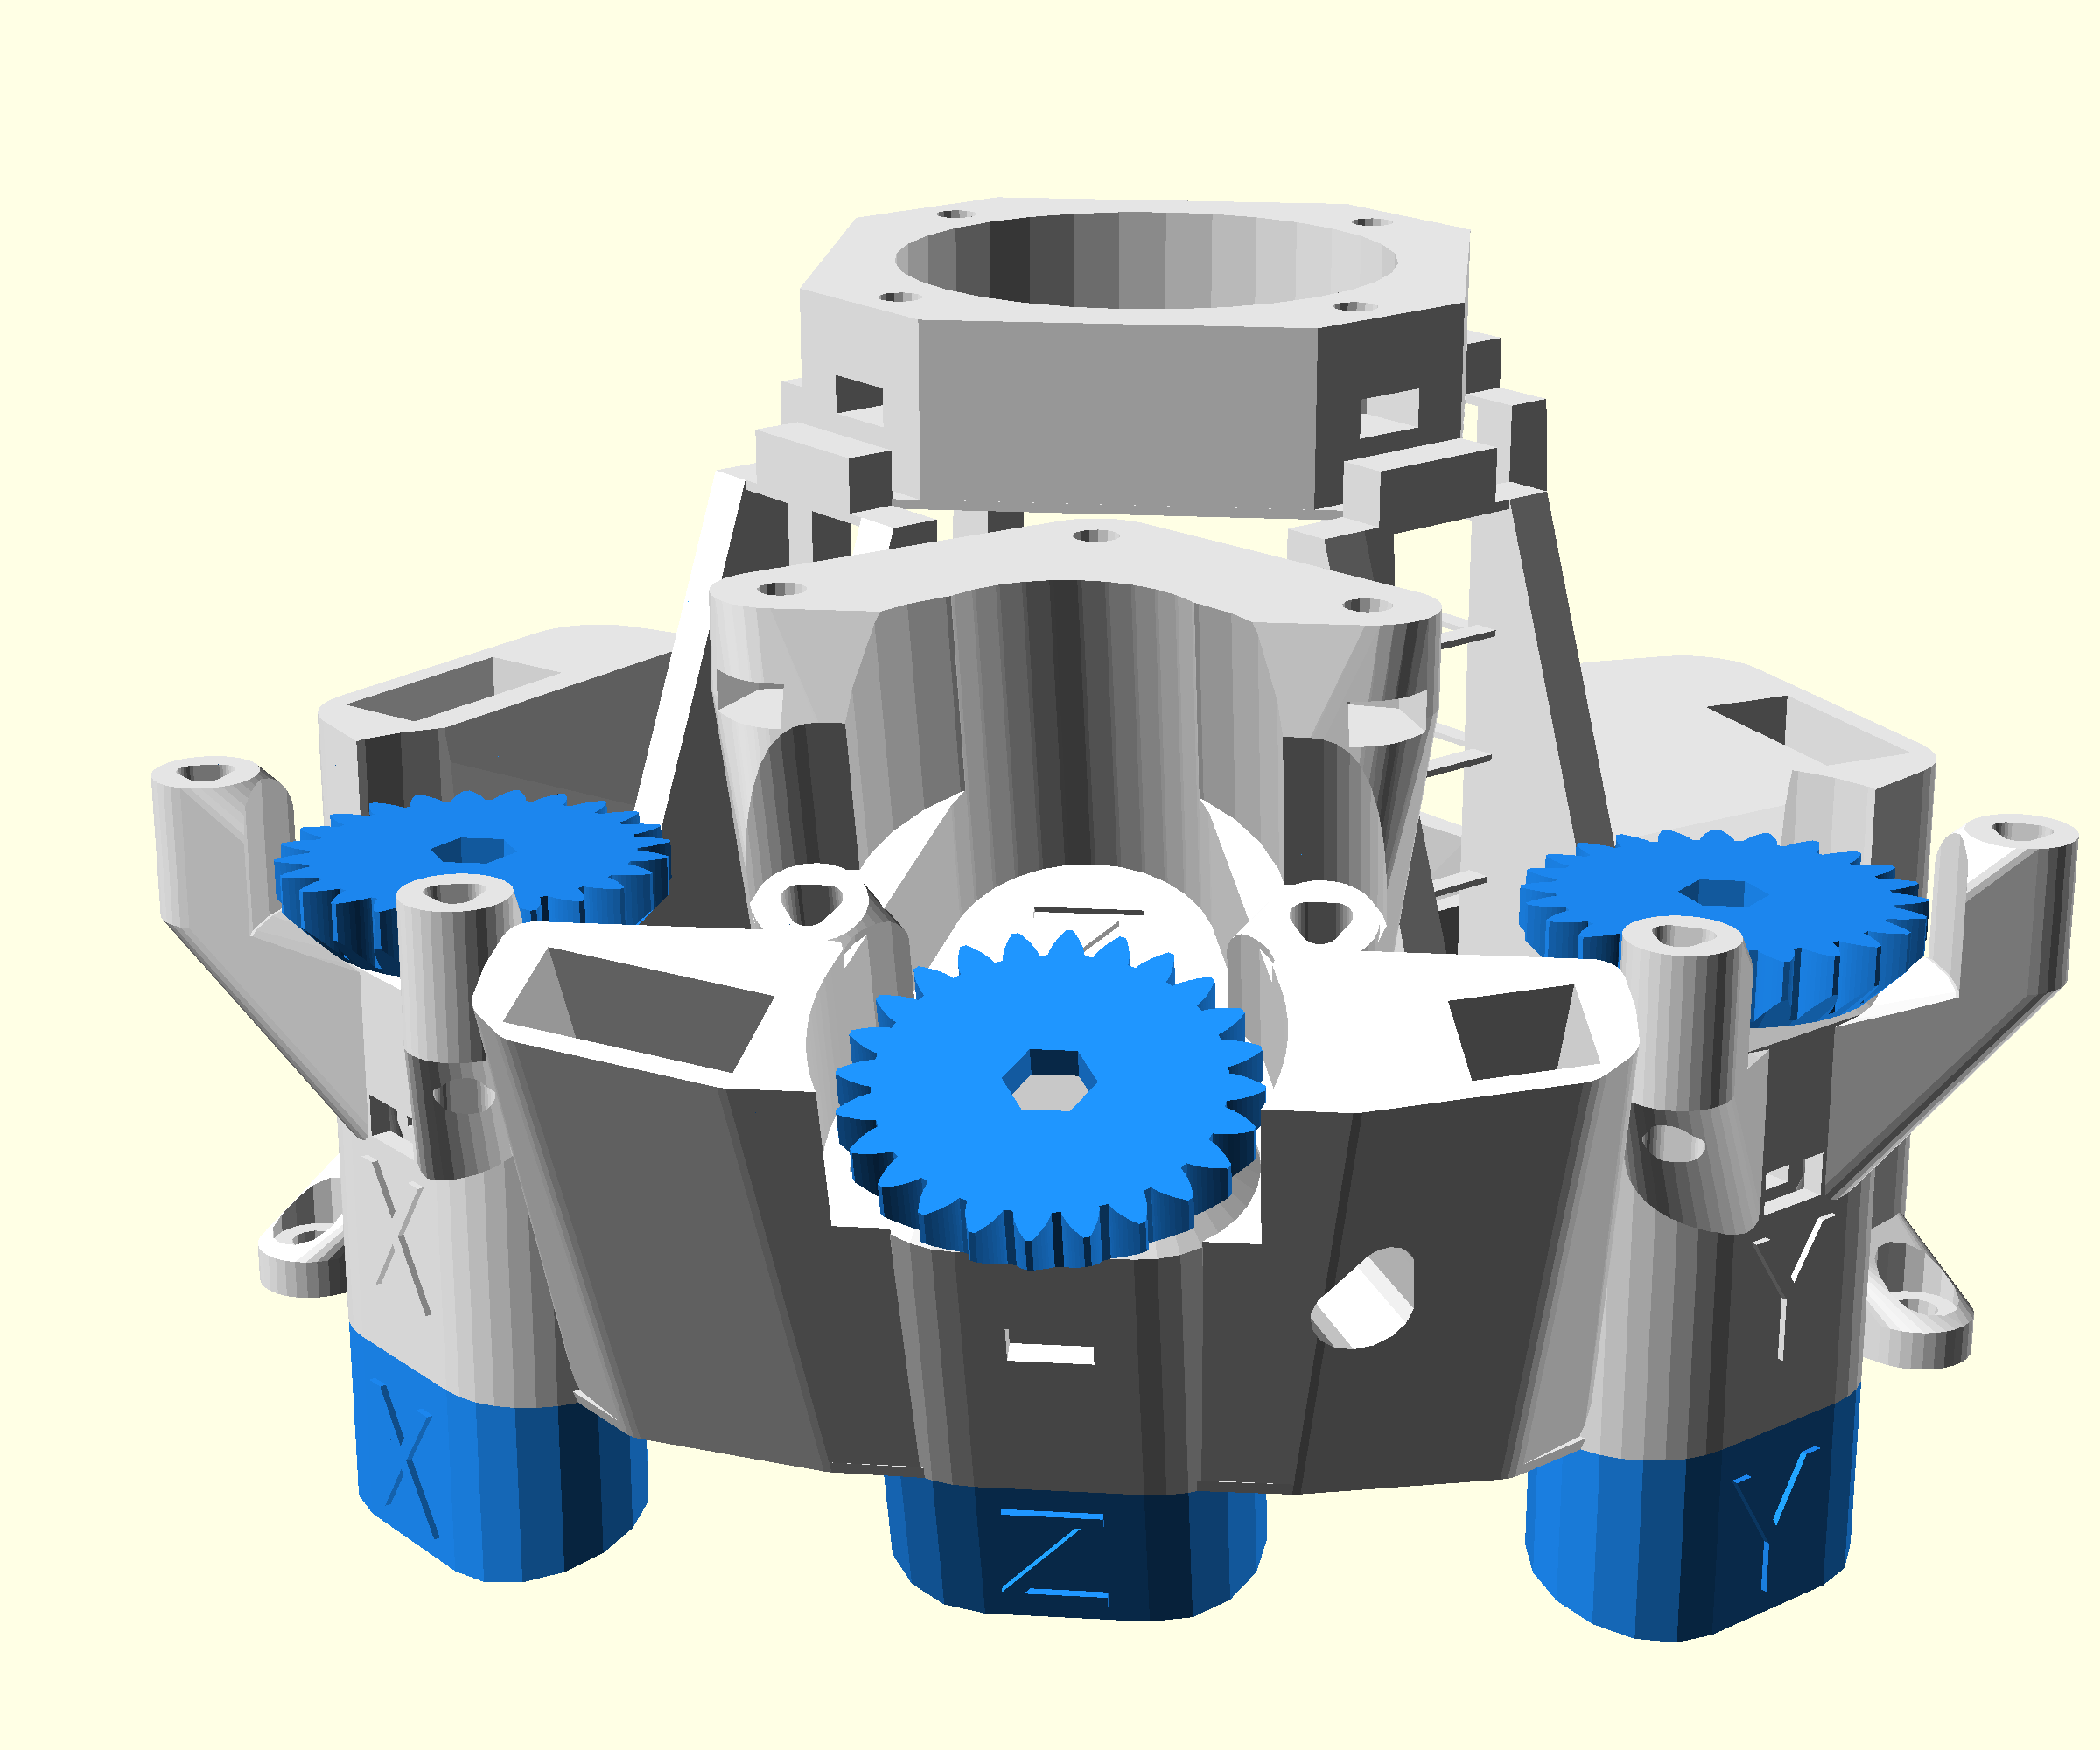
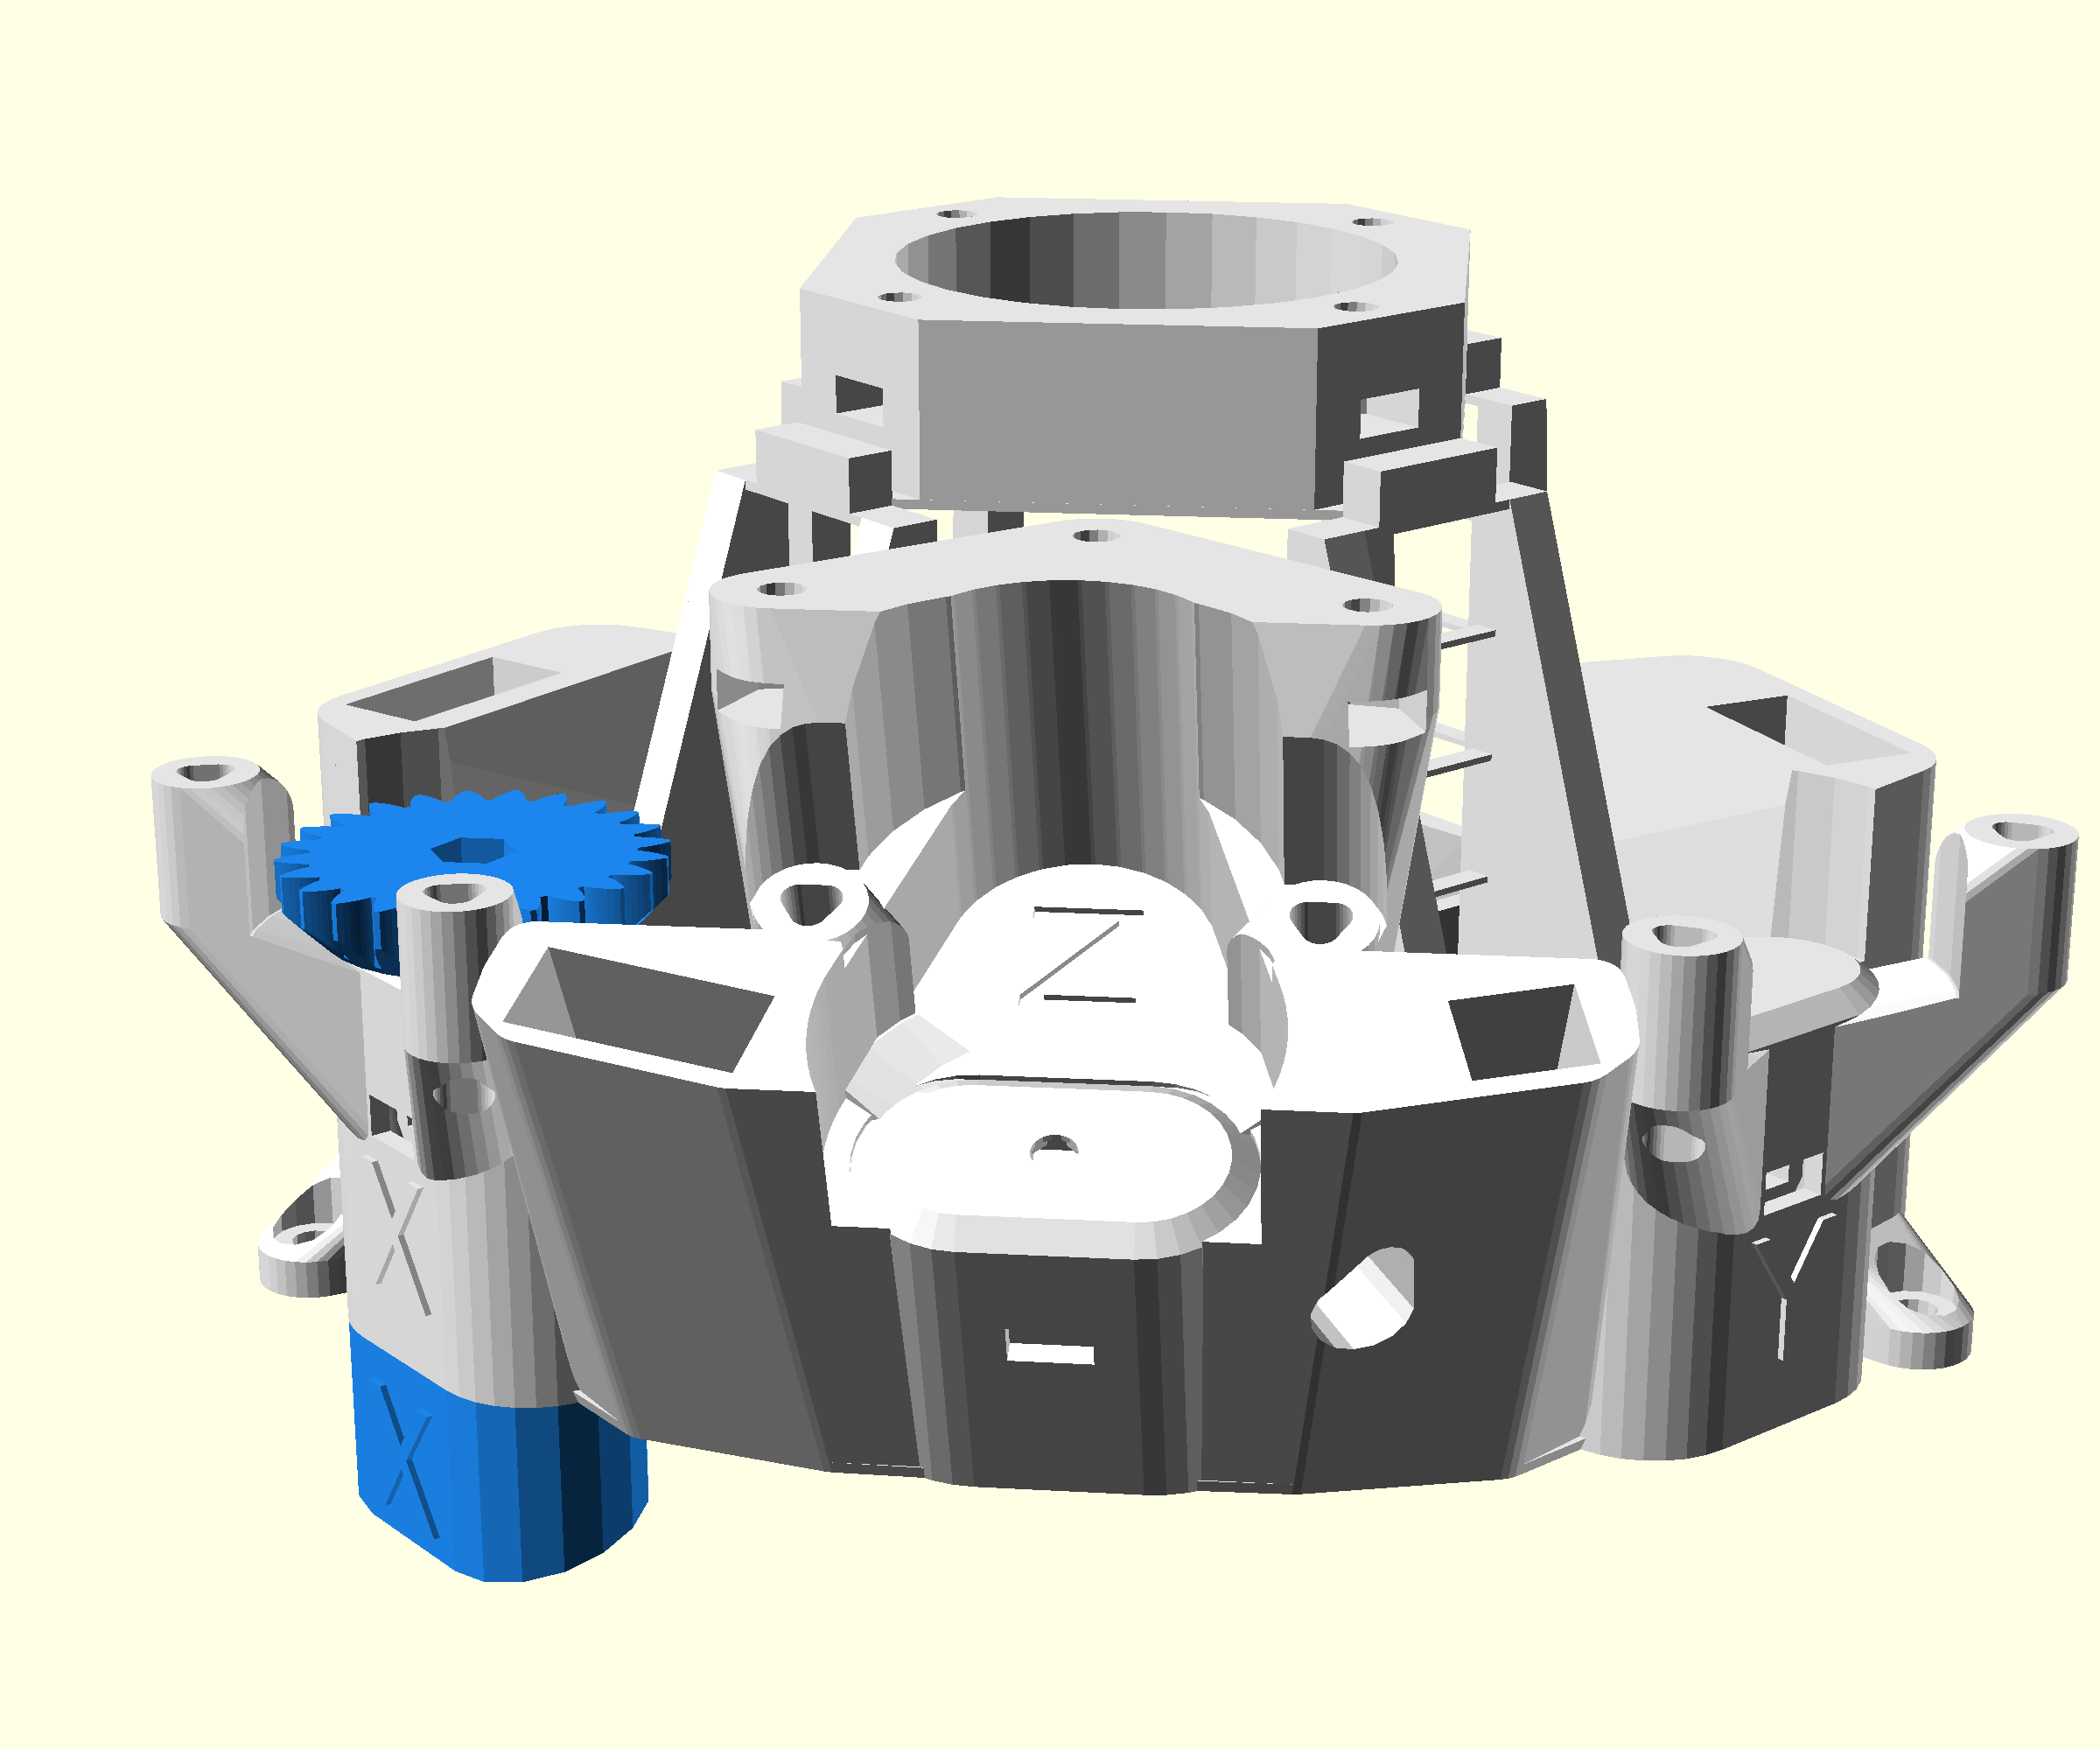
Step 7: Repeat this process for Y and Z
Follow the same procedure for the Y and Z axes. Once complete the microscope with assembled actuators should look like this: