 Assembly Instructions
Print settings
To avoid a brim damaging the mechanism the main body has a custom build in brim. The brim is a separate structure printed parallel to the edge of the main body. Sometimes slicers automatically combine the brim and the part, this makes the brim hard to remove. The same optimisation can also lead to problems in the optics module and condenser, where two parts of the lens gripper are fused together incorrectly.
Correct print settings
In order to print these parts correctly, we recommend you adjust your print settings to reduce the minimum gap that is allowed before parts are joined together.
Ultimaker Cura
Cura (v4.4) automatically slices the smart brim suitably for printing.
PrusaSlicer (or Slic3r)
By default in PrusaSlicer (v2.1.1) the smart brim is incorrectly printed as an extension of the microscope base.
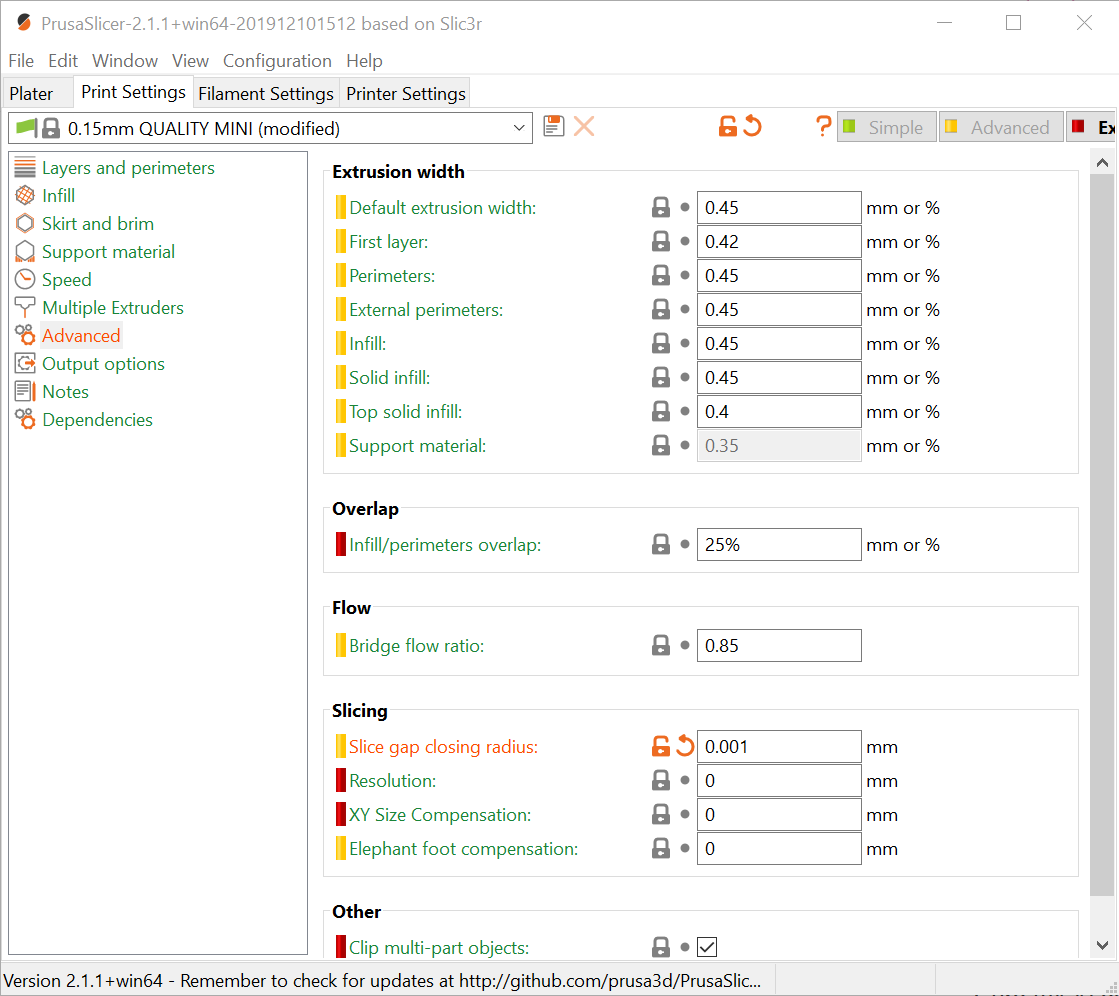
- Select the "Expert" mode in PrusaSlicer.
- Select "Print Settings".
- Select "Advanced" from the list on the left.
- Locate the "Slice gap closing radius" setting.
- Set the value to 0.001 mm.
- If you have already sliced the model, you will need to re-slice it for these settings to take effect.
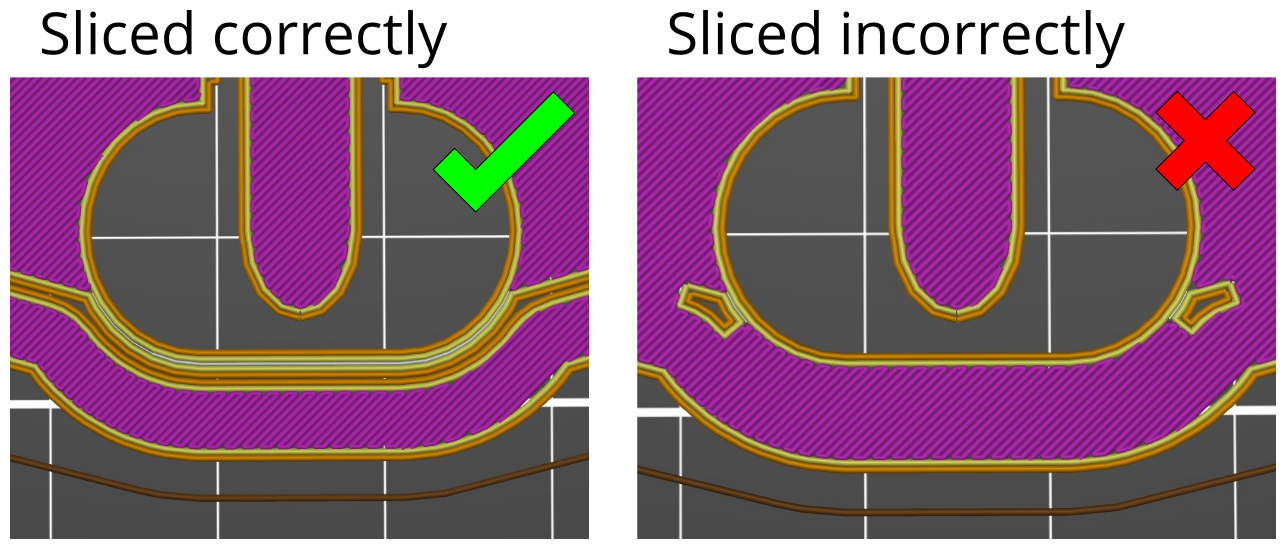
Checking the bottom layer
In the layer-by-layer preview of your slicer, look at the bottom layer of the main body. The outer brim should be printed as a separate structure. If the smart brim is shown as attached, the slicer settings are not correct.
If you are not able to adjust your slicing software, the microscope should still print - but it will most likely be harder to remove the brim from the main body. The lens grippers may also be easier to damage when fitting the lenses, which might require you to re-print the optics module and/or condenser.